
Print Profile(1)


Description
You can watch the creation video here: Mass production at home! Quickly bring your articulated MC character to life
This file is a program for creating 2D pre-cut stickers to be used with Yu Xiaodui's articulated Minecraft character base model
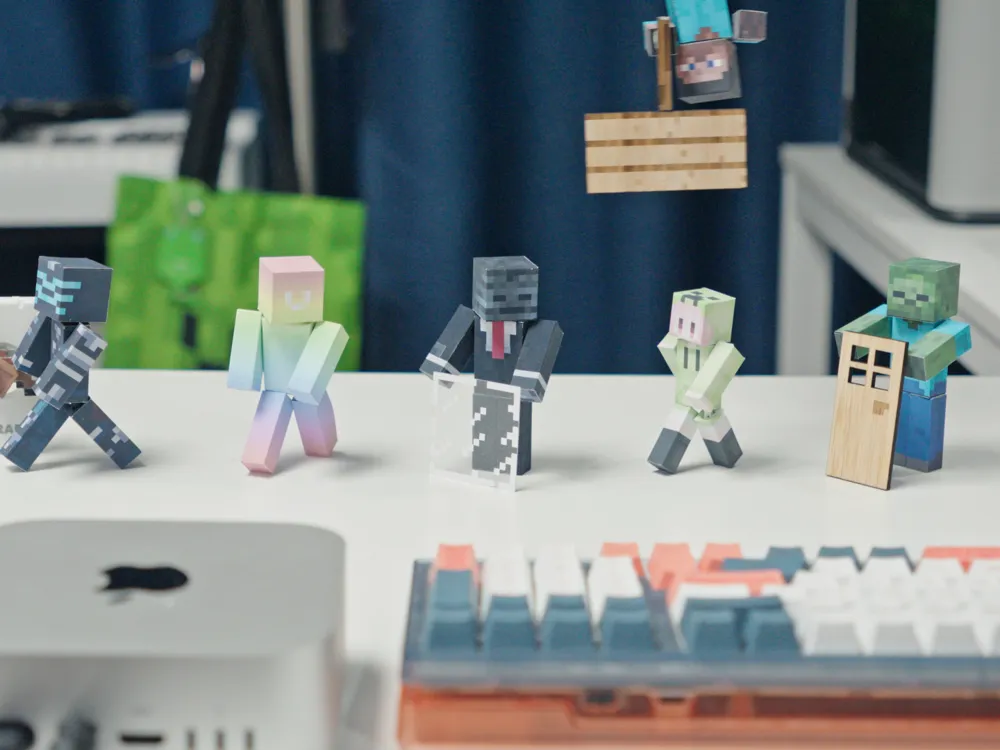
This model uses a double ball joint structure, achieving 5 articulated joints without destroying the original structure. The 3D Printer base model combined with 1:1 2D textures achieves a highly authentic look and excellent feel, and is quick to produce
Traditional paper models require stiff cardstock and glue for shaping, while adhesive-backed paper is easy to apply but a bit soft. However, with the base model, applying the stickers becomes very quick. With the added weight and sturdy articulated structure, the finished product feels significantly better in hand compared to ordinary paper models
Preparation (includes model & file download links)
3D Printer (for printing my self-made articulated base model)
Base model download: https://makerworld.com.cn/models/1321610
Program cutting file download: Download this document file
Inkjet printer (optional, requires A4 adhesive-backed paper, you can order custom prints of the same size online)
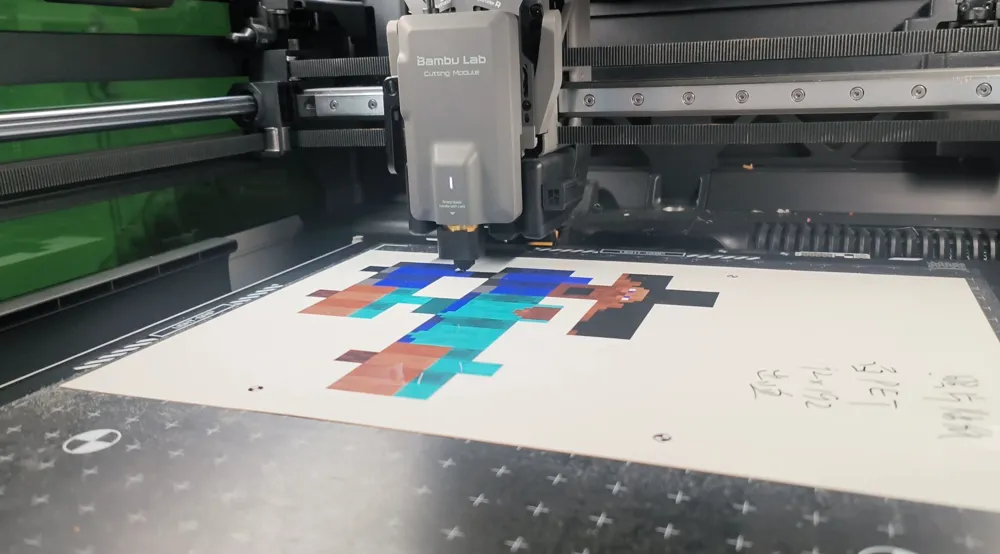
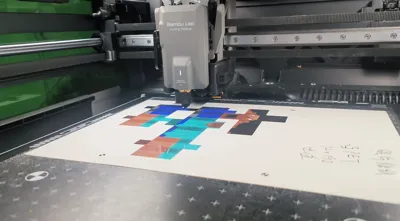
Die-cutting machine (use H2D's cutting module)
A pre-modified Steve skin is also included in the suite file, you can directly try making it
Getting Started
- First, we need to use namemc, LittleSkin skin library
Skin library: LittleSkin - Fast, reliable Minecraft skin site
namemc: Minecraft Names & Skins
Use these websites to find your own or your favorite skins to get a 64x64 PNG file (If it's 64x32, upload it to this website Minecraft Skin Editor - Online and Free and download it again)
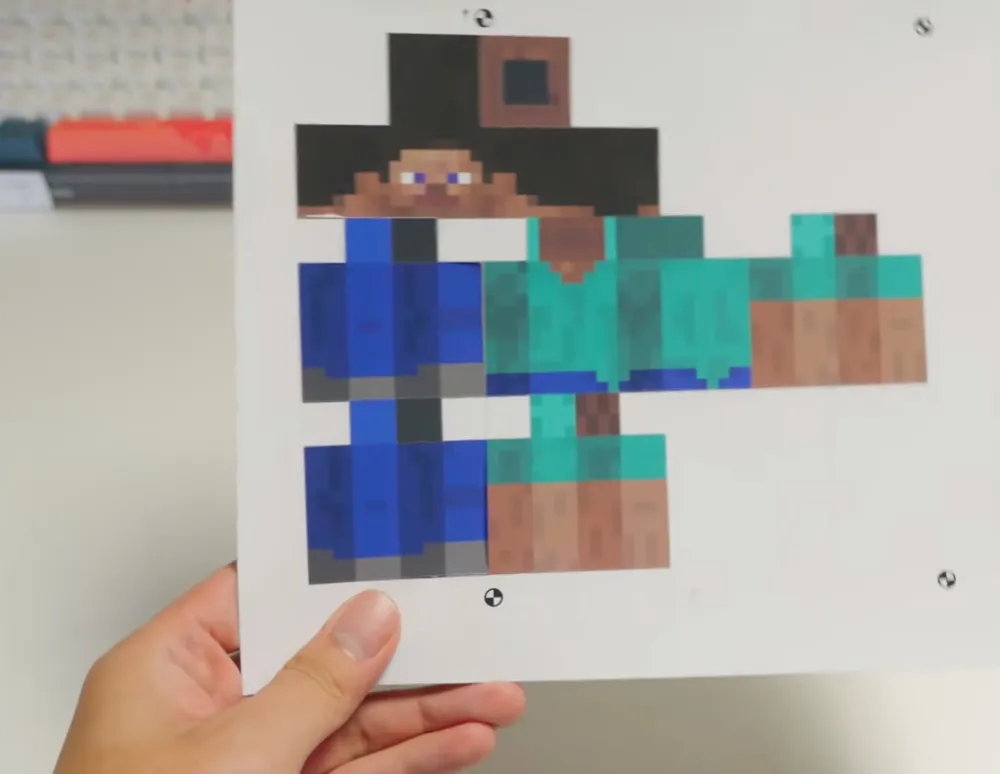
- Next, it's time to start modifying the image. Use the Blockbench website for modifications. You only need the part shown in the image below. Use an eraser to remove the parts not present in the diagram (the white part is only for easy viewing, it should actually be transparent)
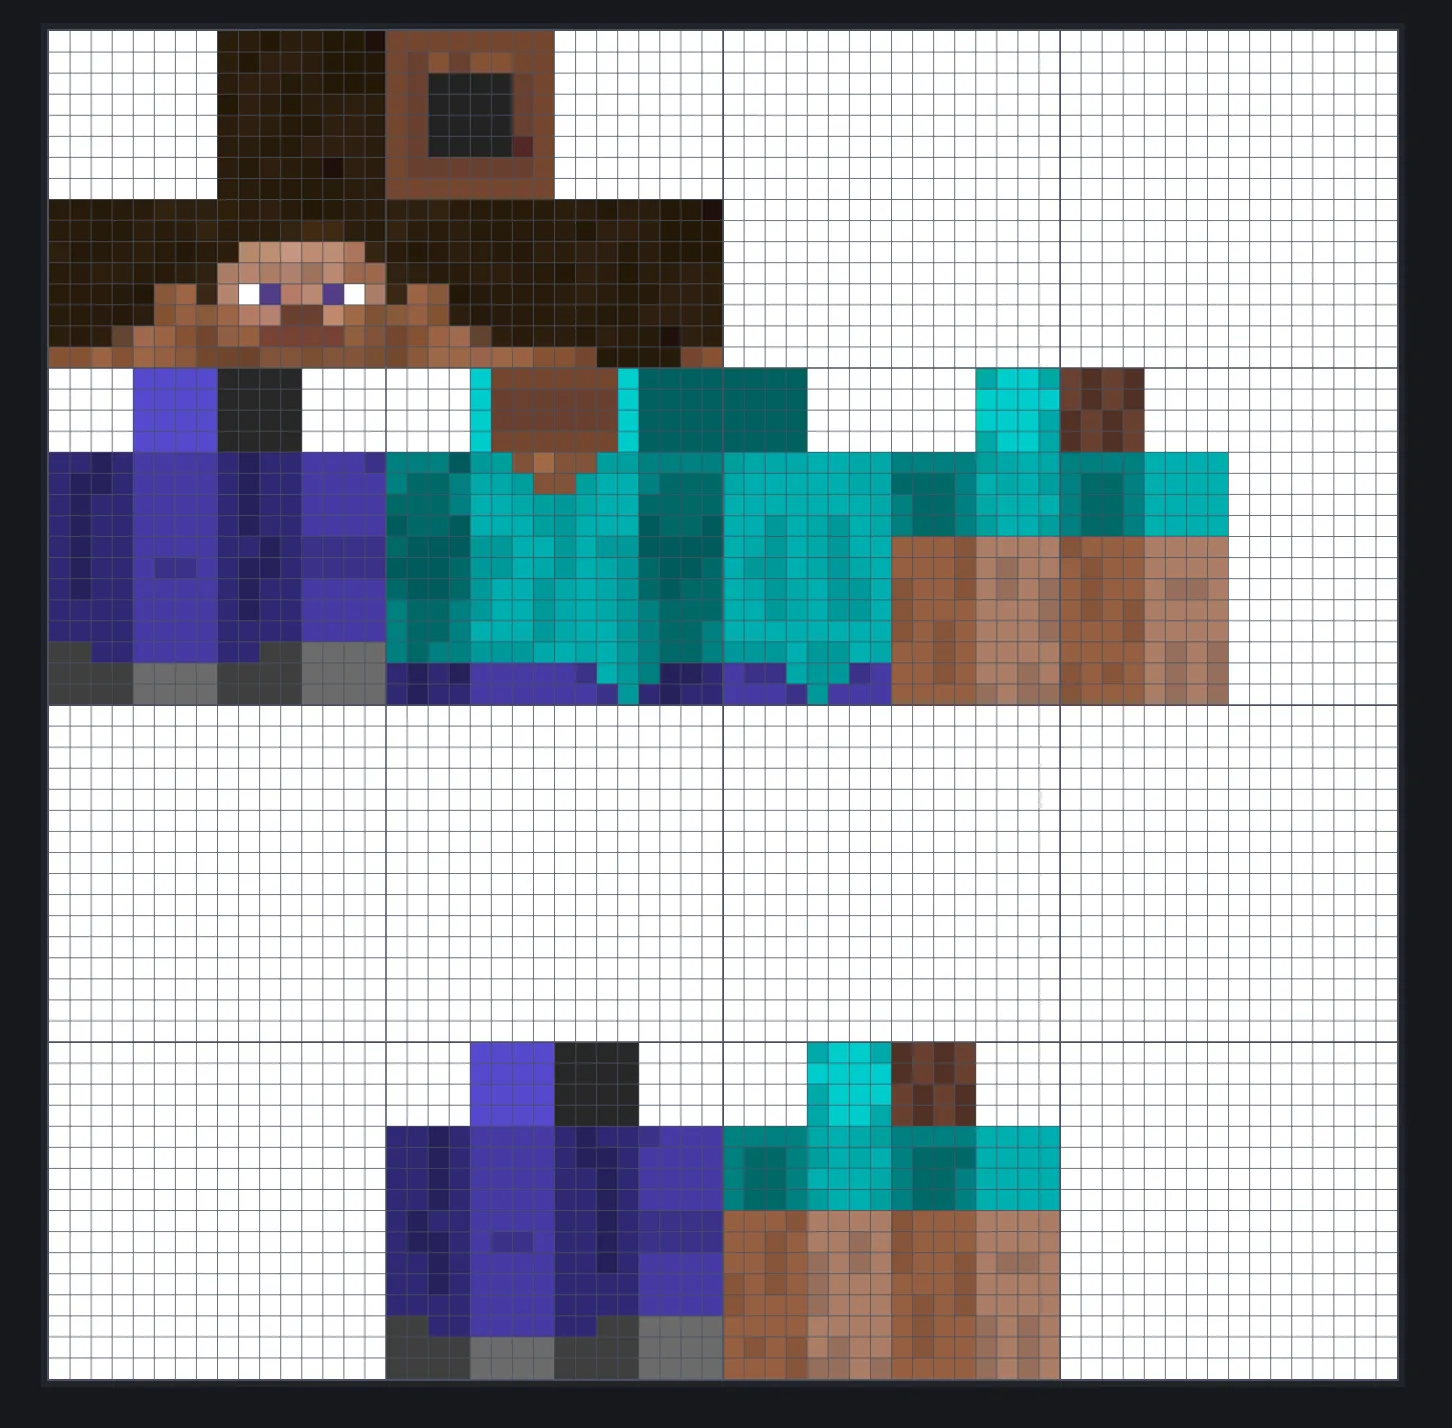
⚠️Note: If you use the program cutting file from this document for creation, please strictly follow the corresponding positions in the image below for arrangement to utilize my pre-programmed cutting paths
- First, use an eraser to remove all pixels that are not part of the first layer of skin (The second layer of skin cannot be easily created at the moment, but you can paste your favorite parts onto the corresponding areas of the first layer)
- Then, please refer to the corresponding positions in the image below and use the selection tool for arrangement. The overall layout should not exceed the 64x64 grid
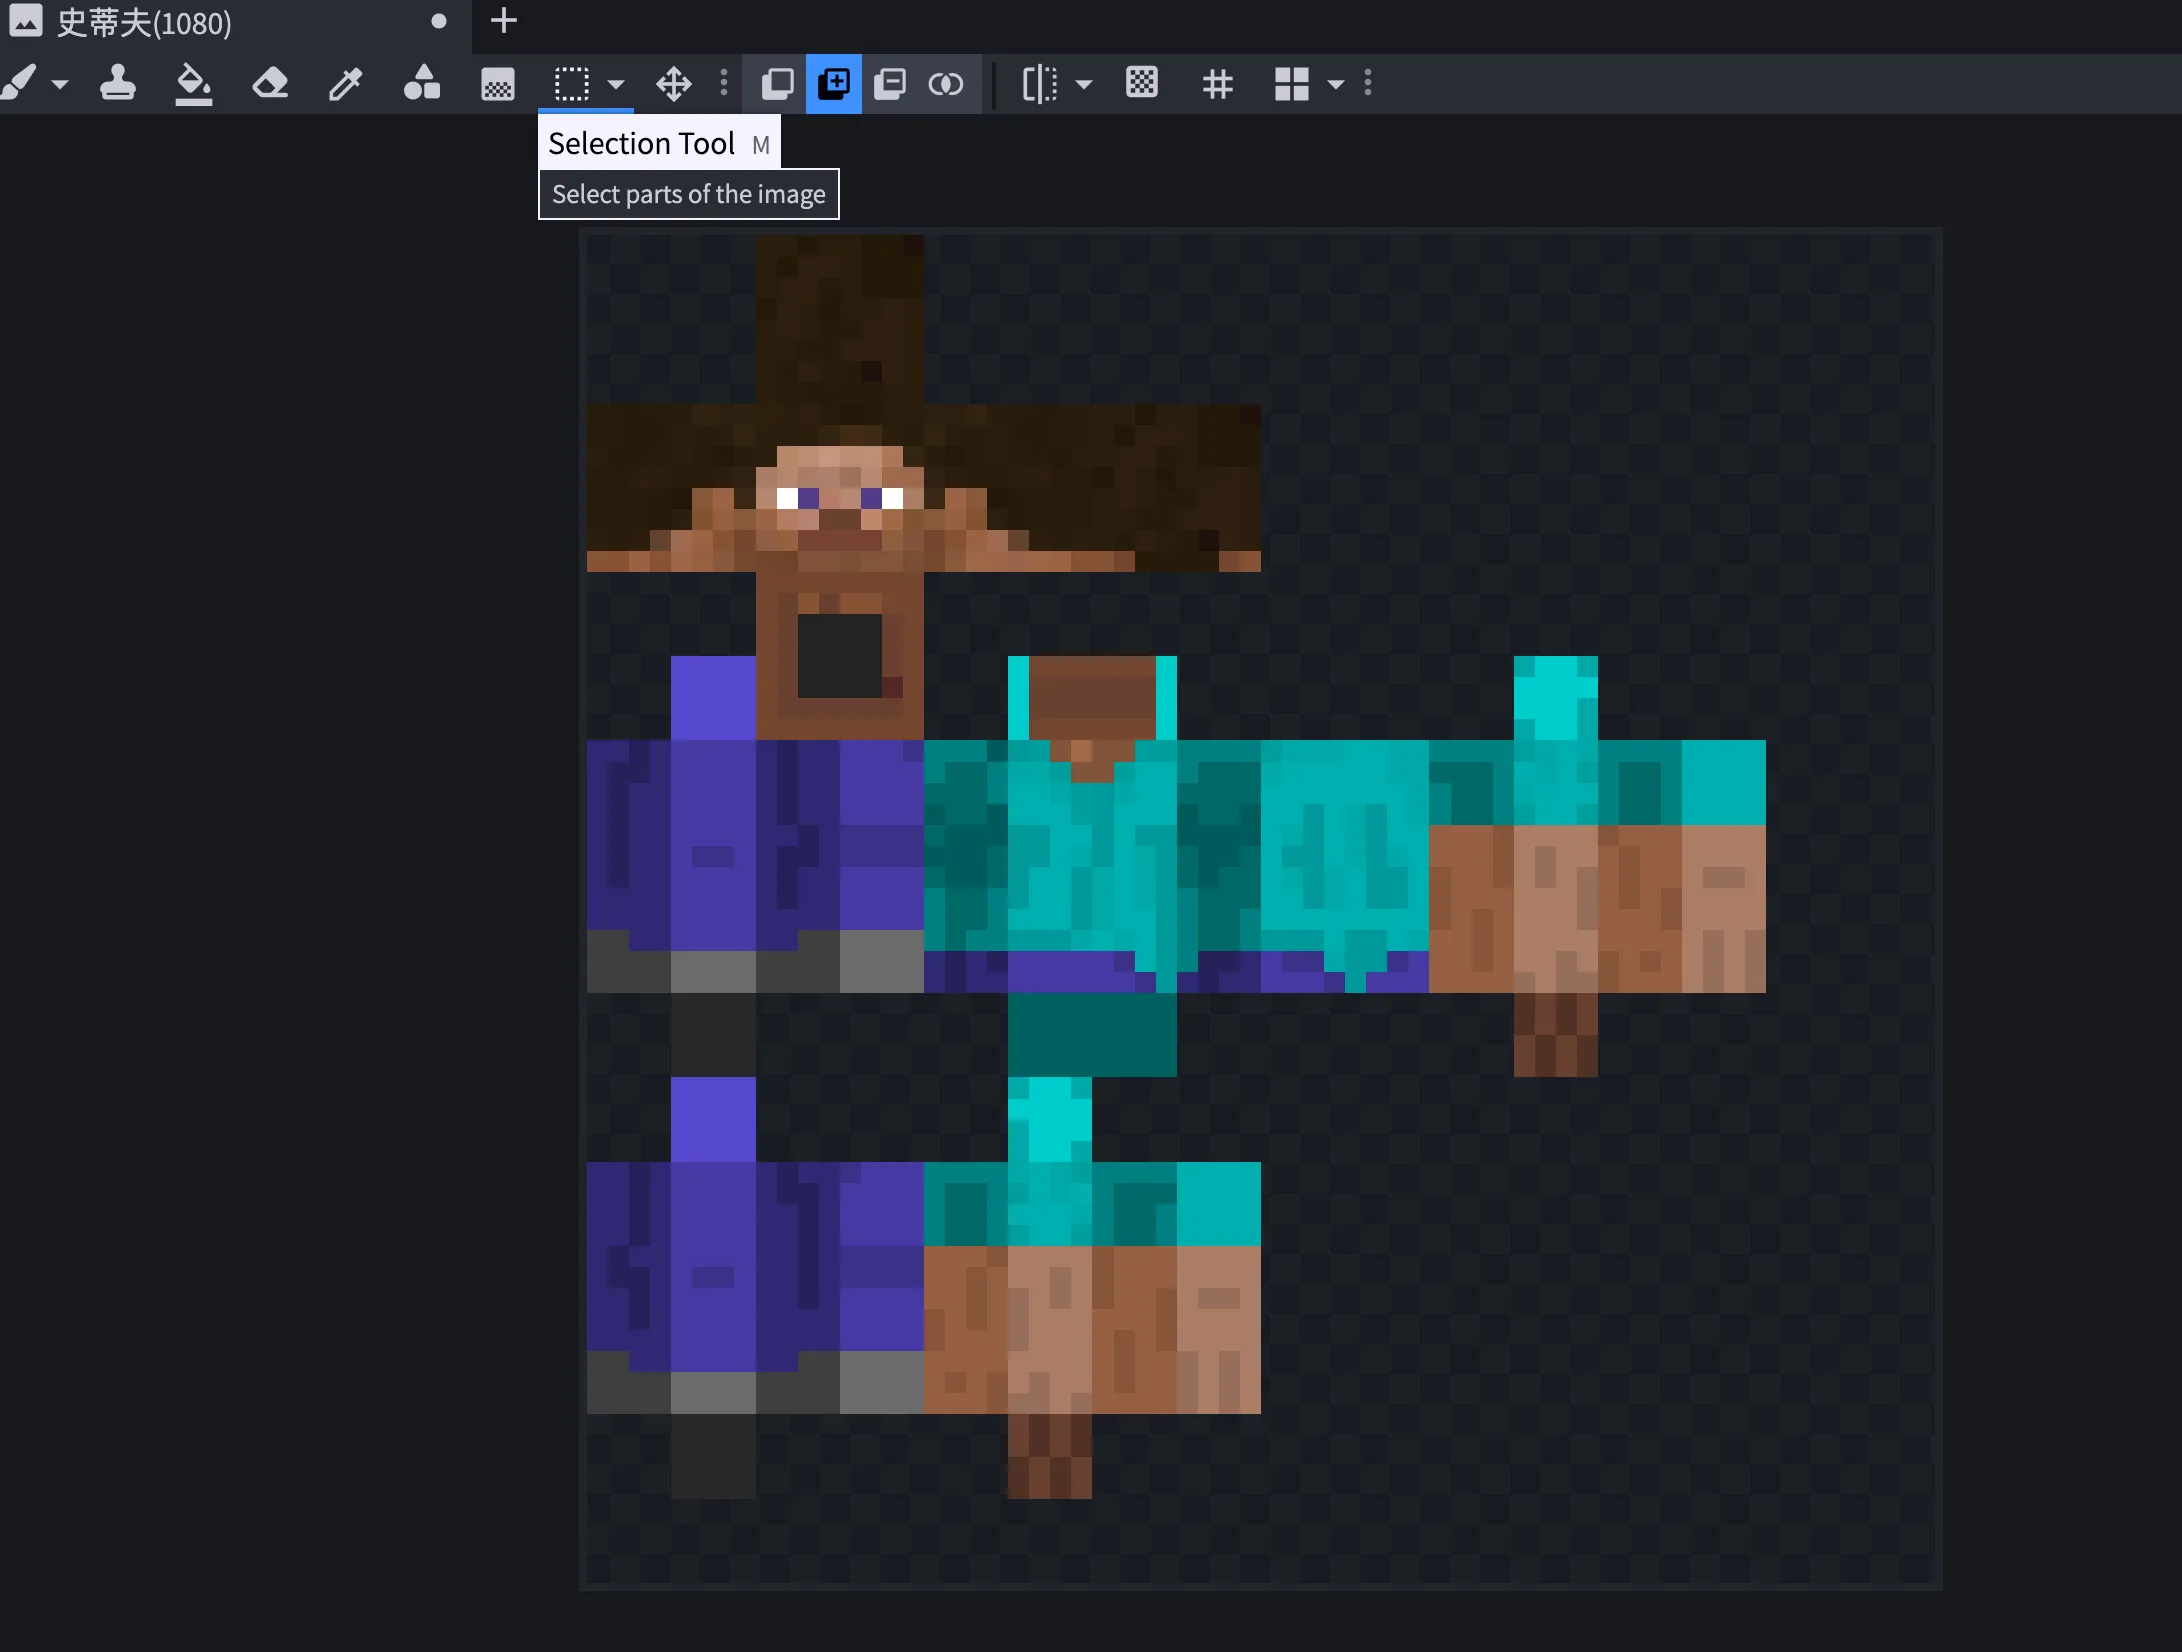
Once completed, in the top left corner of the website, select 'scale' in 'Image-Resize Texture...', change it to 1080x1080 or larger, then export as PNG
(In the future, I might consider creating an automatic script for this step, where you import your skin and it's automatically processed to fit the base model. The paper model website Pixel Papercraft - Minecraft Papercraft and more is also highly recommended and gave me a lot of inspiration, but its structure is not suitable for my base model design; pure paper model users can try it)
Open my program cutting file, import the image you just created into Bambu Suite, adjust the layer order to the bottom, align it with my size reference image, place it below the pre-set cutting paths, then proceed with the cutting process after starting the print normally. If cutting manually, skip to the next step
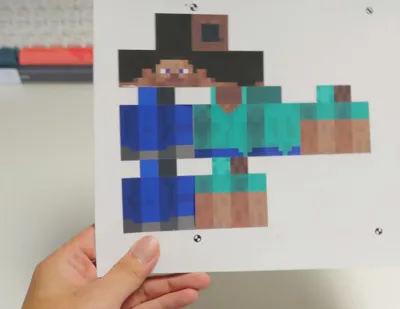
Using A4 white adhesive-backed paper, print the prepared textures with any software. The image, after scaling, should be adjusted to a real-world size of 192mm x 192mm. Then measure the side length of the character's head on the sticker. If there's an error and it's not 24mm, you can scale the texture appropriately and reprint until the measured head side length is 24mm
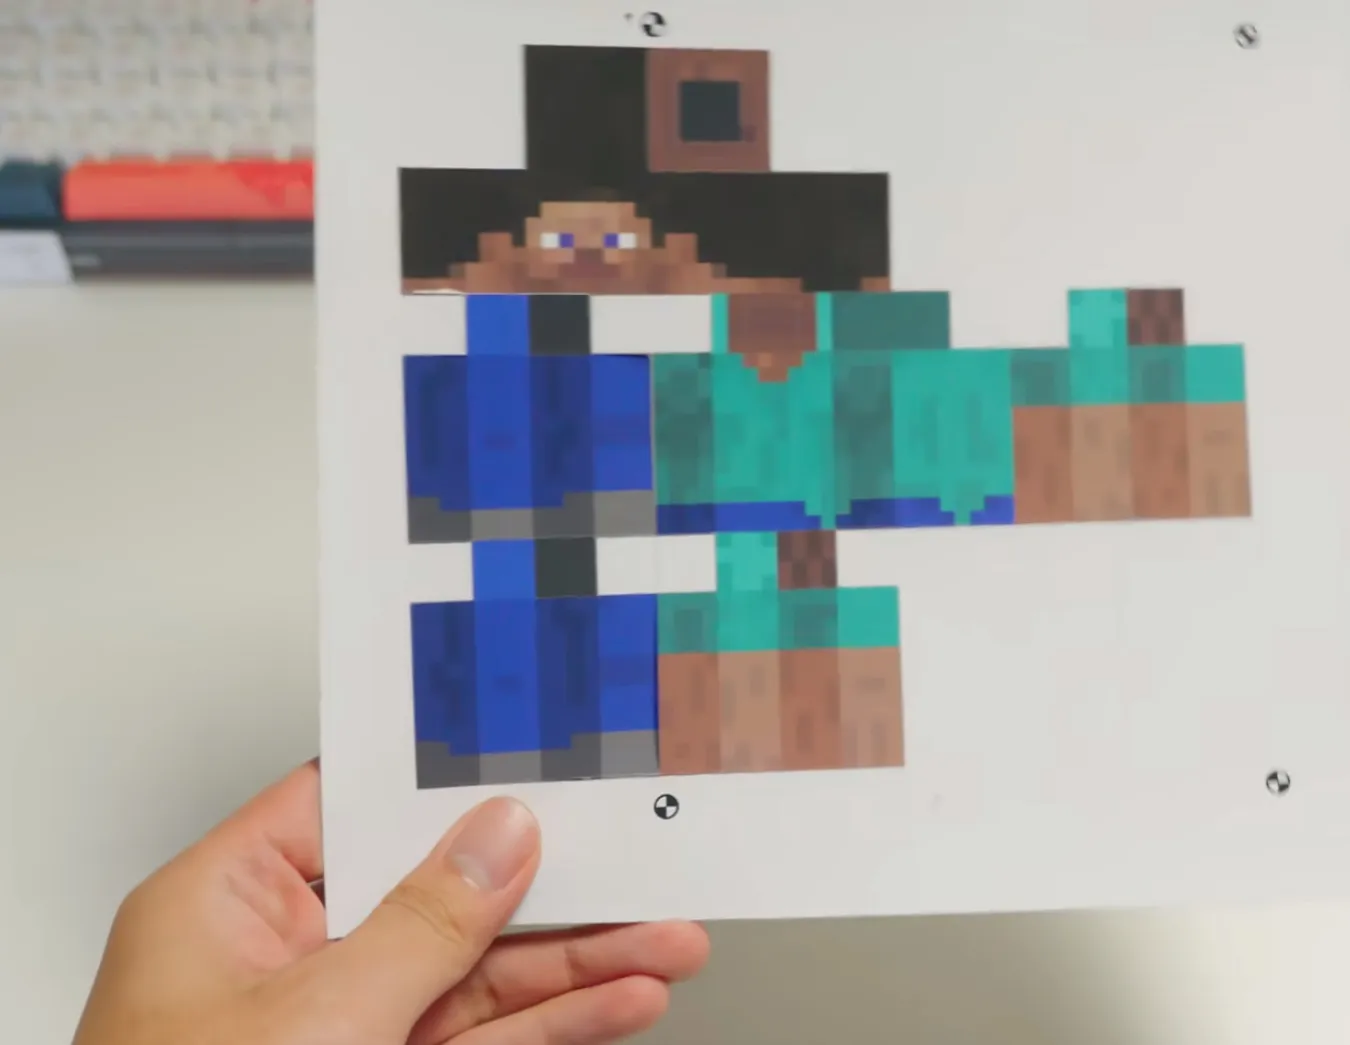
⚠️Note: Using different types of adhesive-backed paper will yield very different results. Stickers printed on PET clear adhesive-backed paper will have no white edges after cutting. Spraying a protective lacquer on the paper can provide a smooth feel and prevent color fading. However, the base model for clear adhesive-backed paper needs to be white to display normal colors and must be printed with white material
- Print a base model. It is recommended to print the joints in a dark color to prevent them from being seen when the character moves. After printing, clean off the supports and proceed to the next step
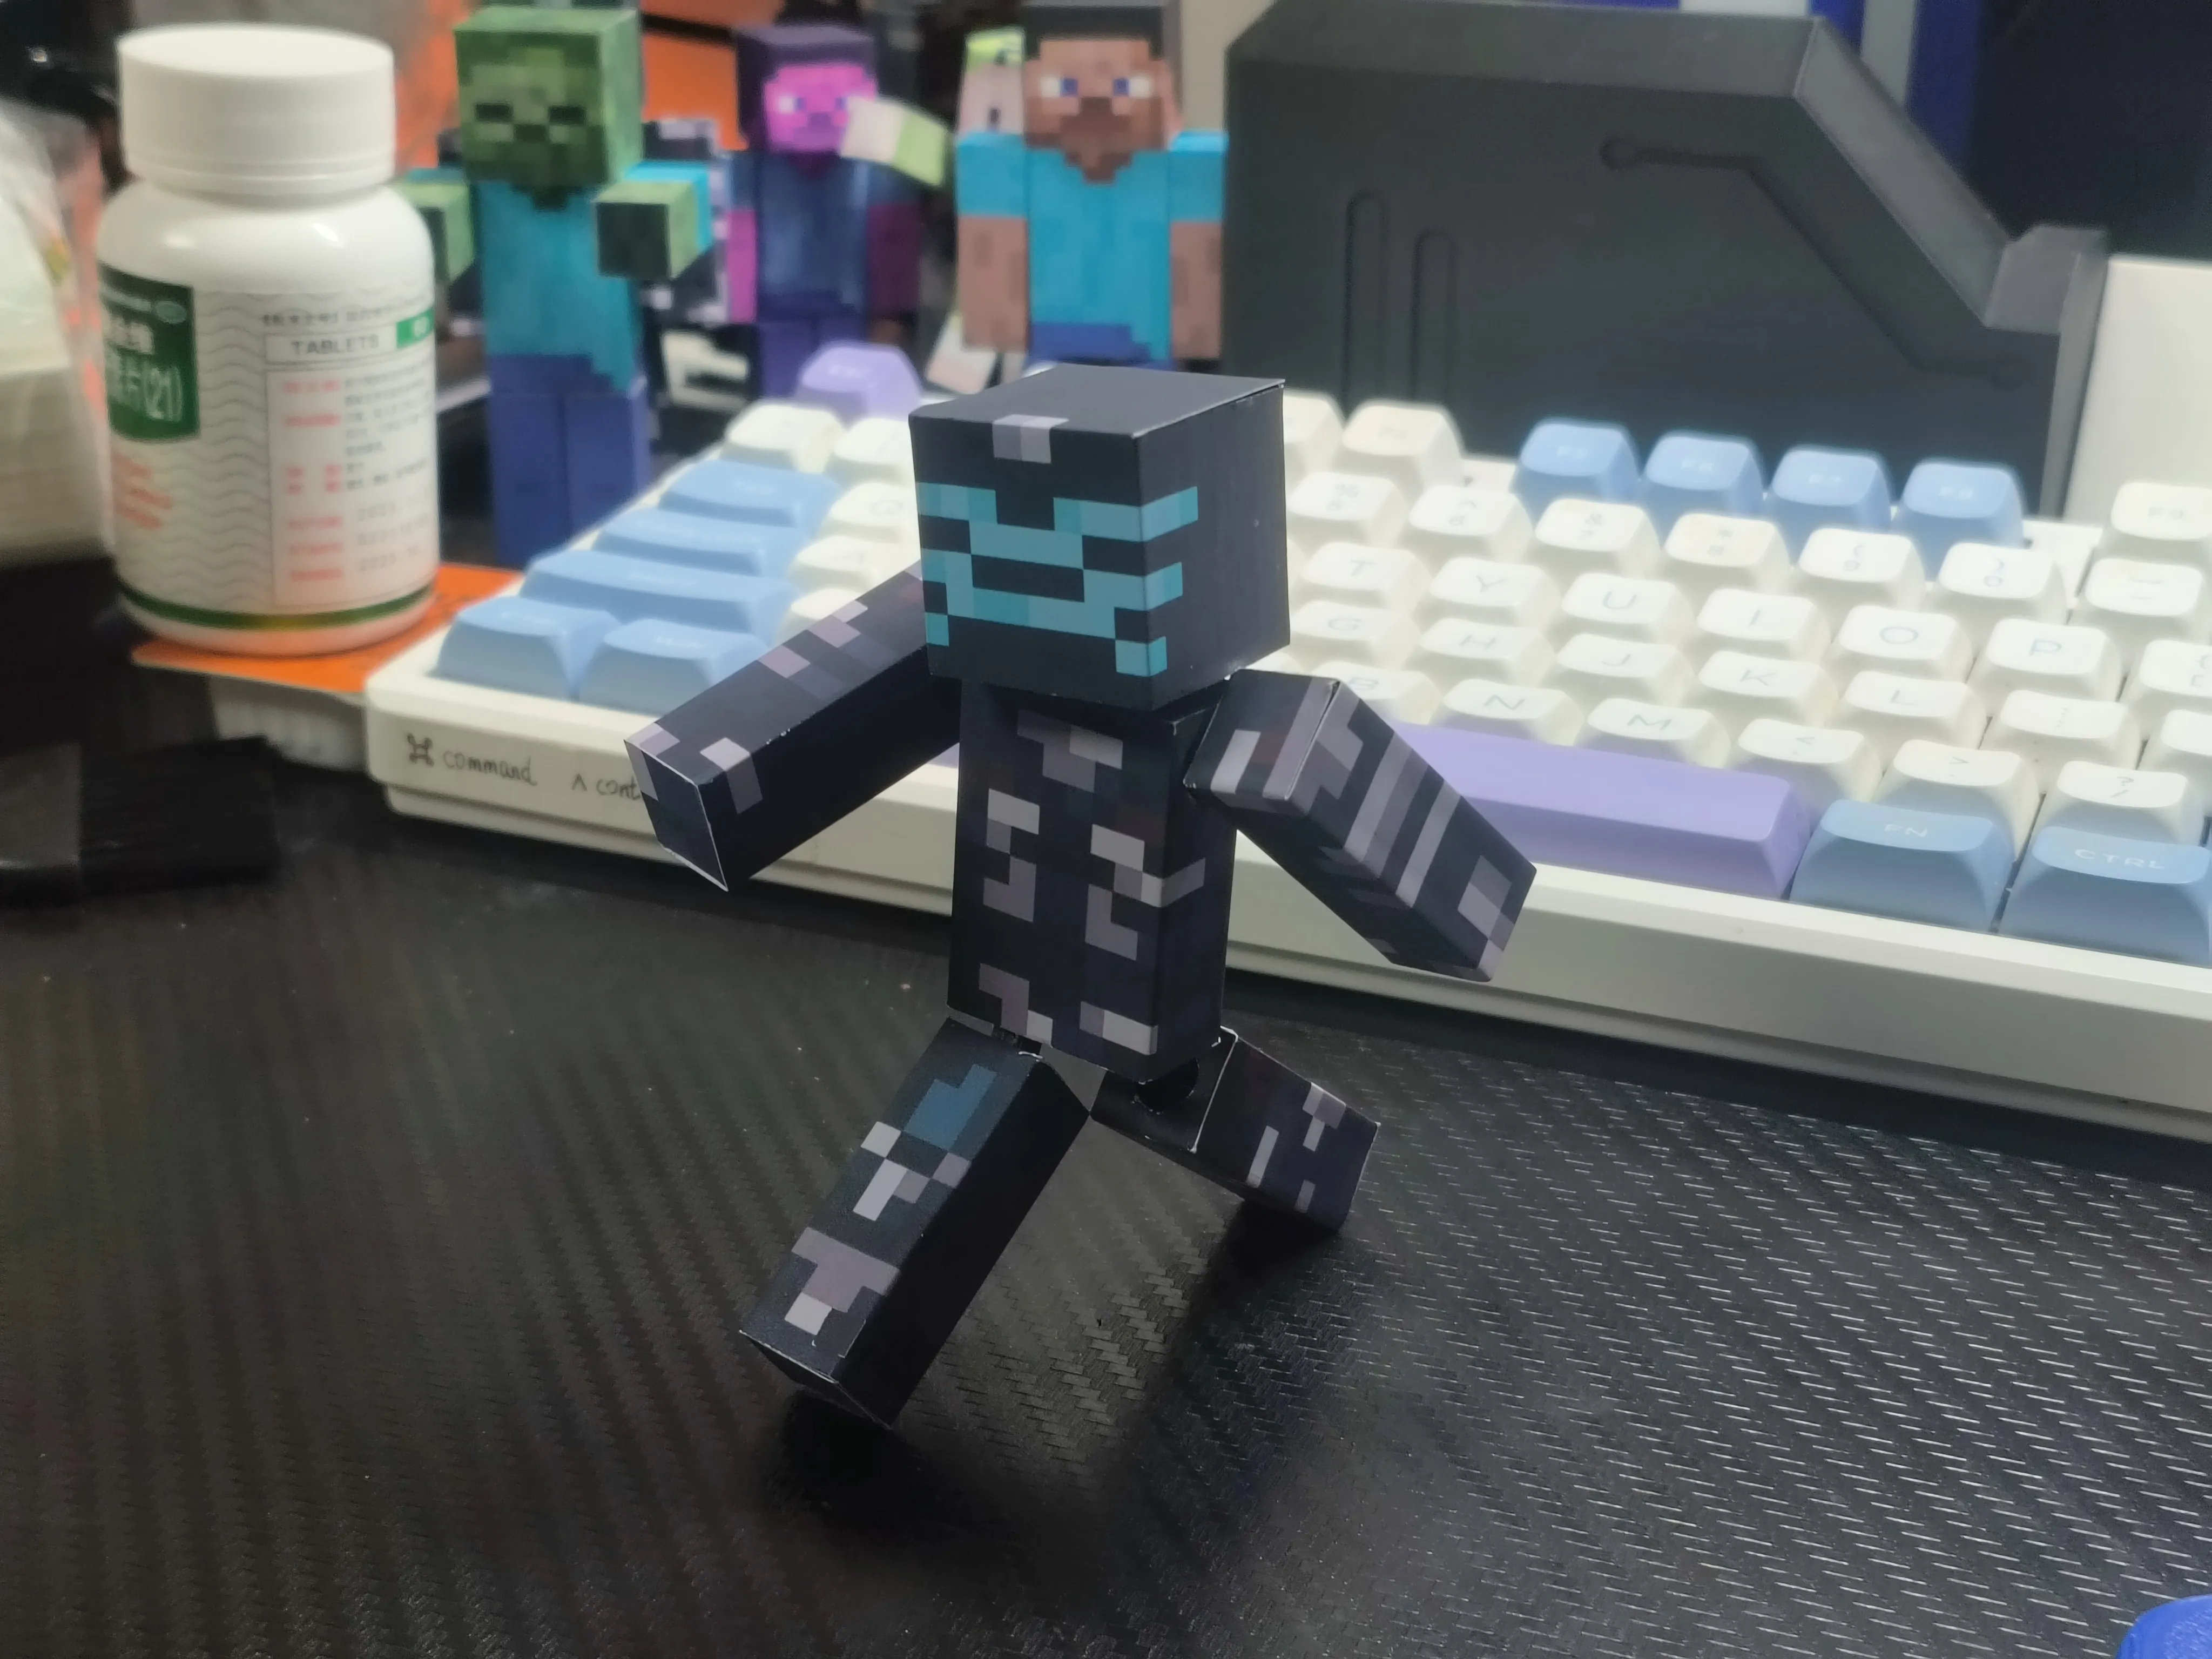
- Paste according to the 3D diagram of the model. It only takes about a dozen pasting actions to complete. The sticker joints already have pre-cut holes for easy insertion of ball joints. Pay attention to the orientation of the stopper in the hole, insert the joint, rotate it 90 degrees, then combine with the other side. Finally, assemble the finished product
⚠️Note: When using ordinary A4 adhesive-backed paper, white edges are inevitable. It is recommended to prepare a marker pen of the same color as the skin or slightly lighter and gently brush over the edges to hide them
Alright, start customizing your exclusive character~
Possible 2.0 updates in the future:
More base model sizes, custom capes, more joint shapes, dual-layer skins...
Material Kit
Most friends probably don't have both a 3D Printer and an inkjet printer at home. The creator (UP) will sell bundled packages of pre-cut stickers + 3D Printer base models at a lower price. One reason is to let fans experience the joy of completing their own characters, and the second is that I'm afraid I might mess up the application for you (I will include at least two complete sets of character adhesive-backed paper)
The Bilibili workshop is now open:  Buy now | [Customizable Skin] Yu Xiaodui 3D Articulated Block Character
Welcome to check it out~
Boost Me (for free)
License

You shall not share, sub-license, sell, rent, host, transfer, or distribute in any way the digital or 3D printed versions of this object, nor any other derivative work of this object in its digital or physical format (including - but not limited to - remixes of this object, and hosting on other digital platforms). The objects may not be used without permission in any way whatsoever in which you charge money, or collect fees.


Comment & Rating (13)