PopTop Slim


Print Profile(2)


Description
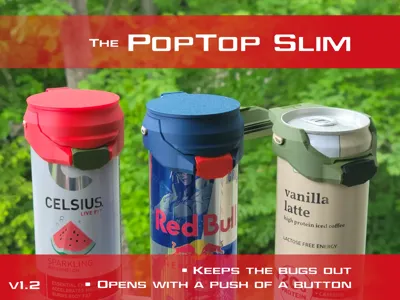
The PopTop Slim
The PopTop Slim is a lightweight, spring-loaded cap for slim-width aluminum cans that opens with a press of a button! It quickly snaps into place and is ready to go in seconds.
Confirmed to fit slim-width cans in the following sizes:
- 7.5oz (222mL) such as Sprite
- 11.2oz (330mL) such as Coca-Cola
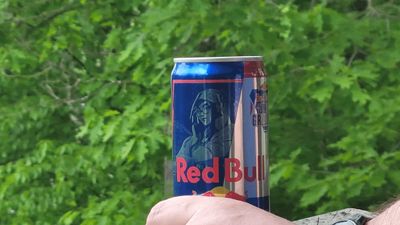
- 12oz (355mL) such as Red Bull and Celsius
Other PopTop Sizes
- PopTop Lite for standard-width cans
- PopTop Mini for original Red Bull (250mL / 8.4oz) cans
- PopTop Yeti Slim for slim-width cans with a Yeti Colster
- PopTop Yeti for standard-width cans with a Yeti Colster
- PopTop Buddy for standard-width cans with a Frost Buddy Universal Buddy
- PopTop Max for Arizona (22oz / 650mL) cans

Features
- Close fitting lid keeps bugs, sand, and rain from getting into your drink while you recline at the beach.
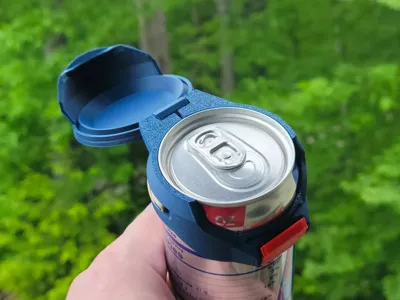
- Lid springs open at the push of a button.
- Compatible with multiple sizes of rubber bands, which keeps the collar squeezed tight to the can and acts as the lid's spring. The recommended rubber band size is #30 (2" long by 1/8" wide).
- Custom text and logos can easily be added to the large flat surface of the lid.
- Spill-resistant when you add the printed TPU gasket to the lid. See “Download Files” for STL.
Usage Tips
- After snapping the lid into place on your can - squeeze the rear of the collar at the hinge. This insures a snug fit of the collar to the can.
- When your beverage is finished and you wish to remove the PopTop:
- Open the PopTop's lid.
- Use two hands to gently pry open the hinge at the rear of the collar.
- Lift the PopTop off of the can.
Boost Me (for free)
The PopTop series has been a challenging design task. With dozens of revisions and multiple rounds of third-party Beta testing, the designs are something that I am quite proud of. If you would like to show your appreciation for my work and would like to see more, please consider giving me a Boost!
Printing Tips
- Due to natural variation in filaments and printers, the paddle's press fit into the collar can vary. The print profile includes two sizes of the paddle. The smaller is marked with a “-” and the larger with a “+”.
- Always clean your build plate with water and mild soap.
- Supports must be enabled - The collar and lid designed to be printed with supports.
- Layer Heights - The collar and lid are printed at 0.2mm layer heights, while the paddle/button must be printed at 0.12mm.
- No Brims - Brims are not required for any components.
- Recommended Material - PLA Basic, PLA Matte, PLA Silk, and PETG filaments have all been tested successfully.
Assembly
- Remove supports from the collar and lid.
- Press fit the smaller paddle/button (marked with a “-”) into the front of the collar. Gently rock the paddle/button back and forth. It should have slight resistance. If the fit is too loose, swap it out for the larger paddle/button (marked with a “+”).
- Gently pry open the rear of the collar and insert the lid's pivot to complete the hinge. Cycle the lid back and forth to insure the lid moves smoothly over the entire range of motion. If needed, shave material with a sharp blade from the pivot pins where there is interference.
- Wrap a rubber band around the two horns on either side of the collar. Stretch one of the lengths of rubber band up over the hook at the rear of the lid. Test the opening force of the rubber band when the PopTop is installed on a can. If more force is required, try a shorter rubber band or double up the rubber band before installing on the horns.


Membership
Commercial Licensing for the PopTop series is available for members.
Revision History
2025-6-6 v1.0 Released.
2025-7-16 v1.2 Added ramps to help guide the elastic. Added second size of paddle to print profile.


License
You shall not share, sub-license, sell, rent, host, transfer, or distribute in any way the digital or 3D printed versions of this object, nor any other derivative work of this object in its digital or physical format (including - but not limited to - remixes of this object, and hosting on other digital platforms). The objects may not be used without permission in any way whatsoever in which you charge money, or collect fees.
Comment & Rating (412)