Simracing Drift DIY hydra e-brake


Print Profile(1)
Description
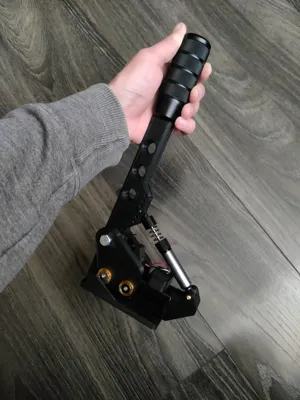
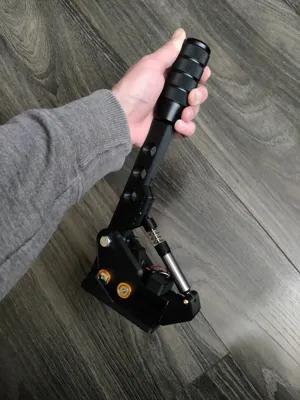
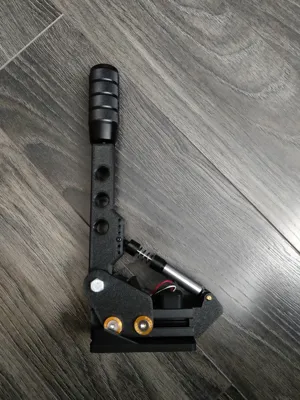
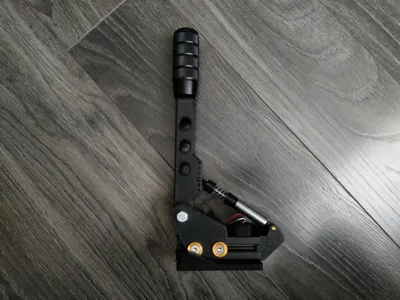
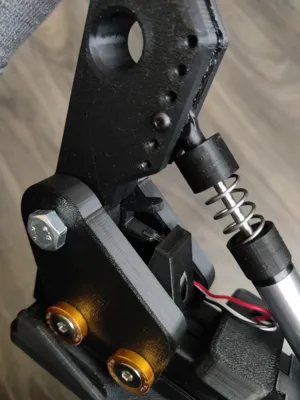
I slightly redesigned the original ebrake but also added a different spring for me orange/yellow spring Stuyo used was too stiff, so I added a different spring. You can find some on Aliexpress with an outer diameter of 13mm, an inner diameter of 10mm, and a length of 20mm. Also you will need extra hardware than Stuyo used, 2x screw M3 12mm, 1x screw M3 14mm I think, 3x M3 hex nut. Original hardware and instructions you can find here (https://www.diy-sim.com/sim-projects/sim-gear/item/easy-diy-hydro-handbrake#comment-51). Electronics-wise wise I used an Arduino Pro Micro clone from Aliexpress. First of all, after assembly, I uploaded the code to test the hall sensor:
void setup() {
Serial.begin(9600);
pinMode(A3, INPUT);
}
void loop() {
int value = analogRead(A3);
Serial.println(value);
delay(200);
}
You need to open the serial monitor with a baud rate of 9600 and look for the minimum and maximum value after pulling the hydro ebrake. When you know your min and max value, you can upload the final code:
#include <Joystick.h>
// Použijeme predvolený konštruktor, ktorý aktivuje X, Y a Z os
Joystick_ Joystick;
const int hallPin = A3;
void setup() {
pinMode(hallPin, INPUT);
Joystick.begin();
}
void loop() {
int rawValue = analogRead(hallPin);
int mappedValue = map(rawValue, 171, 870, 0, 1023); // uprav podľa rozsahu
mappedValue = constrain(mappedValue, 0, 1023);
Serial.print("Raw: ");
Serial.print(rawValue);
Serial.print(" → Mapped: ");
Serial.println(mappedValue);
Joystick.setZAxis(mappedValue); // použijeme Z os
delay(10);
}
Values 171 and 870 in the code are your min and max values, so change them to your numbers, and you are done.
This remix is based on

/https://fbi.cults3d.com/uploaders/14659269/illustration-file/b02ba7d4-197e-4cb1-bc59-b6a0ea27e133/Top_case.png)
Comment & Rating (6)