HumidiFire Watergun


Print Profile(3)


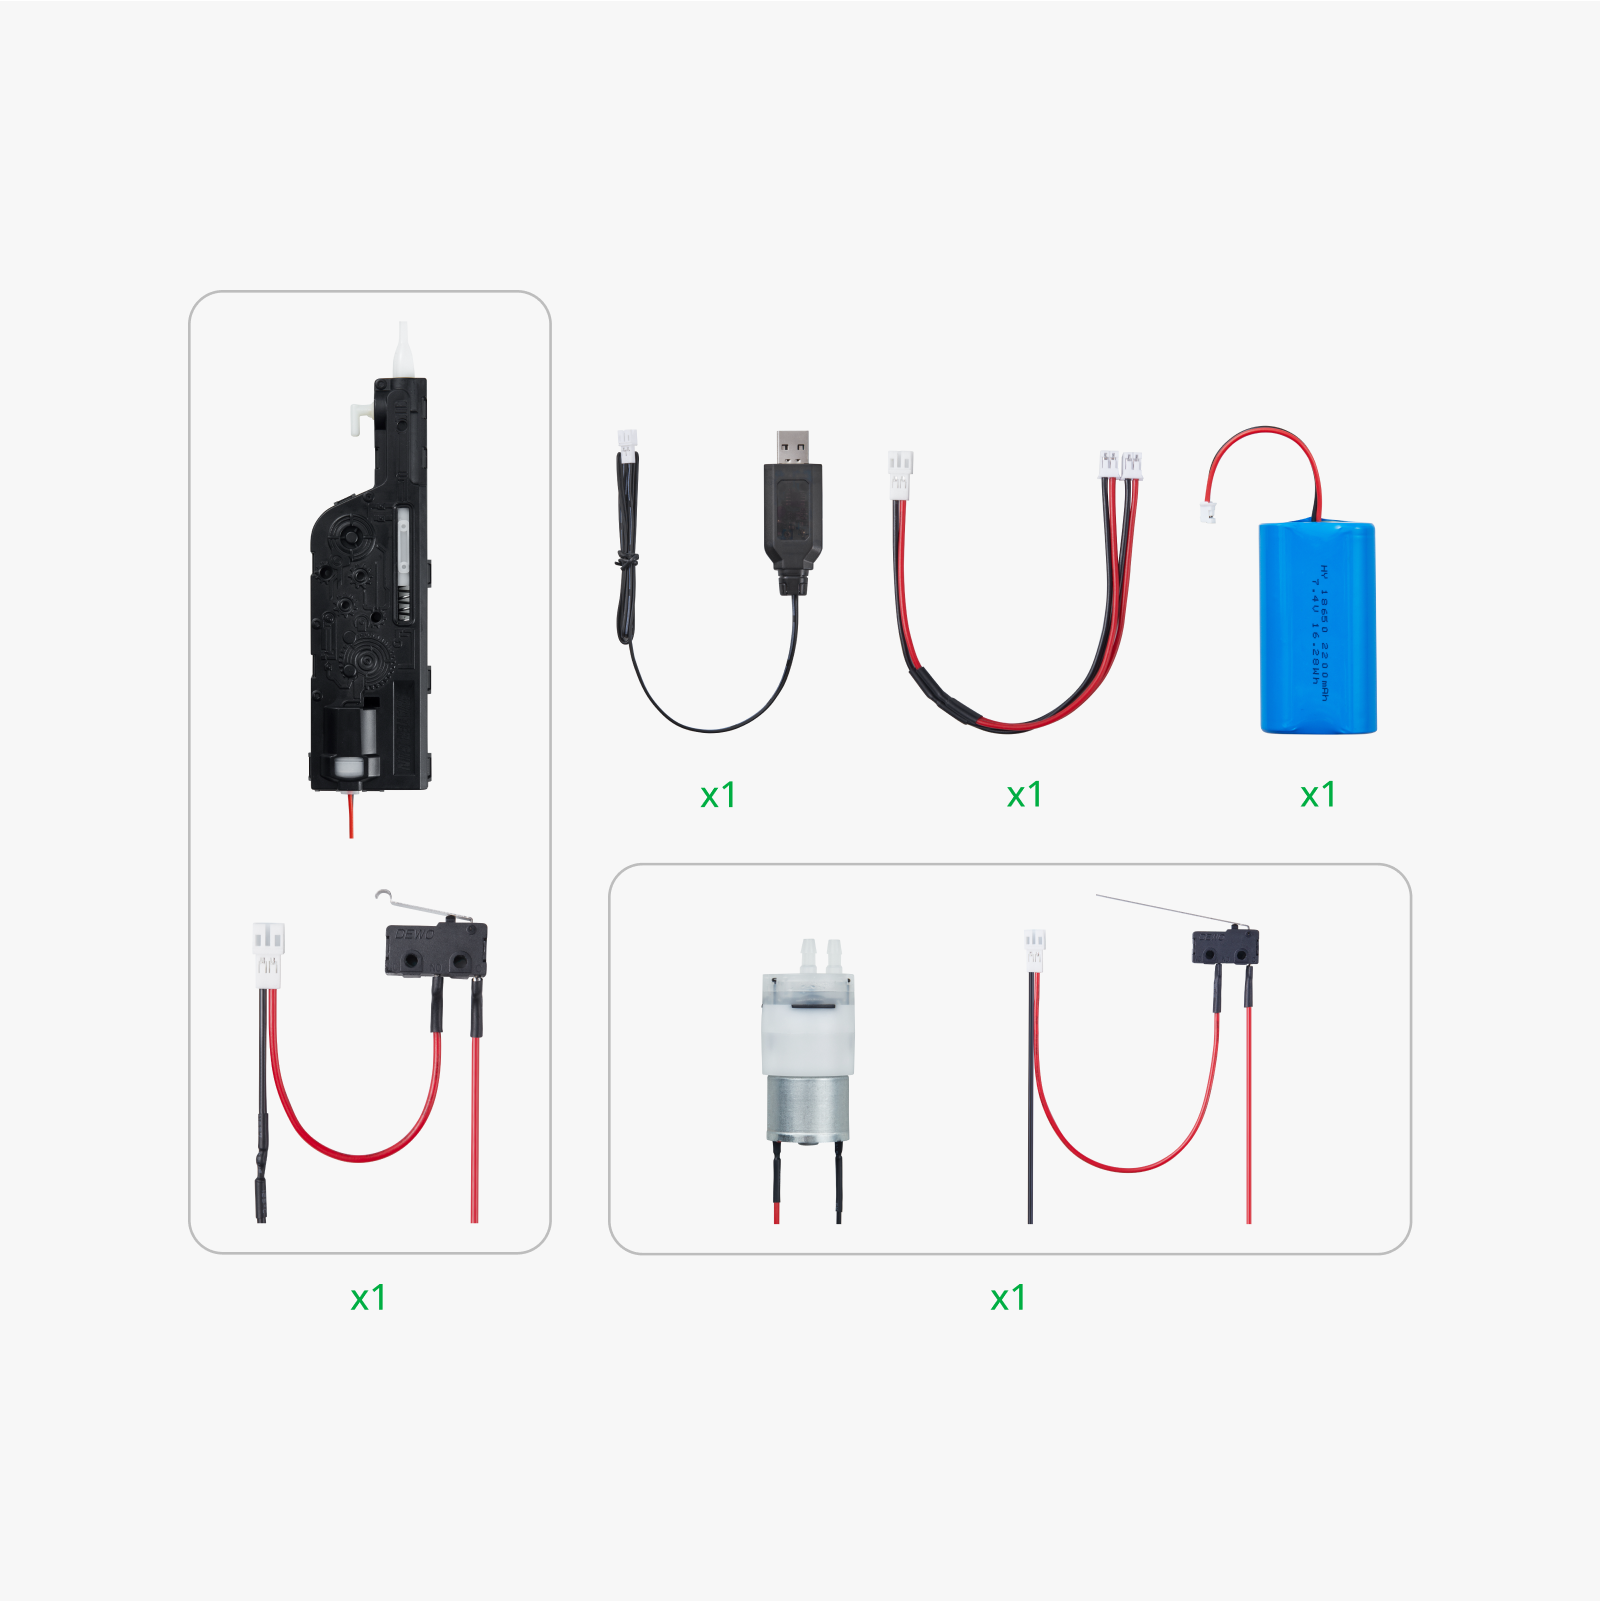
Bill of Materials


Description
This self filling watergun is designed for the Bambulab Electric Water Spray Kit 01.
Printed Parts

External Hardware
- 1pc - Electric Water Spray Kit 01 (ZC004)
- 5pc - M3 Brass Heat Inserts
- 4pc - M3x16mm Screw
- 1pc - M3x6mm Screw
- 1pc - 3x5mm silicone tube
Assembly

Install the 4 brass heat inserts into the triggercase

install the brass insert into the frontside of the tank

Use a piece of filament to assemble the triggercase. If the holes are too tight, you can drill them with a 2mm drill.

Use a lighter to warm the filament

press the heatet filament tight with the grip.

Cut the remaining filament and let it stand out about 3mm.

repeat this procedure for all the holes on one side

Remove the lid and the left handle

Insert the main trigger and the refill switch

Shorten the metal strip of the pump switch by using some pliers.

Insert the triggerswitch and the pump switch. Test if they are working and the metal for the pump switch is short enough to not stuck during operation.
You can now close the housing again and melt the other side of the filament to make it permanent.

Insert the pump on the tank

Put the silicone tube through the middle hole of the tank and install it onto the pump

Push the silicone tube into the tank inlet. Try to push it as far as possible inside (~20-30mm to make it watertight). Insall the other side on the pump outlet. Make sure the bending radius is big enough so the tube won't get crushed.

Insert the silicone tube into the tanks outlet. Also try to push it in as far as possible. It is a little tricky because of the tight space, but you can use tweezers to make this step easier.

Insert the water spray mechanism into the tank, and connect it with the silicone tube.

Slip on the outer shell.

Assemble the top shell and put the trigger-assembly in place.

Add the bottom shell

Screw the parts together with the 4 M3x16mm screws

Secure the main shell with the M3x6mm screw.

Insert the battery and close the lid. The battery holder is designed a little bit loose. If the battery slips too much, you can thicken it up with some tape.

Let the fun begin
Empty the tank
When you shoot the tank empty there is still a little bit of water inside the tank. You can use the pump to empty it over the pressure equalization holes. Hold the gun upside down pointing a few degrees upwards and push the pump switch. The remaining water should now flow out of these little holes

License
You shall not share, sub-license, sell, rent, host, transfer, or distribute in any way the digital or 3D printed versions of this object, nor any other derivative work of this object in its digital or physical format (including - but not limited to - remixes of this object, and hosting on other digital platforms). The objects may not be used without permission in any way whatsoever in which you charge money, or collect fees.
Comment & Rating (97)