AR-15 Charging Handle Mod for Tippmann M4-22


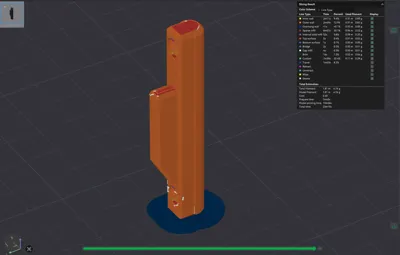
Print Profile(1)

Bill of Materials


- 2.5mm drill x 1: For drilling the final hole size
- M3x0.5 tap x 1: For cutting the M3 threads
- <=2mm drill x 1: For drilling the pilot holes
Description
AR-15 Charging Handle Mod for Tippmann M4-22
What is this about?
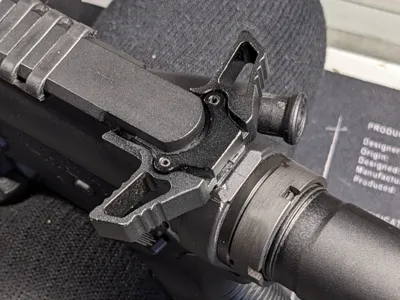
I wanted to use an ambidextrous charging handle in my Tippmann M4-22, but not pay for the overpriced one from Tippmann (goes for around 150 bucks here in Germany). Since the M4-22 uses a proprietary charging handle, you can't just drop in a standard AR-15 one. But you can modify one to make it work. Which is what this printed part is for.
How to print?
My initial version used SUNLU Easy ABS, which I have had great success with for functional parts that need to take mechanical stress. But the wall thickness around the screws is apparently too thin and it broke around the rear screw after some time (it was still working and held in place by the front, so not a catastrophic failure).
I reprinted it in eSUN PA-CF and this has held up with no visible wear in the previous failure area for thousands of rounds now. I highly recommend using PA-CF or stronger material for this. Or print some spares and be prepared to replace it over time (which is easy to do due to the screw fastening system).
How to assemble?
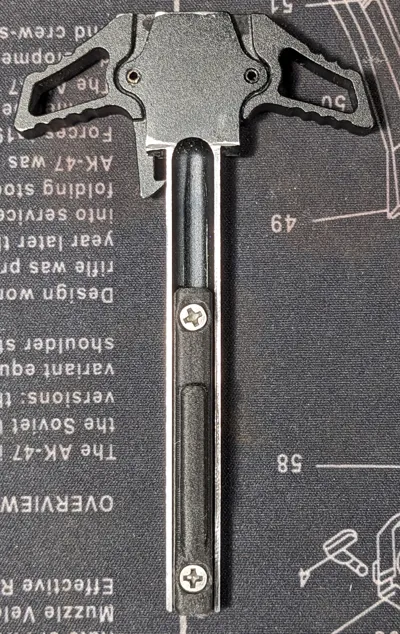
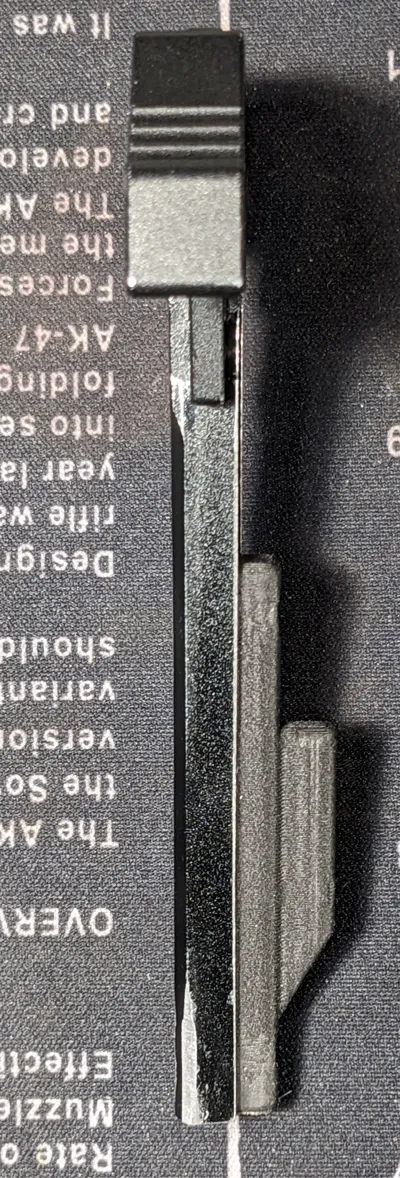
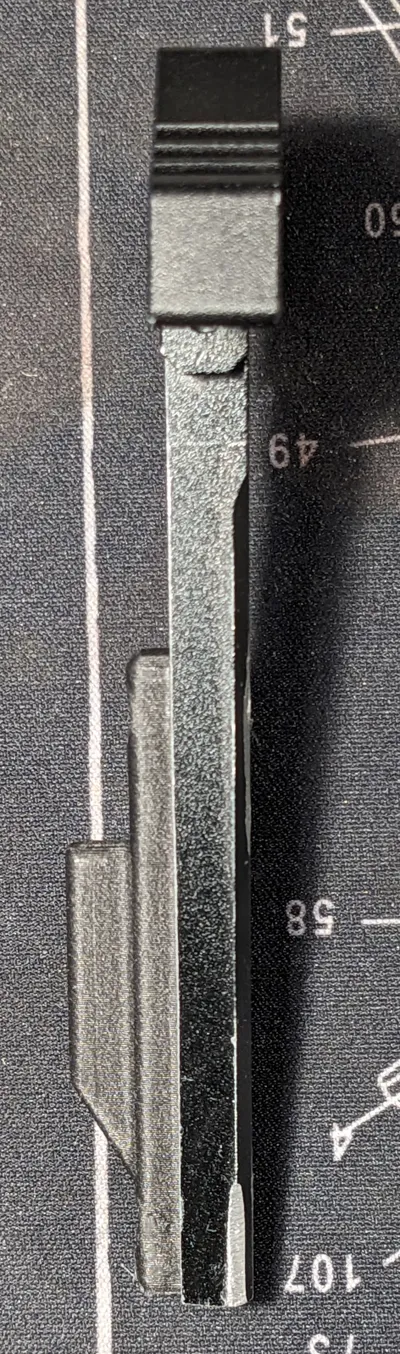
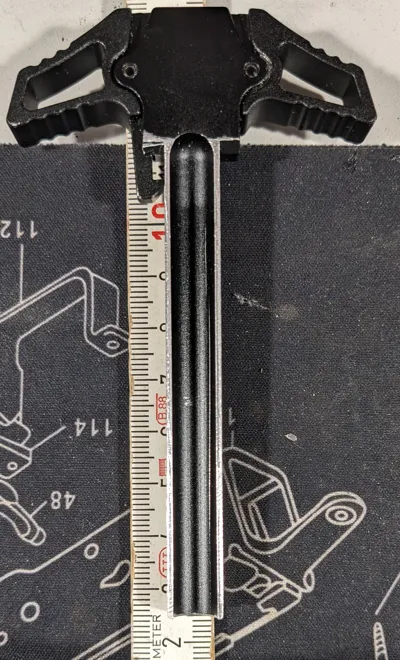
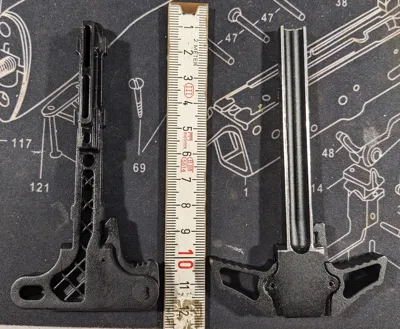
I sourced a copy of a Radian Raptor AR-15 charging handle (you could use an original, but I didn't want to risk one for the first try) and cut it to the same length as the stock one of the M4-22. Make sure to measure from the front edge of the locking mechanism that interfaces with the rear of the receiver, not the rear of the charging handle. The dimensions of the mechanism can differ in length!
There is a comparison picture included with a ruler (in cm scale), if you need a reference.
I needed to do some filing to get it to fit my Tippmann, but not sure if that was because of deviations from the AR-15 standard in the Tippmann or in the cheap copy of the Radian. Either way, aluminium is very easy to file even with a simple hand file. So it should be easy to get it to fit.
Then place the printed part in the cut down charging handle, using the original as a template to position it. For me, having it flush with the front of the charging handle worked perfectly. Try to orient it as straight as possible and clamp it down to hold it in place (I used my vice for this). Then drill a pilot hole with a ≤2mm drill through one of the holes in the printed piece. Try to be as close to 90° to the charging handle as possible, so the screw can sit straight and flush in the recess.
Once you have the pilot hole, remove the printed part and drill a 2.5mm hole and tap M3 threads into it (tap sets are available from Aliexpress etc. for a few bucks, no fancy stuff needed). You are cutting into aluminium, so it's easy to cut, but also easy to screw up (there is a third hole in mine, because I screwed up the first time and had to change the design to move the screw). Go slow and keep the tap at 90° to the charging handle. I also recommend cutting the threads from the top of the charging handle, not the bottom. You are more likely to mess up the first part of the threads and the screw will then still start out with clean threads and center itself better.
When the first hole is done, screw the printed part into place with an M3 countersunk screw. I didn't have the right size, so I used oversized ones (M3x20 I think) and then ground them down afterwards. At this stage it doesn't matter if they are too long. With the part held firmly in place, drill the second hole (use the same process as before, using an undersized drill for the pilot hole and then drill to 2.5mm and tap with M3 threads).
You can now screw in both screws and grind them down until they are flush with the charging handle on the top.
Special considerations?
The process sounds more complicated than it is. Even if you have never cut threads (as I did before this project), this is easily doable. Maybe don't start out with your fancy (and expensive) name brand charging handle you actually want to use, but try it out on an old mil-spec one or cheap copy you have sitting in a parts bin somewhere. Once you are familiar with the process, step up to the one you actually want to use. Or just YOLO it. Whatever works for you XD
The charging handle should basically be a zero wear item (unless you mess up and cross-thread the screws somehow). So even if the printed part breaks, you can easily replace it with a new one in about a minute (plus print time). There is no glue to mess around with. If you want the extra security, you can of course also add some glue before screwing the part into place. But I'd rather have the flexibility of replacing it if necessary.
Lastly, charging handles may not all be the exact same dimensions on the inside. If this part doesn't fit your charging handle, I have included the Fusion360 project file as well. Feel free to modify the top part as needed to make it work for you. If your are using a common charging handle design, please then also upload it as an additional print profile so others can use it as well. Because sharing is caring :)
Thanks for checking out my designs. If this has been useful to you, I'd appreciate a like or comment. If you are having any issues, please let me know in the comments as well and I can try to help you address them.
Boost Me (for free)
I'd gladly take any boosts you have to spare <3
License
You shall not share, sub-license, sell, rent, host, transfer, or distribute in any way the digital or 3D printed versions of this object, nor any other derivative work of this object in its digital or physical format (including - but not limited to - remixes of this object, and hosting on other digital platforms). The objects may not be used without permission in any way whatsoever in which you charge money, or collect fees.
Comment & Rating (11)