Vertical AMS Hub - for placing AMS under printer


Print Profile(1)

Bill of Materials


Description
Hi there! PLEASE READ!
This is another one that i've designed to solve a problem that i've faced every now and then.
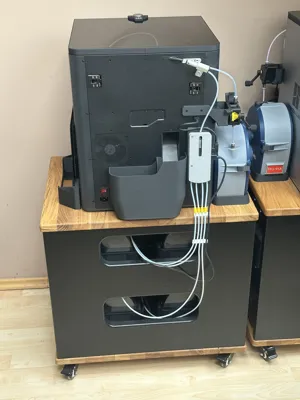
As you can see in the pictures, my 4 AMS are stored under the printer.
With the original placement of the AMS Hub i sometimes got one of these errors:


It was also clearly audible that the first stage feeders were beginning to struggle at the end of the laoding process.
This mod has completely solved this issue for me - If you have similar issues with a setup like mine, you should probably try this out!
The noise level of the feeding process now remains almost the same until the end - a drastic improvement.
Boost Me (for free)
i this has solved an issue for you, please consider supporting me for future projects!
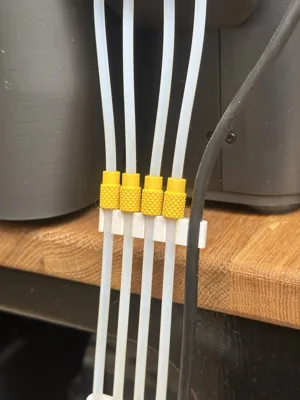
The print profile also includes some parts for cable/PFTE Tube Management, as well as some quick release sleeves as shown in the pictures.
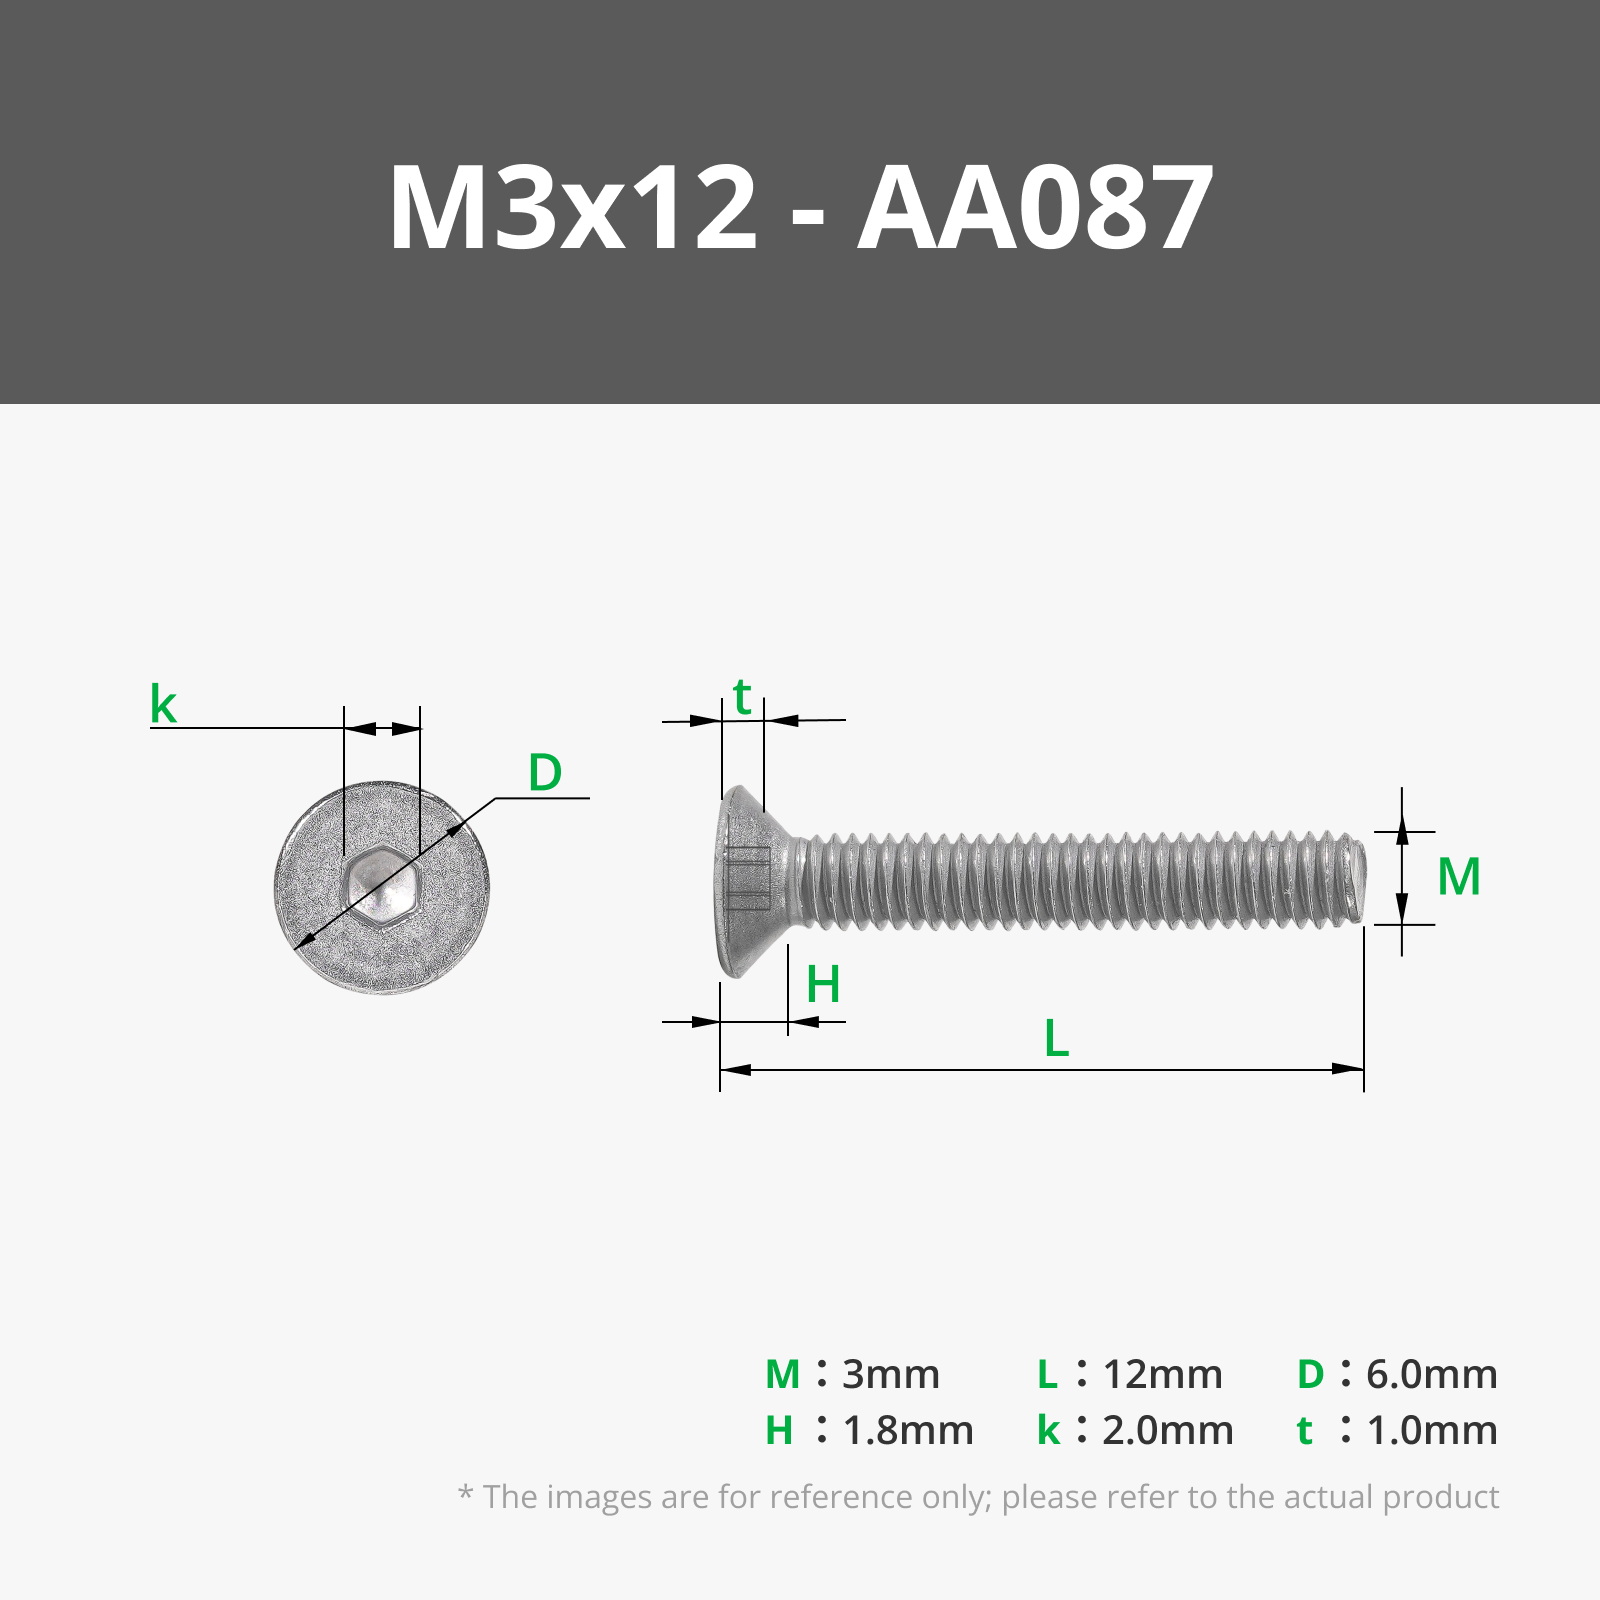
As far as hardware goes, you will need two M3 heat inserts and two M3x12mm countersunk screws(to attach it to the printer) as well as the original screws the AMS Hub came with. Check the Bill of Materials.
Additionally I use two small pieces of thin double sided tape between the flat area of the holder and the back of the printer for a better hold, but that is not urgently needed.
This will print well with almost every material. For the adapter i would recommend to use PETG or higher.
The adapter sits exactly above an air vent, so it could get a littler warmer there. (Thats also the reason for the air vents in the model).
I chose ASA-CF for the adapter because it's overkill regarding temperature resistance for this project and i love the look of it.
Feel free to upload your own profiles for other materials.
Have an nice day,
M.I.M
License
You shall not share, sub-license, sell, rent, host, transfer, or distribute in any way the digital or 3D printed versions of this object, nor any other derivative work of this object in its digital or physical format (including - but not limited to - remixes of this object, and hosting on other digital platforms). The objects may not be used without permission in any way whatsoever in which you charge money, or collect fees.
Comment & Rating (59)