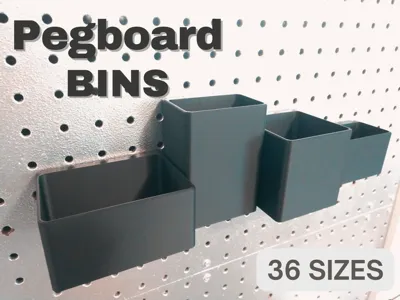
Pegboard Bins - Multiple Sizes


Print Profile(7)


Description
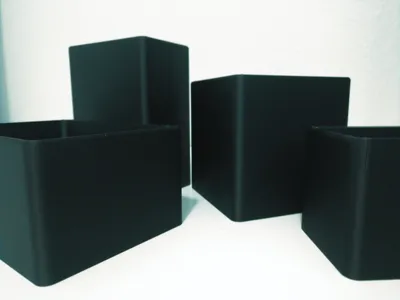
Creating pegboard bins started with just one or two—But quickly turned into wanting a whole array of them in different sizes to create my perfect workspace organization. These rounded edge bins are simple, yet sturdy and fit together to help create a neat and efficient setup, maximizing pegboard space and keeping everything within reach. Whether it's tools, supplies, or accessories, I wanted to ensure that anyone could print as many bins as they need to make their workspace more organized and functional.
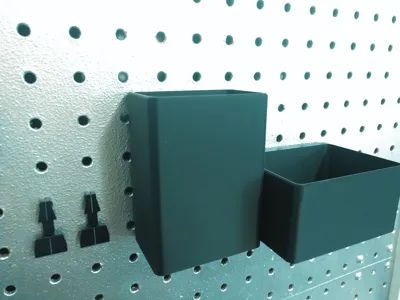
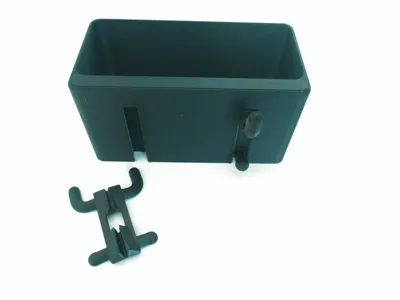
These bins are designed for pegboards with 1-inch (25.4 mm) hole spacing commonly sold in US hardware stores. Designed around Sy's Peglock System, both the pegboard bins and pegboard clips can be printed flat and without supports. This eliminates the weak pegs that are prone to breaking in other pegboard models because the print orientation is not optimal for the strength of the hooks, which are much stronger when the plane of the hook is parallel to the print bed.

Each build plate includes one bin with two pegs for the typical 0.25-inch (6.35 mm) thick "Home Depot" pegboard with 0.25-inch holes. While pegboards in the US have a standard 1" hole spacing, the actual boards can be a range of thicknesses and hole sizes. Hooks sized to fit thicker boards, result in a loose-fitting hook, on thinner boards. If you need, you can generate different sized pegs from this Onshape project.
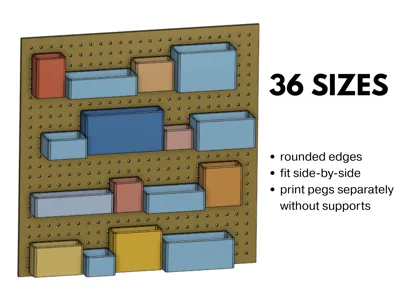
Multiple Sizes:
Bins are grouped into print profiles by height and depth (front to back dimension). Within each print profile are a set of multiple width bins based on that specific height and depth combination. Bins are named by approximate OUTSIDE measurements (in inches) on each build plate by WIDTH x HEIGHT x DEPTH. For example, ‘7x4x3’ would be a bin that is 7-inches wide, 4-inches high, and 3-inches deep.

Links for other styles of pegboard organizers I have created can be found here: Pegboard Organization for pegboards with 1" hole spacing.
Printing:
I printed in both PETG and PLA with the 0.20mm standard settings in Bambu Studio.
Assembly:
To mount, fold each "peglock pegboard clip" with the flat printed sides together. Insert it into the pegboard so the triangular surfaces point up spaced to match the slots on the bin, then slide the bin down over top. It should securely fit into place compressing the bin against the board and preventing accidental movement.

Comment & Rating (88)