Customizable PC Case Starter Kit


Print Profile(1)

Description
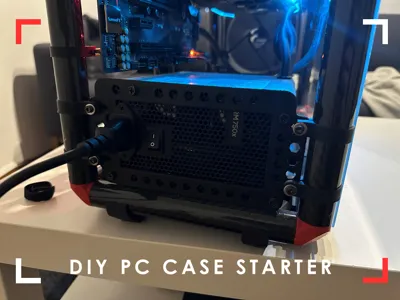
Welcome to the DIY PC Case Starter Kit!
I've designed and build this back in 2023 and decided to share it with you know. I always wanted to design my own pc case that I can adjust in size to my current needs.
All parts are printed in PETG (red) or PLA (black)
Personalization
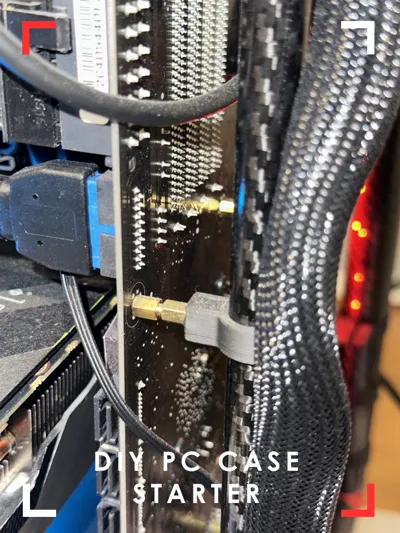
This is not supposed to be set&forget print. Feel free to personalize your build. add custom parts/mounts, you can use different materials for the tubes (e.g. copper) as long as they have the same dimension
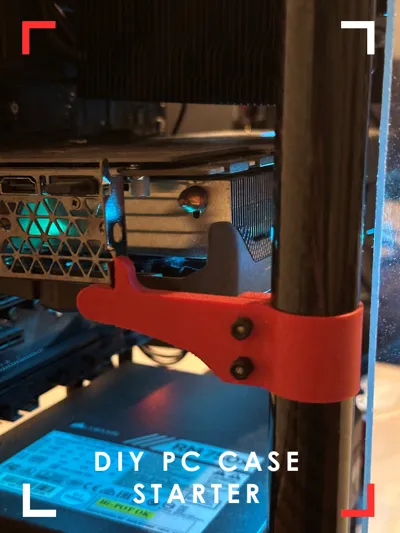
You can design your own side panels, radiator mounts or integrate a headset mount.
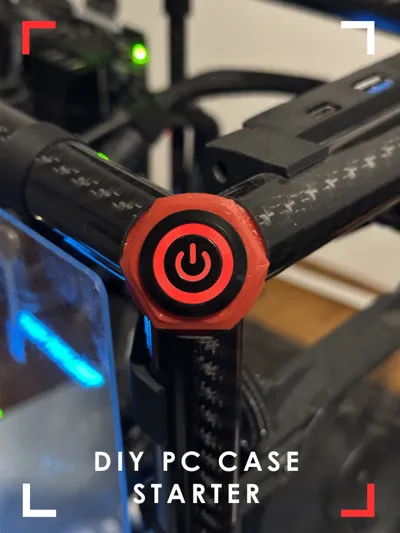
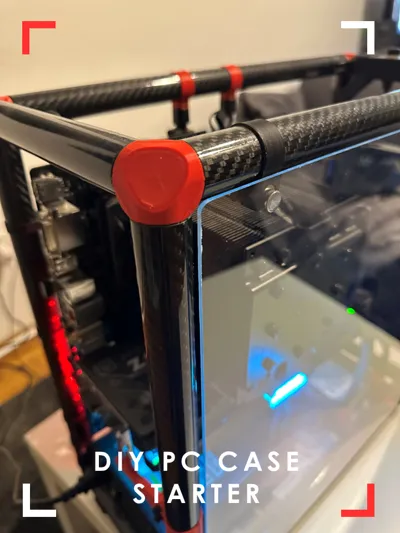
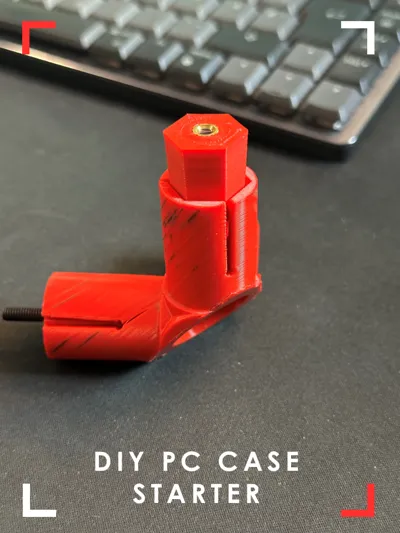
My personal highlight is the integrated power button which sits neatly in the corner joint.
Parts:
- M4 screws
- 40mm: 21pcs (clamping mechanism for corner joints)
- M3x screws
- 4mm: 7pcs (cover for corner joints)
- 10mm: min 25pcs (all mounts)
- 20mm: 2pcs (front IO)
- M4 (4&6mm) heat inserts/M3 (4mm) heat insert:
- Pack of 300 Threaded Inserts, M2 M2.5 M3 M4 M5 M6 Insert Nut Brass Threaded Bushings Female Thread Knurled Nuts with Plastic Box for Plastic Parts by Heat or Ultrasonic in 3D Printer Parts : Amazon.de: DIY & Tools
- Pro-Tip: if you don't have a soldering iron to press the insert in, you can also add them to a screw, grab the screw with some pliers and use a lighter to heat up the inserts before you press them in the plastic
- PC screws and mainboard standoffs:
- Tubes 12/10mmx500mm (outer/inner diameter): min 2pcs, depending on further configuration
- 2PC Twill Glossy Carbon Fiber Tube Pipe Drone Accessories OD4mm8mm12mm20mm30mm40mm50mm Length 500mm Factory CNC Cutting - AliExpress 26 (Watch out, link doesn't support the right selection, look for “2PCS 12x10x500mm”)
- Tubes 25/23mm (outer/innter diameter): min 9pcs depends on configuration
- 2PC Twill Glossy Carbon Fiber Tube Pipe Drone Accessories OD4mm8mm12mm20mm30mm40mm50mm Length 500mm Factory CNC Cutting - AliExpress 26 (Watch out, link doesn't support the right selection, look for “2PCS 25x23x500mm”)
- Power Button Flat, 22mm Black Shell, 12-24volt: 1pcs
- Front IO Panel
- Magnets (10x3): 4pcs
- Acrly Glas 50x50x0.2cm
- can't find a link since i bought this in a local hardware store.
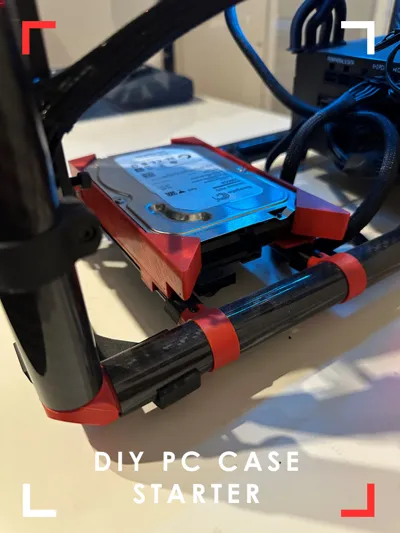
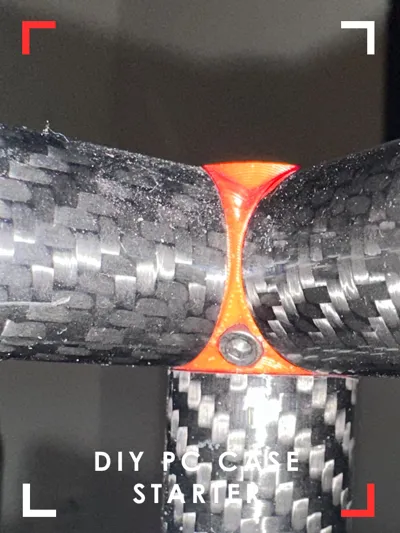
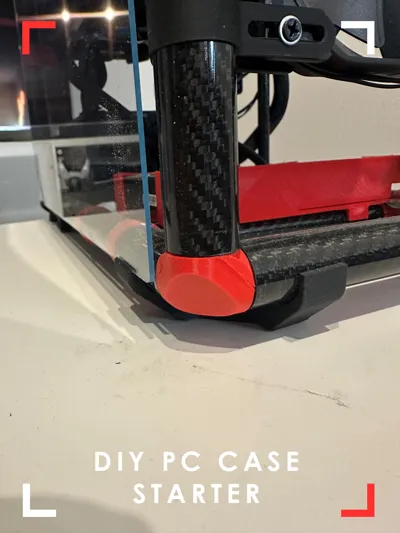
All Parts red in the image are printed in PETG, all black parts are printed in PLA. This PC is running in this case for more than 1.5 years and nothing deformed or broke.
I currently chose the following dimensions for the frame tubes, adjust to your needs:
43,5cm x 17,5cm x 42cm (LxWxH)
Assembly Tips
- For assembly make sure to print 7 of the regular corner joints and one of the power button versions
- Add the cones to the corner joints using the M4x40 screws and start tightening them until the start to touch the joint.
- then start assembling the tubes to layout the bottom rectangle and tighten the screws of the joints pulling in the cones to generate some clamping force
- build the top rectangle and tighten the screws.
- add the tubes for the height to the bottom rectangle, then place the top rectangle from the previous step on top.
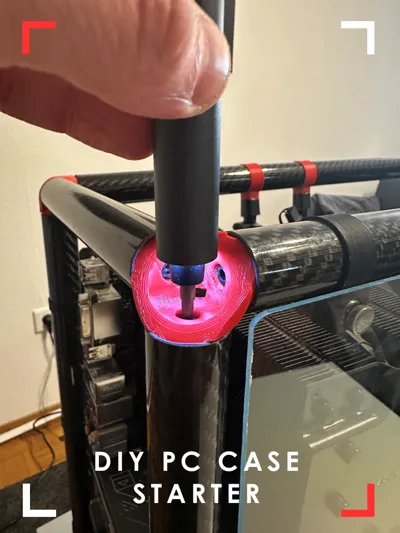
- The covers of the corner joints are screwed in from “inside” the case using a M3x10 screws. (see pictures)
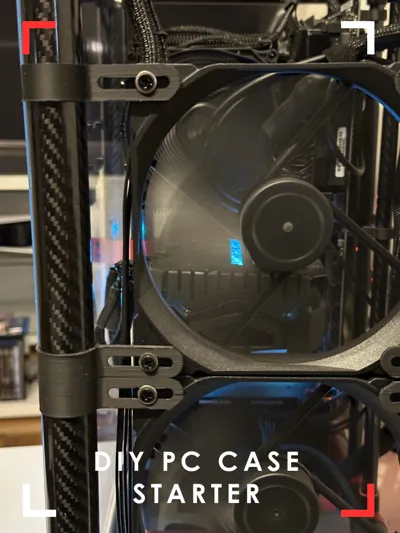
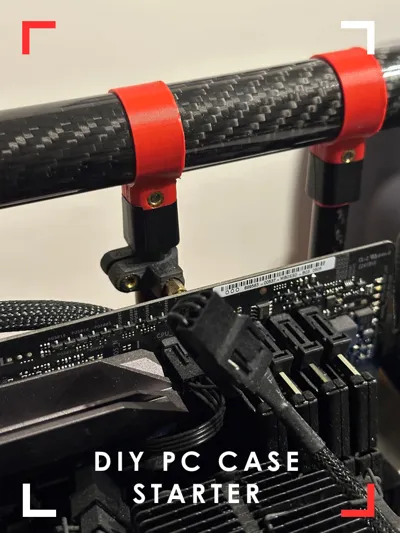
- you need at least 4 of the perpendicular joints to mount 2 of the 12mm tubes for the mainboard mounts
- depending on your mainboard size you need to print the according number of mainboard mounts
- if you want to include a 3.5"HDD theres a tray included
- Fan mount fits 120 or140mm fans with my width, dimensions
- I used 2 motherboard standoffs to lift the mother a bit further from the rear tube.
- Make sure to print and place the 4 PSU supports! The PSU mounting cover will not carry the wait on its own.
License
You shall not share, sub-license, sell, rent, host, transfer, or distribute in any way the digital or 3D printed versions of this object, nor any other derivative work of this object in its digital or physical format (including - but not limited to - remixes of this object, and hosting on other digital platforms). The objects may not be used without permission in any way whatsoever in which you charge money, or collect fees.
Comment & Rating (21)