Medieval Renaissances - Smithing Hammer - PROP


Print Profile(1)

Description
Why I made this
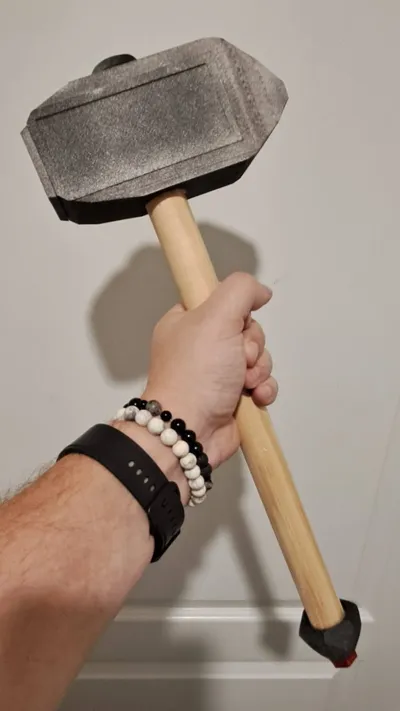
After recently enjoying my first Medieval Fair, we started looking for the next one we could attend. I decided to dive in a bit more and create a character who was a smith by trade. This hammer is extremely light and proved to be quite durable at a full day event. It was in a tool frog and dangling from my hip the entire day.
Assembly information
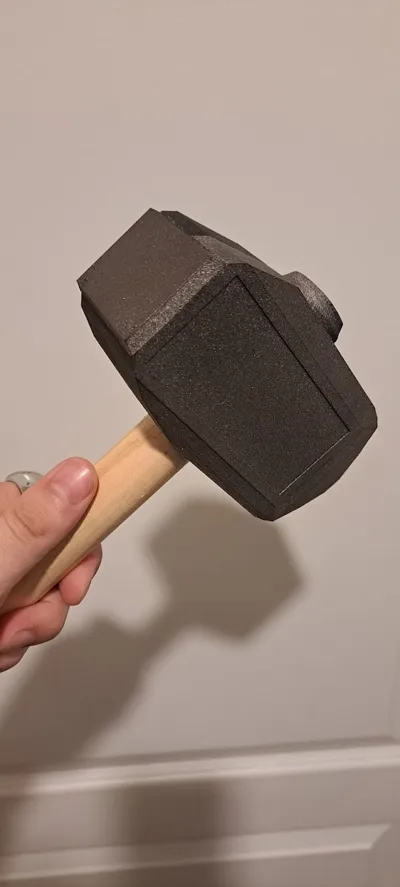
It's easy to get excited and dive in but lets take a moment and work smart. Before any assembly, check your parts. Have you painted them how you want? Do they reflect what you have in mind for the final project? It's much easier to paint the pieces NOW and apply touchups later when assembled. It's much more of a pain to tape off the handle and the gem later and try to paint at the end.
Personally I took to an automotive primer spray as a base and then lightly blended in hammered brown to give some depth. The only warning here is do NOT paint the ‘inside’ surface of the hammer head. You're going to sand that later to get a better grip and it'll be inside the head - no one will see it. Plus, paint interferes with adhesion.
I recommend looking at the notes about the grip section below. Ultimately, this is your hammer! If you want to sand, stain or rap the grip, do it! It should be the first thing you uh…. handle. Once this is ready see the section below on how to adhere the grip to the head pieces.
Notes about the grip
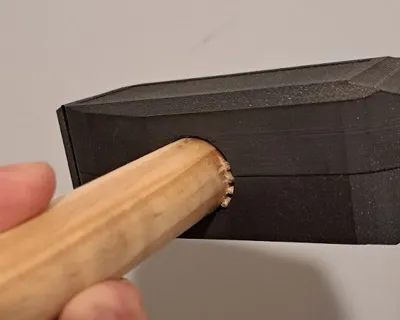
The shaft of the hammer is a 1" wooden dowel. I had a length of this left over from another project. You may find some smaller, precut pieces so always check the scrap pile! After numerous styles of printing out the grip, nothing held up near as well as an actual piece of wood. The hole size is purposely larger so as to accommodate for any abnormalities or if you wanted to add a wrap material. Wood is natural so you may need that wiggle room!
I recommend sanding the inside tube portion of the hammer head pieces and then using an adhesive cement as they tend be thicker, stronger and cure up with extreme flexibility. Do not use superglue. Yes it's faster, it'll also be very likely to break.
Apply a liberal amount of adhesive cement to the head tunnel, place the dowel into this place and then apply adhesive to the rest of the ‘inside’ of the hammer head. Take the second part of the head and firmly place it down to match. The adhesive cement will allow you plenty of time to get the alignment correct so take your time and be patient. I recommend placing a heavy object or the use of a wide mouth clamp to keep things in place.
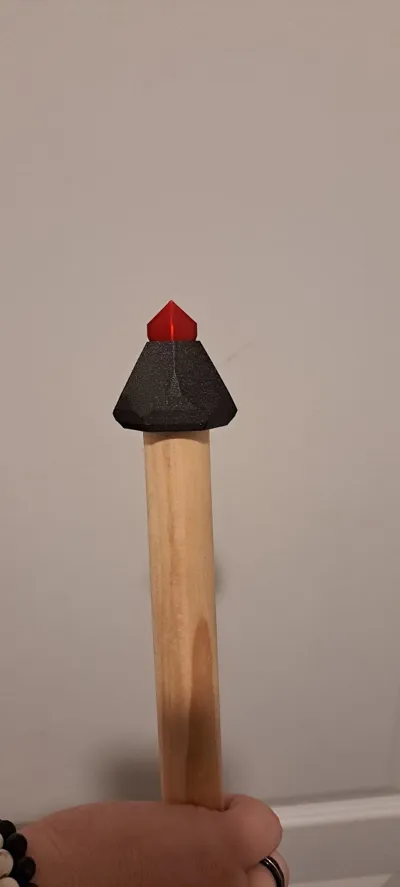
While finetuning the placement, ensure that you have enough of the dowel coming out of the ‘top’ of the head. While the two head pieces are curing, go ahead and place a bit of adhesive on the inside of the head cap and place it on the end of the dowel. The adhesive should be on both down facing surfaces. The inner most will be where the down adheres to the cap and the outermost is where it will contact the head surface.
Slide this cap down until it's touching the hammer head. As it dries, this serves to securely hold the handle and both pieces of the head in one place. Now go get something to eat, run some errands and let this all cure up over a few hours. The photo below shows this cap once it is dry. See how it meets the hammer head?

Have some wiggle room? Not a problem. Check the photos and see that I was able to use toothpicks as a shim. A tiny amount of adhesive on the ends, insert into the empty space and snip with some clippers.

Assembling the rest
Now you have the handle and the hammer head joined. The rest is simple! Glue the jewel to the pommel core and let it cure. Once it's ready to go, you can use the cement to bond the pommel to the dowel.
The final piece is the ‘strike plate’ which simply goes on the hammer head surface. You can leave this off if you like but I found that it cleans up the look and helps hide the joining seam.

License
You shall not share, sub-license, sell, rent, host, transfer, or distribute in any way the digital or 3D printed versions of this object, nor any other derivative work of this object in its digital or physical format (including - but not limited to - remixes of this object, and hosting on other digital platforms). The objects may not be used without permission in any way whatsoever in which you charge money, or collect fees.
Comment & Rating (6)