
Spooling Helper for Printed Filament (magnetic)
Print Profile(2)


Bill of Materials


Description
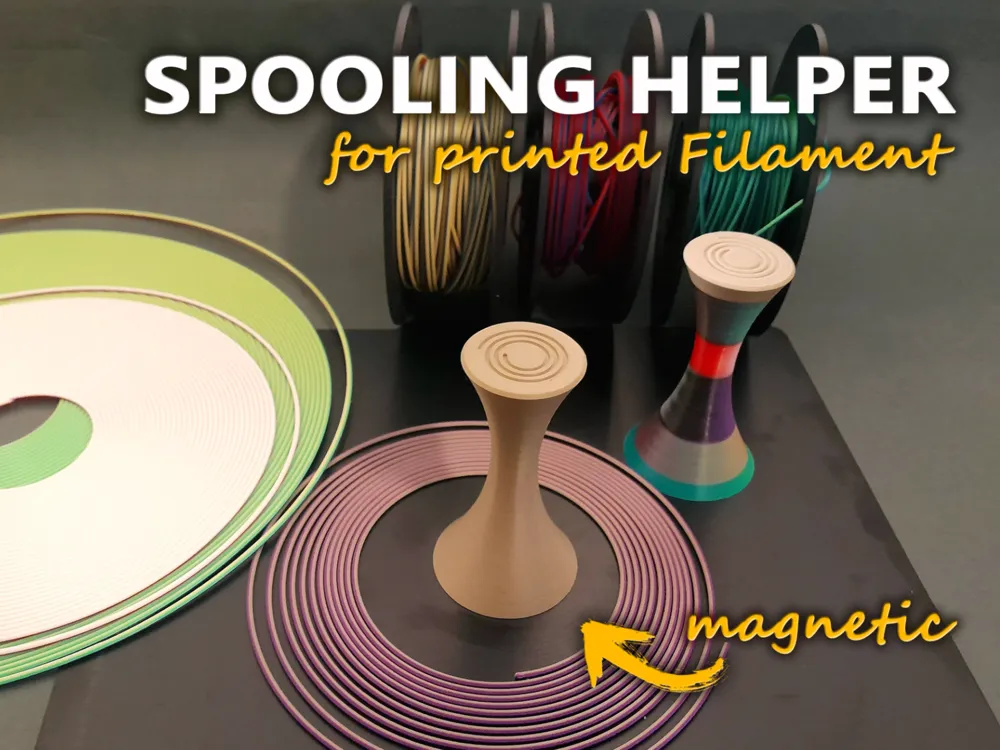
This is the “Spooling Helper” to aid the process of winding printed filament on a spool. There are magnets embedded at the very bottom that attach to the buildplate and keep the tool in place during the process.
It was developed with this printed multi-color filament in mind but can be used for every other home printed filament.
There are 2 versions. The first print profile uses 7 10x3mm round magnets, the second one has pockets for 9 pieces of 6x4mm magnets (optional 2 pieces of 6x2mm magnets per slot or one 6x3mm is fine too). Select the profile you want and start the print. There is a Pause set at the layer that would bridge over the pockets for the magnets. While the printer is paused, insert the magnets.
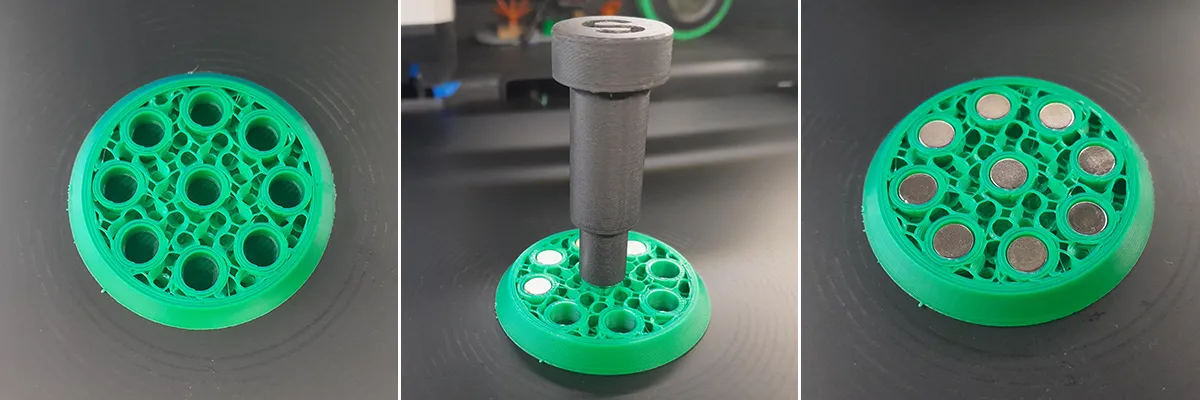
It is important to orient all magnets in the same direction so they don't cancel each other out (either north or south pole). I used a magnet-placer tool here but it can be done without. The magnets will be attracted to the buildplate already (there is only 1 layer between) and won't be able to jump out, even with the toolhead moving above. After this is done, simply resume the print until it is finished.
Tip: To increase the friction of the spooling helper on the buildplate, print it on a textured plate if you primarily print your filament on textured plates. Should you print the filament on smooth plates, use a smooth plate for the helper as well. Matching the “grid” of the two helps to have better friction.
Useage:
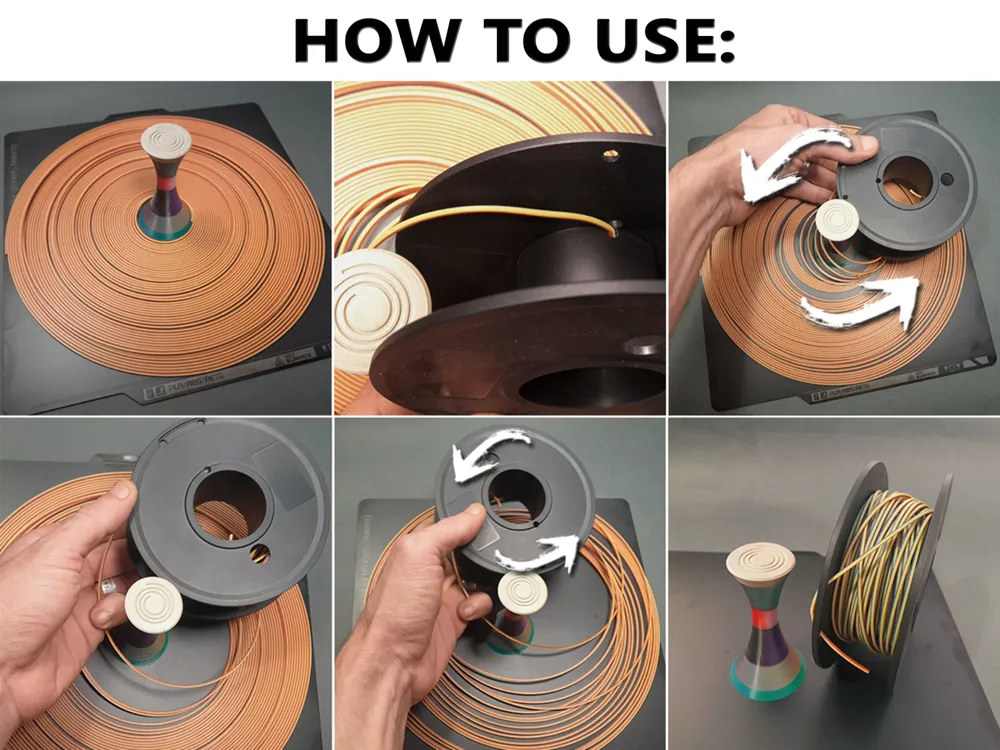
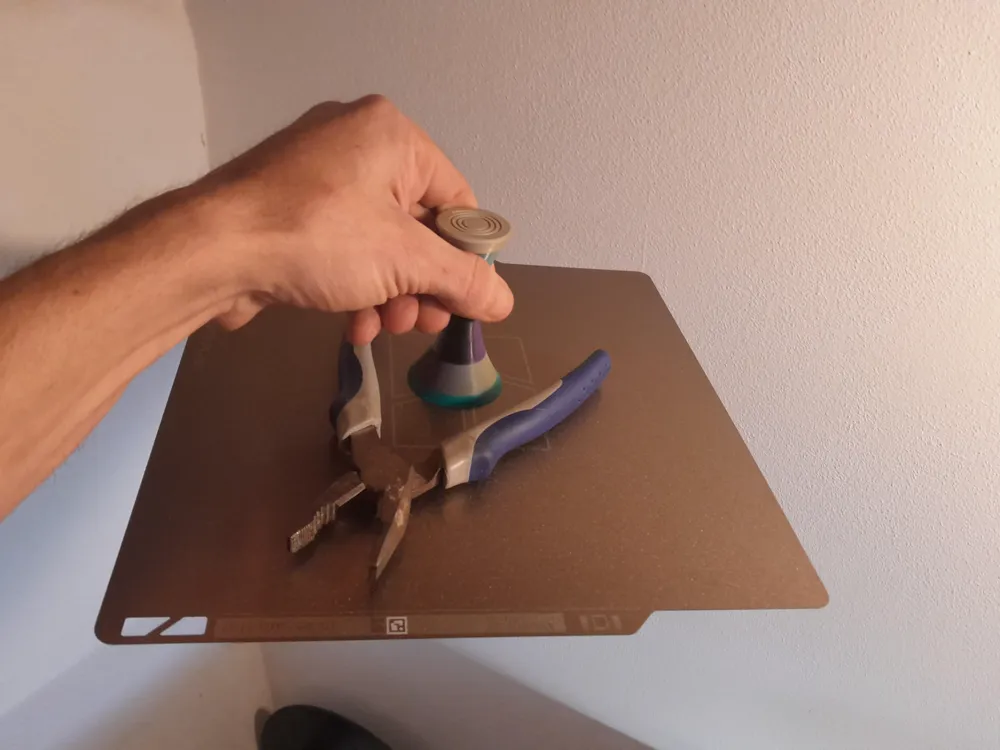
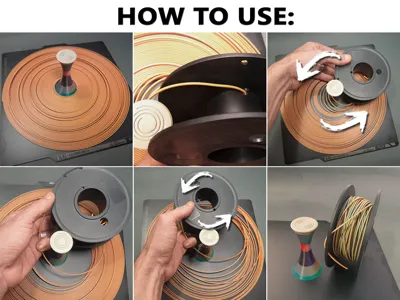
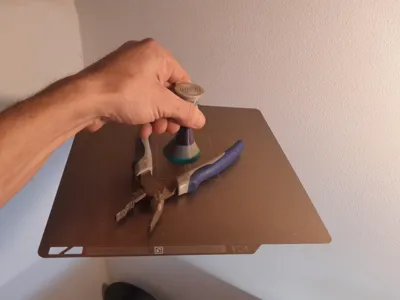
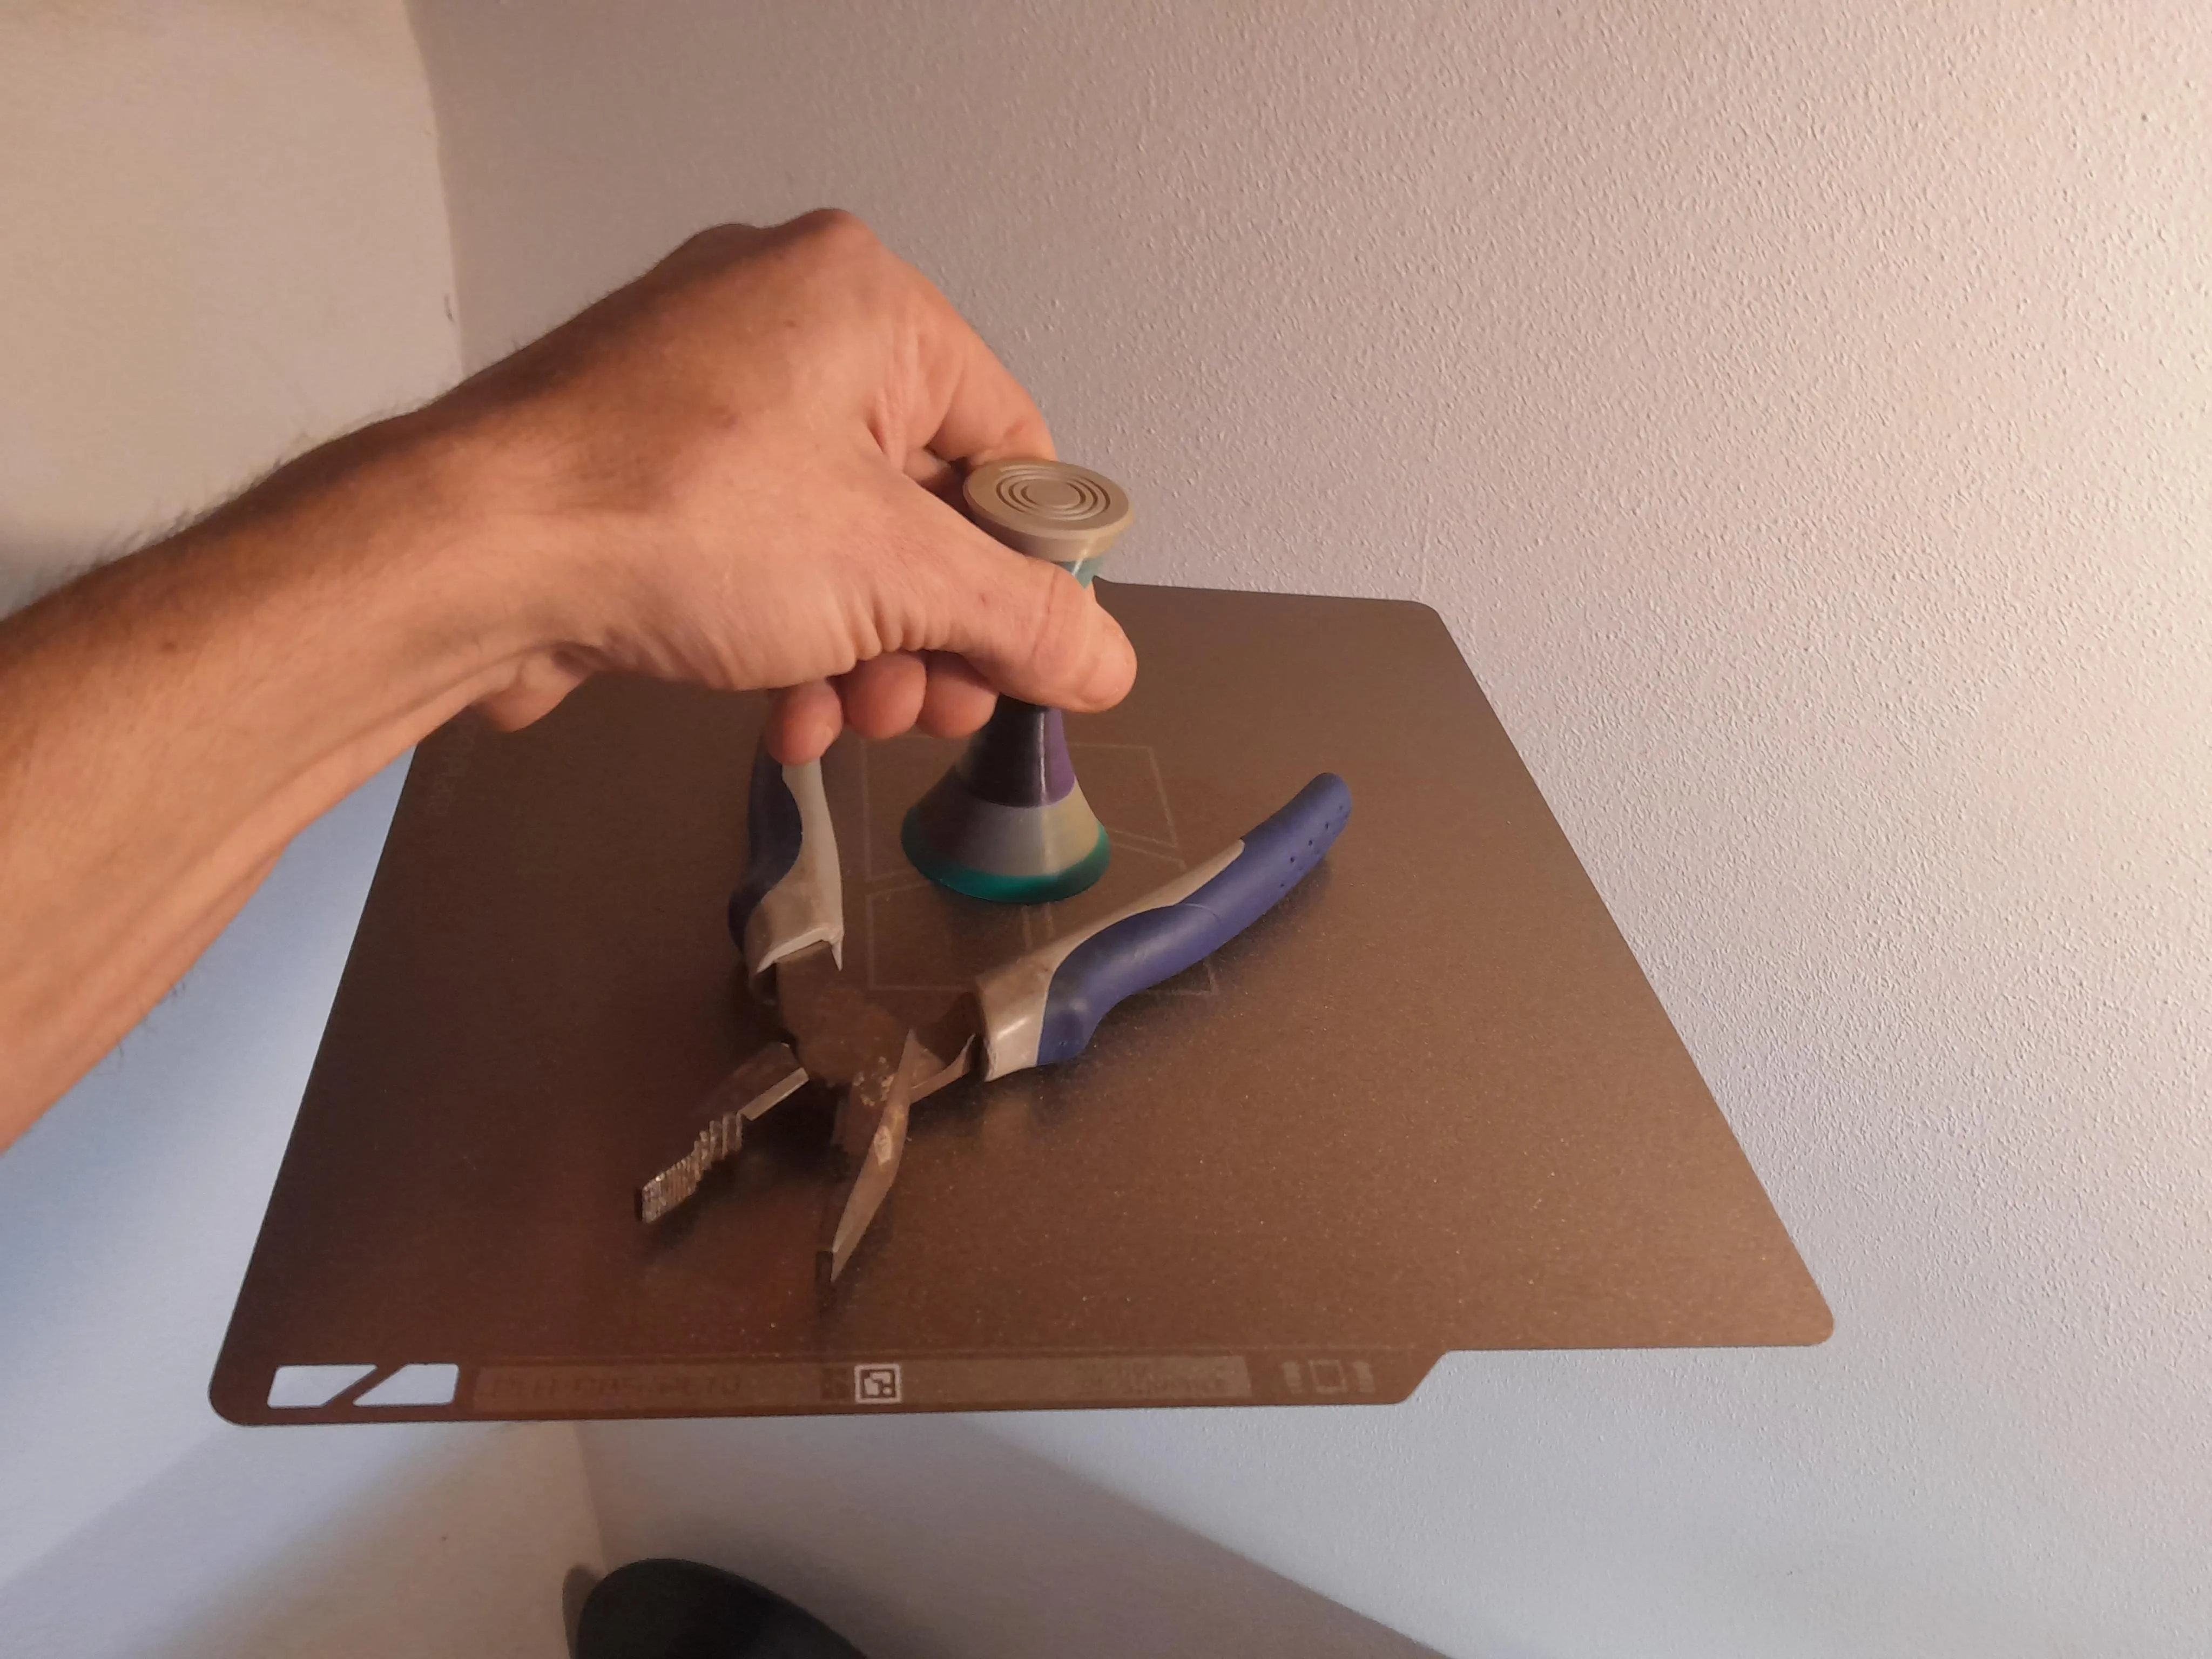
It is a very simple tool but is very helpful in winding up home printed filament. You place it in the middle of your buildplate with the printed filament still on there. It gets strongly attracted to the plate (enough to lift up the whole plate with it) and stays in place there. Like this it acts as a guide for the filament to slide over and prevents it from changing direction and flipping over. This should prevent any attempt of the filament from trying to get tangled.
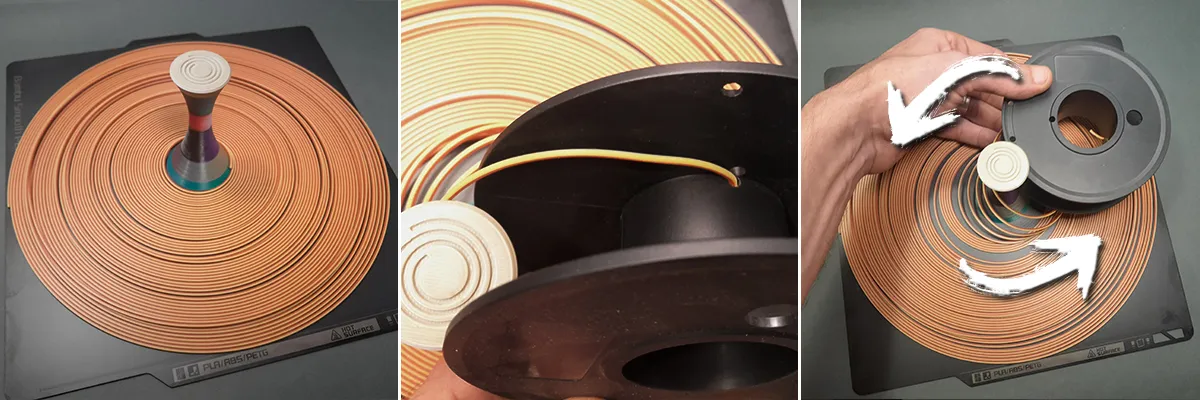
Grab the inside end of the printed filament and push it through this small hole on the inside of the spool and slightly bend it over.
Start winding it up by turning the spool slightly - but mostly - spinning the spool around the helper at first.
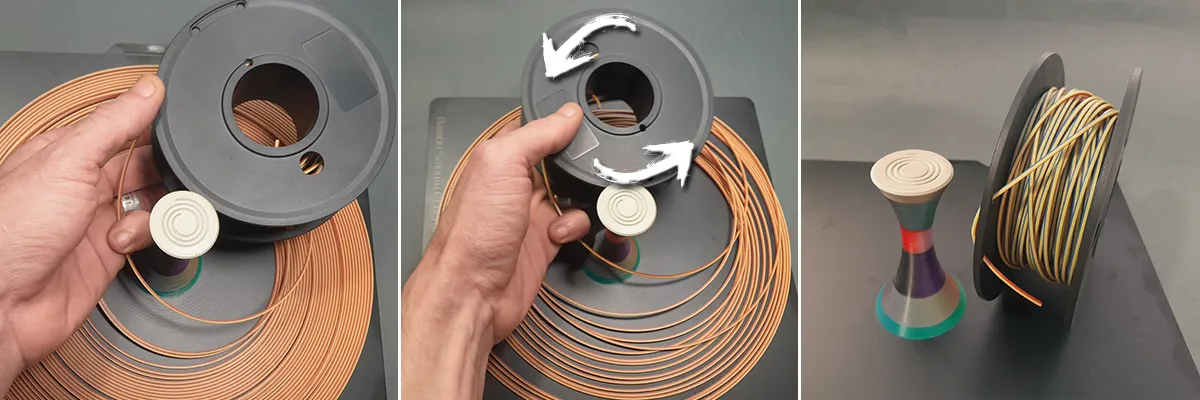
Keep the filament wound up on the spool under tension as good as you can to have it compact. You will find that later in the spooling process you will mostly turn the spool and only have to spin it around every few turns, as the ratio in diameter of the filament changes compared to the spool. When you are done, fix the end of the filament to the spool or use a clip.
I hope you find this tool useful and it helps in winding up your printed filament.

If you want to print your own Multi-Color filament or mix your own colors at home, have a look at this model:
License

You shall not share, sub-license, sell, rent, host, transfer, or distribute in any way the digital or 3D printed versions of this object, nor any other derivative work of this object in its digital or physical format (including - but not limited to - remixes of this object, and hosting on other digital platforms). The objects may not be used without permission in any way whatsoever in which you charge money, or collect fees.


Comment & Rating (20)