
Hey, everyone! I hope you’re all doing well, because I’m not! I’m feeling rather under the weather, so in an effort to make myself feel the littlest bit better, I’ve decided to do some mental spring cleaning and vomit out some of the thoughts that have been bouncing around my head recently.
Today’s topic: MakerChips!
At the turn of the month, I was extremely blessed to be able to attend the Japan RepRap Festival. Despite being an avid printer for the last 8-ish years, the stars had never aligned, so this would be my first ever in-person 3D printing event. As such, I wanted to experience it to the fullest–I volunteered to be a translator, and scoured the official site to learn as much as I could about the event. It was in my perusing that I stumbled across a page dedicated to something called MakerChips. Curious, I read on…
Where Did They Come From?
When I started my 3D printing journey, I remembered watching a lot of videos to prepare myself for buying my first machine. 3D Printing Nerd, Maker’s Muse, Thomas Sanladerer… all great sources for information on how to get into designing and printing your own models. However, I distinctly remember one short 4-minute video from Maker’s Muse talking about Maker Coins. Basically, the idea was that you could design your own little small coin to practice/show off your modeling skills, test out filament samples, and do a little advertising by handing them out at events. Some people were calling them “business cards for makers,” but honestly, given how no contact information was typically displayed on them, I think “calling card” was a better descriptor.
A much closer equivalent for the “business card for makers” would come about some time later, when a maker by the name of K2_Kevin would come up with the idea of a standardized Maker Coin called–you guessed it!--MakerChips. While I’m certainly no expert on the history of MakerChips (to be honest, there doesn’t seem to be a lot of concrete “official” information by the man himself out there), the idea of the MakerChip is to serve as “a customizable token designed for 3D printing enthusiasts. It serves as a creative outlet for personalization and a practical tool for advertising and showcasing your 3D printing capabilities,” if I may be so bold as to lift directly from the description of its MakerWorld template.
Essentially, the more concrete gist I got was that while Maker Coins are indeed really cool, once you start heading to a few events, you now just have a bucket of plastic geegaws of various sizes and shapes kicking around your house, which you keep because you don’t want to be rude but then inevitably throw away because God dangit you’re a 3D printer and you’ve got enough junk as it is. In order to solve this, K2_Kevin made a pretty simple suggestion: why not standardize Maker Coins’ dimensions, say, to 40 millimeters in diameter, and 3~3.5 millimeters in thickness; about the size of a poker chip? That way, while makers may not have the same amount of space to be creative with their own designs, people can have a much better time organizing them and displaying them. And why not encourage people to put a QR code on the back, to let people link to their stuff? Thus, the MakerChip was born.
So What Do I Think?
Honestly, I really like this idea. While I’m not a fan of it being based off of a gambling token, and it’s certainly a shame that people don’t have as much space to be creative as they do with Coins, I actually really like the principles behind MakerChips. I think the strict limit on size actually can encourage people to think more outside the box with how much they can cram within such a small space, so it results in some genuinely impressive designs. Also, the standardization really scratches that “collector” part of my brain, and is probably why they’ve taken off so much in Japan.
It also allows for a lot of creativity in terms of accessories surrounding the MakerChips. Carrying cases, display pins, little gacha-esque machines that facilitate trades by accepting someone else’s chip and spitting out yours… The sky’s the limit! They even held an accessory contest for JRRF, so if you wanna see the cases I made for them, you can check them out here, among other things.
HOWEVER, with all that being said, do you remember how I said that Maker Coins would just kind of sit in a bucket until you inevitably throw them away? Well, MakerChips are different! They sit in a neat little case until you inevitably throw them away.
Oh, and to shoehorn something else right here–remember when I rhetorically asked “why not put qr codes on the back?”
Well, fraud’s why. Just sayin’ it’s not a great idea to scan QR codes from strangers.
Anyway, here’s the deal:
While they’re generally thought of as business cards for makers, in my experience at JRRF, there was a sort of collector’s mania about them–you would see people with signs requesting to trade, you’d swap Chips, and keep walking.
In Japan, with traditional paper business cards, there’s a very particular culture around how you exchange them. You swap them, take a good look, put them away in your carrying case, and continue talking. There’s intention there, because if you are receiving a business card, chances are you’re doing so because there’s a real chance you would want to contact the person you’re receiving it from again in the future.
With MakerChips, it seems that more often than not, you just pick them up in droves at events, so they really aren’t all that effective at being a business card. For example, I put my website in QR Code form on the back of my Chip, as is customary. And when I checked Google Analytics in preparation for writing this article, I found that in order to sign up, you apparently need to register your site as a business and it doesn’t start counting traffic for your site from that day forward even if your site literally uses Google Sites. So, uhh… it turns out that I can’t tell how many people visited it during or soon after JRRF. Oops.
I can, however, track the number of people who saw and signed up for the Pumpkin Jam, but despite putting in Japanese on the homepage instructions on how to sign up, a grand total of 0 people did so.
Side note, though, if you’re unaware, the Pumpkin Jam is an online event that challenges you to create and upload a 3D printable model in only 48 hours according to a Theme I send out when the event starts. Good for beginners and veterans alike! You should check it out if you’re at all interested–next one is the weekend of July 11th!
This leads to quite the conundrum. On the one hand, we have this really cool 3D print that allows makers to embody what they’re all about into one little Chip, but on the other hand, we have a whole bunch of inevitable plastic waste. So how can we reckon these two conflicting issues?
Well, it seems relatively simple to me: just make good MakerChips that people will want to hold onto.
How to Make MakerChips Good
Now is the part of the article where I ramble on about what to do and what not to do when making your MakerChip, based off of what I noticed from the dozens upon dozens of chips I received. Let’s see if I actually have a substantive amount of things to say!
Oh, and while it would have been a good idea to show images of what not to do for illustrative purposes, I really don’t want to put some random person on blast, so I will refrain from doing so. Conversely, I want to show off a couple good MakerChips, and will link to the respective creators’ sites so you can check out their stuff.
Hopefully, through these instructions, you’ll come away with ideas to make MakerChips worth handing out.
1~ Stick to the Dimensions.
The first one is very simple: your MakerChip should be 40mm in diameter, and anywhere from 3-3.5mm in thickness. Honestly, for both your and others’ sakes, I’d recommend sticking with 3mm. Thicker just means more plastic to print, and the chance that it won’t work properly with various accessories people make for them goes up. And while you can (and should) do a lot of creative things with your Chip, you absolutely cannot have anything sticking out of it.
Imagine a little container with a cylindrical space in it that’s 40mm in diameter and 3.5mm thick. You should be able to put your MakerChip in that container and close the lid all the way down. If you can’t, then I regret to inform you that the thing you’ve created is not a MakerChip, but a Maker Coin.
While being creative is something that I will harp on in later points, you absolutely should not think outside the box here. Why? Because the standardization is the entire reason MakerChips were created. To quote the original MakerChip model on MakerWorld: “Size Matters! A MakerChip is 40mm dia.. x 3mm to 3.5mm thick.”
That’s Rule #2, right behind “It's called a MakerChip, not a coin.” But unlike Rule #1, though, if you break Rule #2, bad things actually can happen.
For example, if you, say, design a really cool free-rotating propeller into your MakerChip, that’s awesome. But if it’s held in place by a nose cone that sticks out a few millimeters, all of a sudden you’ll no longer fit inside most storage containers, you won’t be able to stack properly, and you’ll jam up most dispensers.
If I can’t put it in the case I made specifically for MakerChips, chances are it’s probably not making it home with me. And if I don’t have it, I’ll never be able to use it to navigate back to your webpage/socials/whatever.
That being said, if you want to cut away material from the Chip, you may do so, although I will caution against removing material from the borders to the point that it’s no longer round–it might not be compatible with certain accessories if so. And if you really, really want to have something sticking out past the boundary, there is a way to do so; it takes extra ingenuity, but you can design moving parts that can move outside the limits, as long as they can move back into the typical Chip shape. If they have no way of sticking back together, and just freely fall apart… yeah, that’s not good either.
2~ Whose Chip is This?
While this isn’t the most fun thing to think about, if you don’t properly display your information, the whole “business card” aspect of the Chip kinda falls through. There are two ways people tend to link their related stuff to their Chip–either by putting a QR code on the back (the more popular option), or putting an NFC tag inside (do people just have NFC scanners kicking around that they can use?)
If you go the QR code route, try and make sure that whatever URL you use to link the code to is as short as possible. The longer it is, the more little squares they gotta use to contain the info, which means that it’ll be increasingly hard for both your printer to print them, and for other people to scan them. If you really want to get fancy, you can have a short domain name that redirects to your site to make it really easy for folks to scan your code. Just make sure that whatever QR code generator you use actually makes the QR code to your site of choice; some QR code generators will first link you to their site, but then immediately redirect you to the site you entered. They do this to eventually cut off access until you pay to have it reinstated, so double-check that your QR code is good by scanning it and confirming that the associated link that shows up with it is, indeed, where you want it to go.
Also, make sure it’s obviously visible. I saw a really cool concept of someone that printed the QR code in black and the background in filament that, when heated up in your hand, turned white and revealed the code. While this is very creative, is it worth people having to grip your coin for 30 seconds before they can see your code? I’d argue it is not.
Oh, and I recommend that if at all possible, you have your own site domain to link to over a social media profile; you never know when the social media you like to use will change, go down, or get taken over by a Nazi. Hypothetically speaking.
Ideally, you also want your name somewhere on the Chip. In my experience, people like to put their logo on one side, their QR code on the back, and call it a day. The issue with this, however, is that it’s really easy for recipients of your Chip to forget who the heck you are just based on your logo. Also, if someone is genuinely interested in checking out more about you but (understandably) doesn’t want to scan a code given to them by a stranger, they can’t search you up if you don’t put your name on it somewhere.
But of course, that’s assuming that they do find you or your MakerChip interesting, which is a challenge in and of itself. So…
3~ What Makes a Good MakerChip?
Hopefully you do!
Now that we’re done with the nitty-gritty of marketing and the like, we can finally talk about the fun part: the actual design!
My absolute favorite part about MakerChips is the information they hold about the creator. Not the QR code or the logo; no, the best MakerChips are ones that tell you what kind of creator they were made by. It’s not 1-to-1, obviously, but I tend to notice that the more interesting stuff the creator is doing, the more interesting their MakerChip tends to be.
Regrettably, the two MakerChips I thought were the most interesting I was only able to see in the big Wall of MakerChips they had near the entrance, so I was unable to actually take them home or scan them. However, it seems one of them was a time traveler and took this article’s advice when they made theirs, because they put their name on the front.
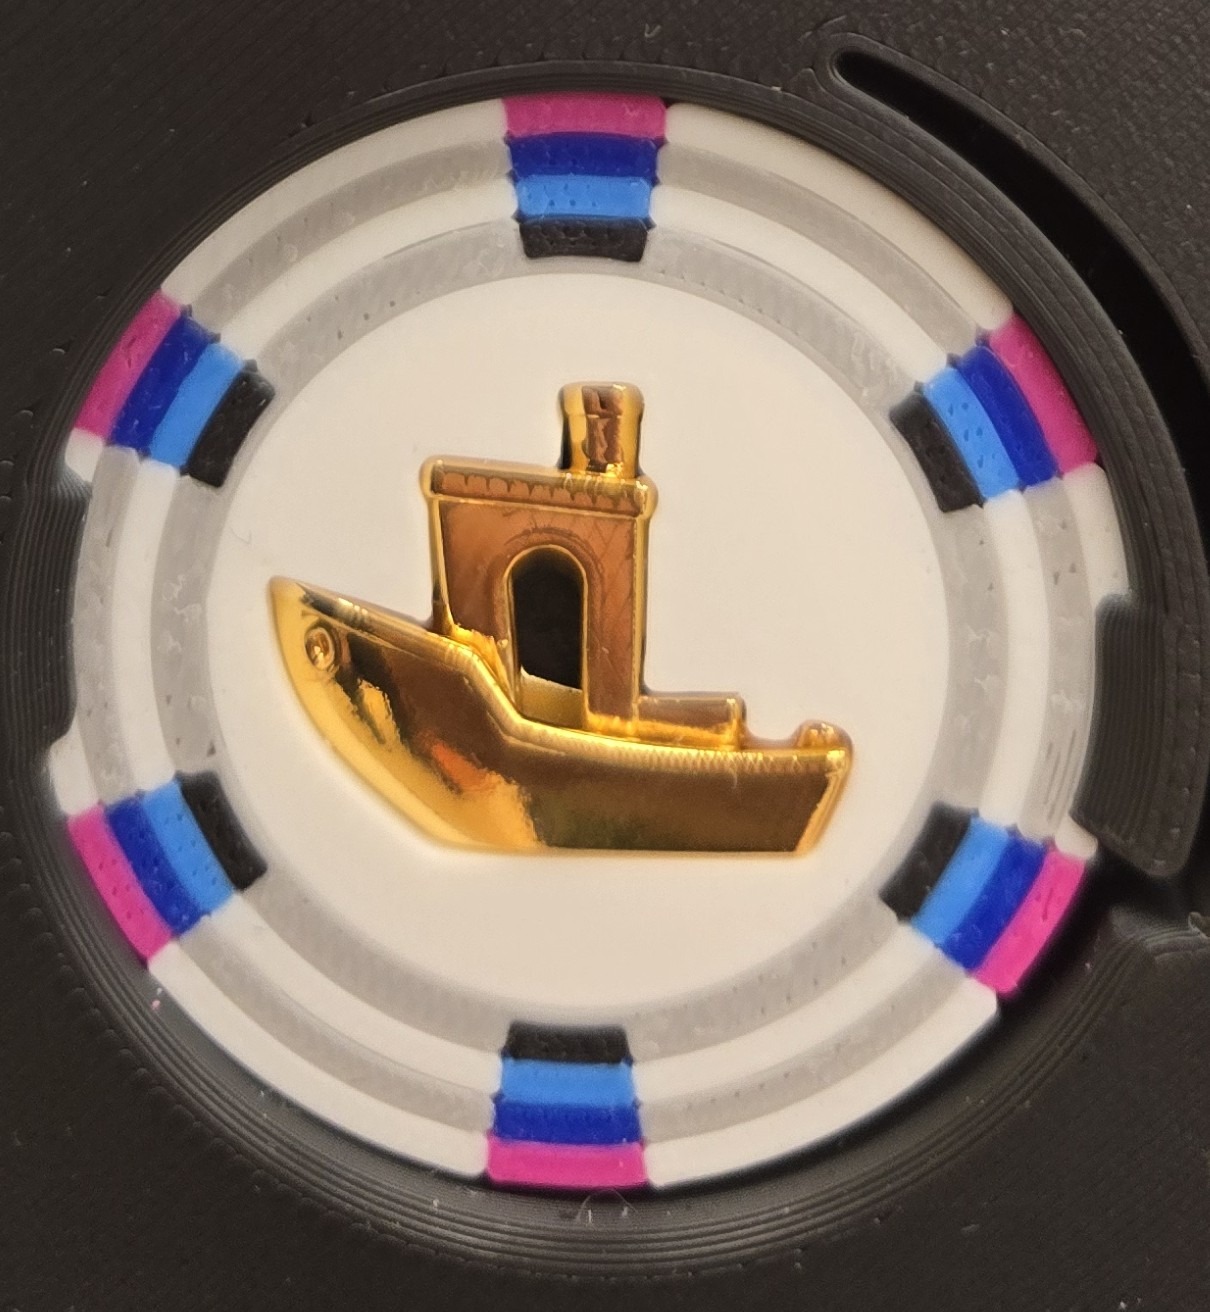
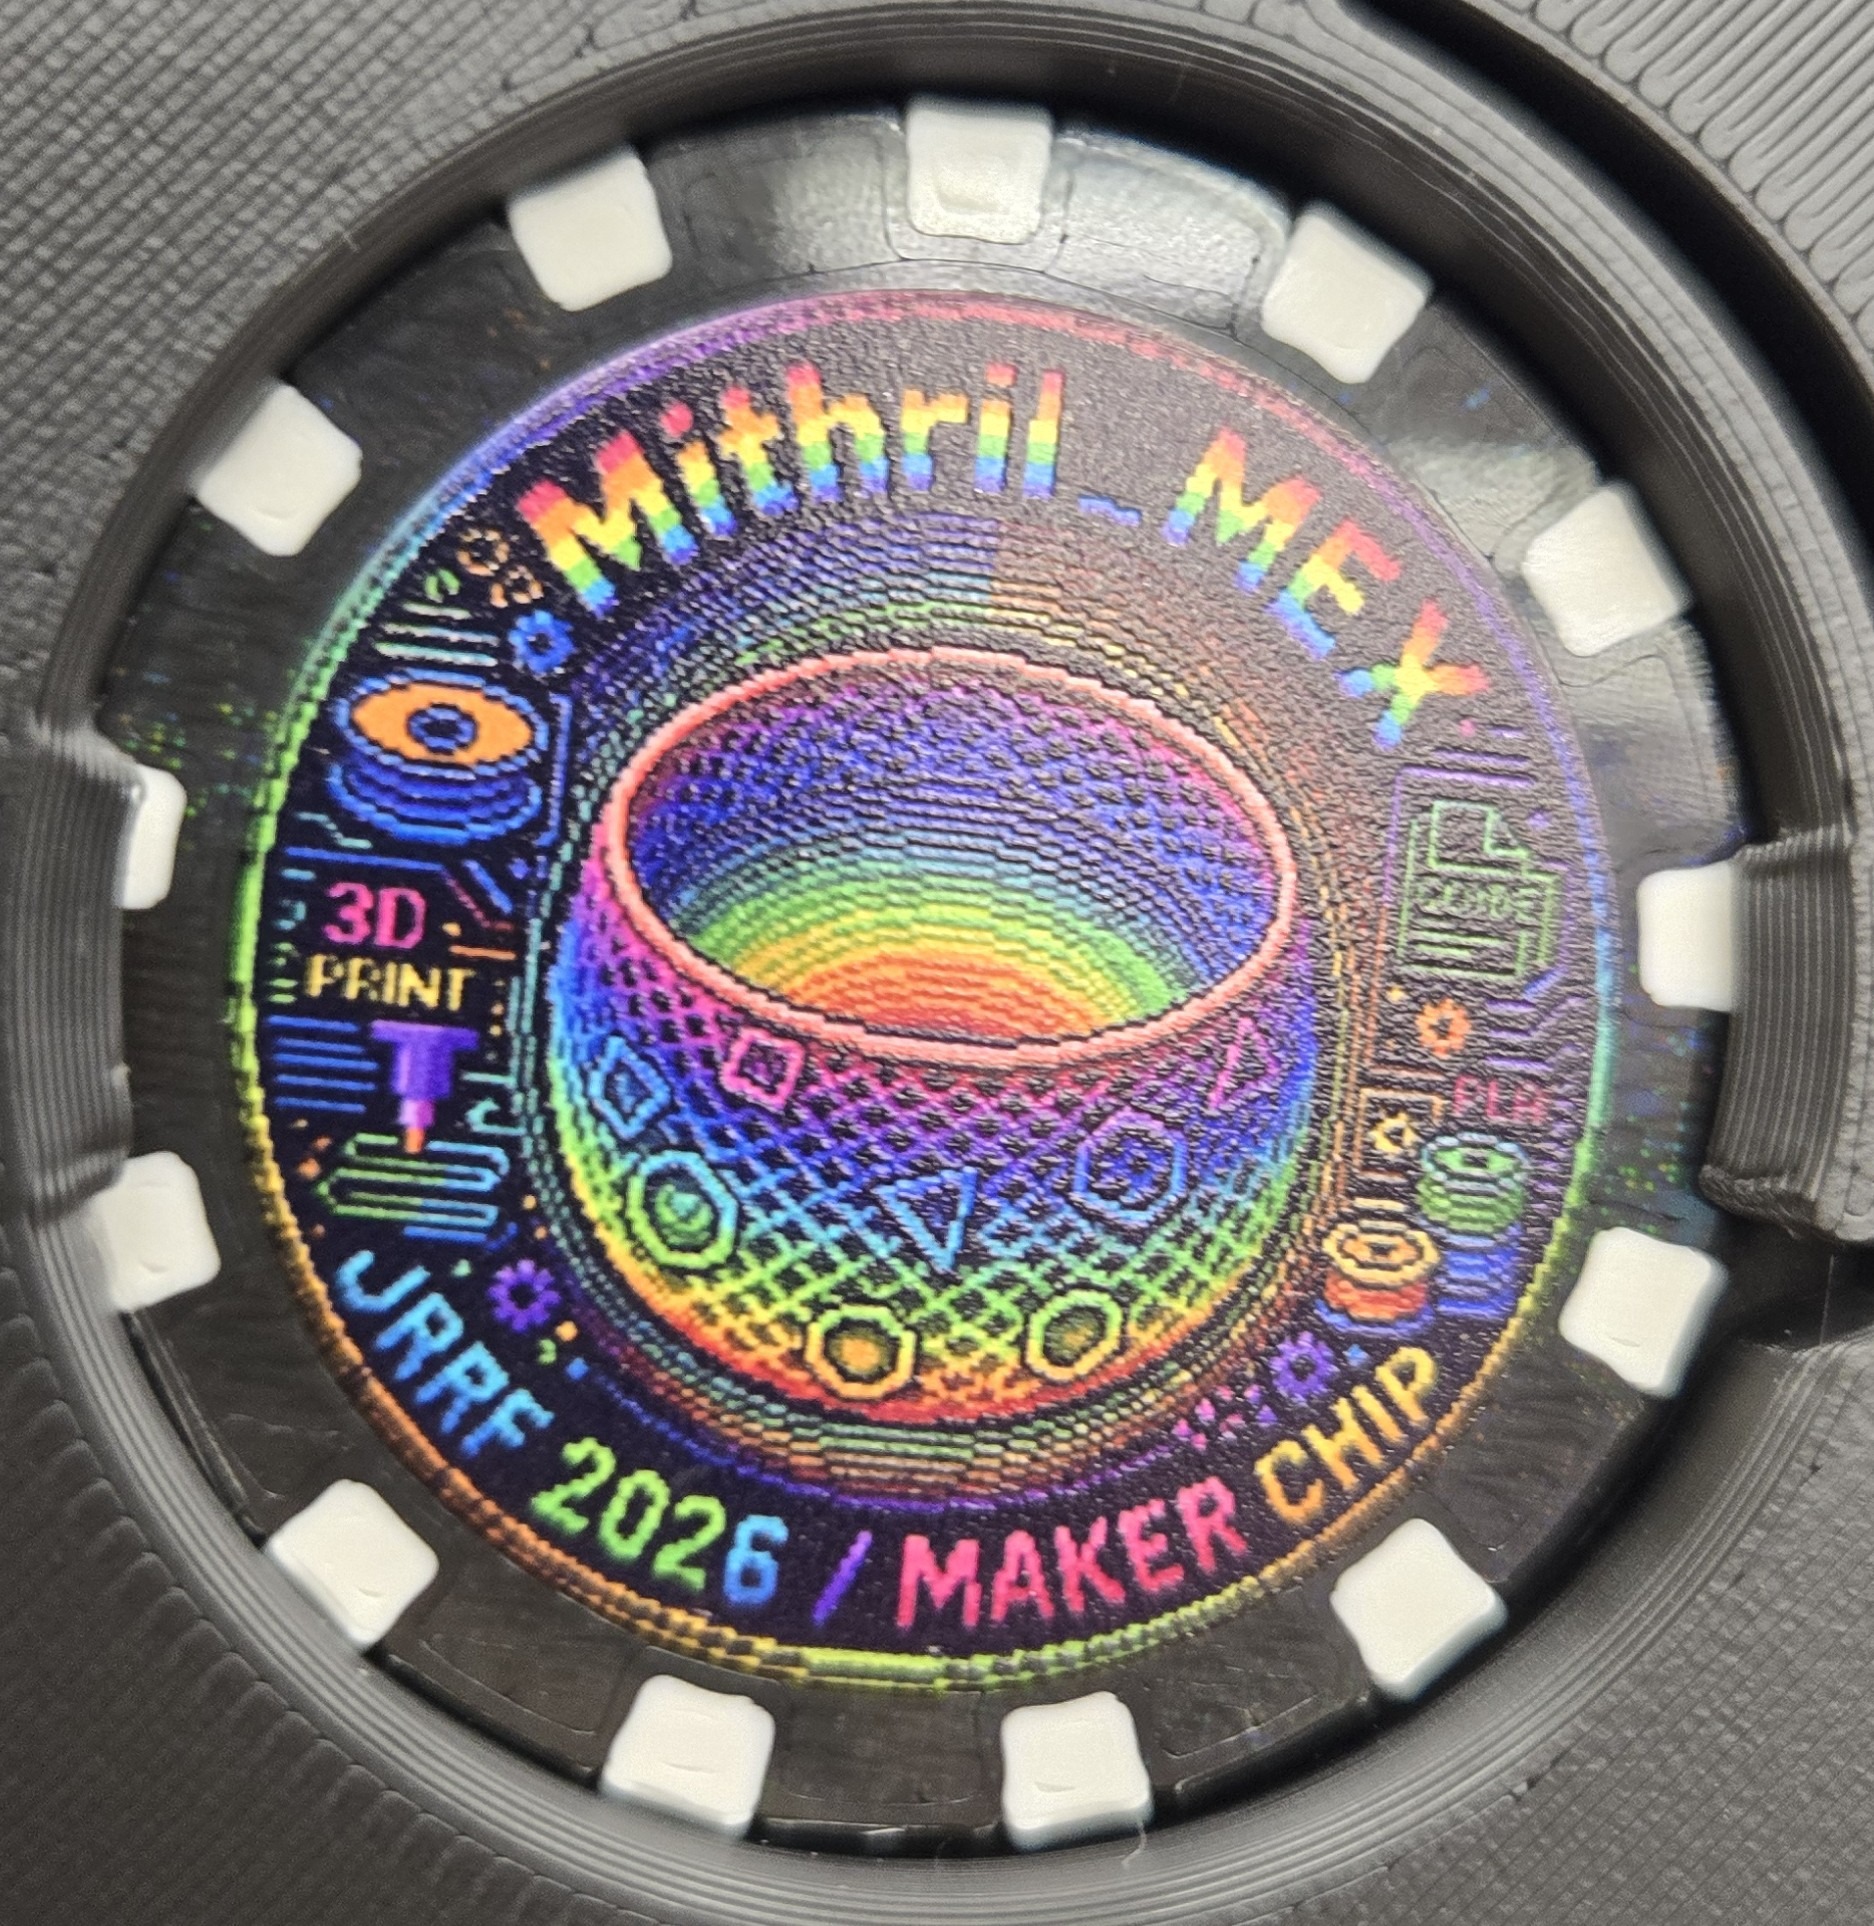
The first I believe contains a genuine electroplated 3D print, made by Hen3drik, a creator whose videos I’ve often seen in my YouTube recommended. The second one belongs to the creator who presumably owns this twitter account. I’d love to check it out and see how the heck they managed to get such insane detail in so many colors on their Chip, but I nuked my account into oblivion long ago. It looks kind of like it might be a sticker, but I don’t know, so I want to find out more!
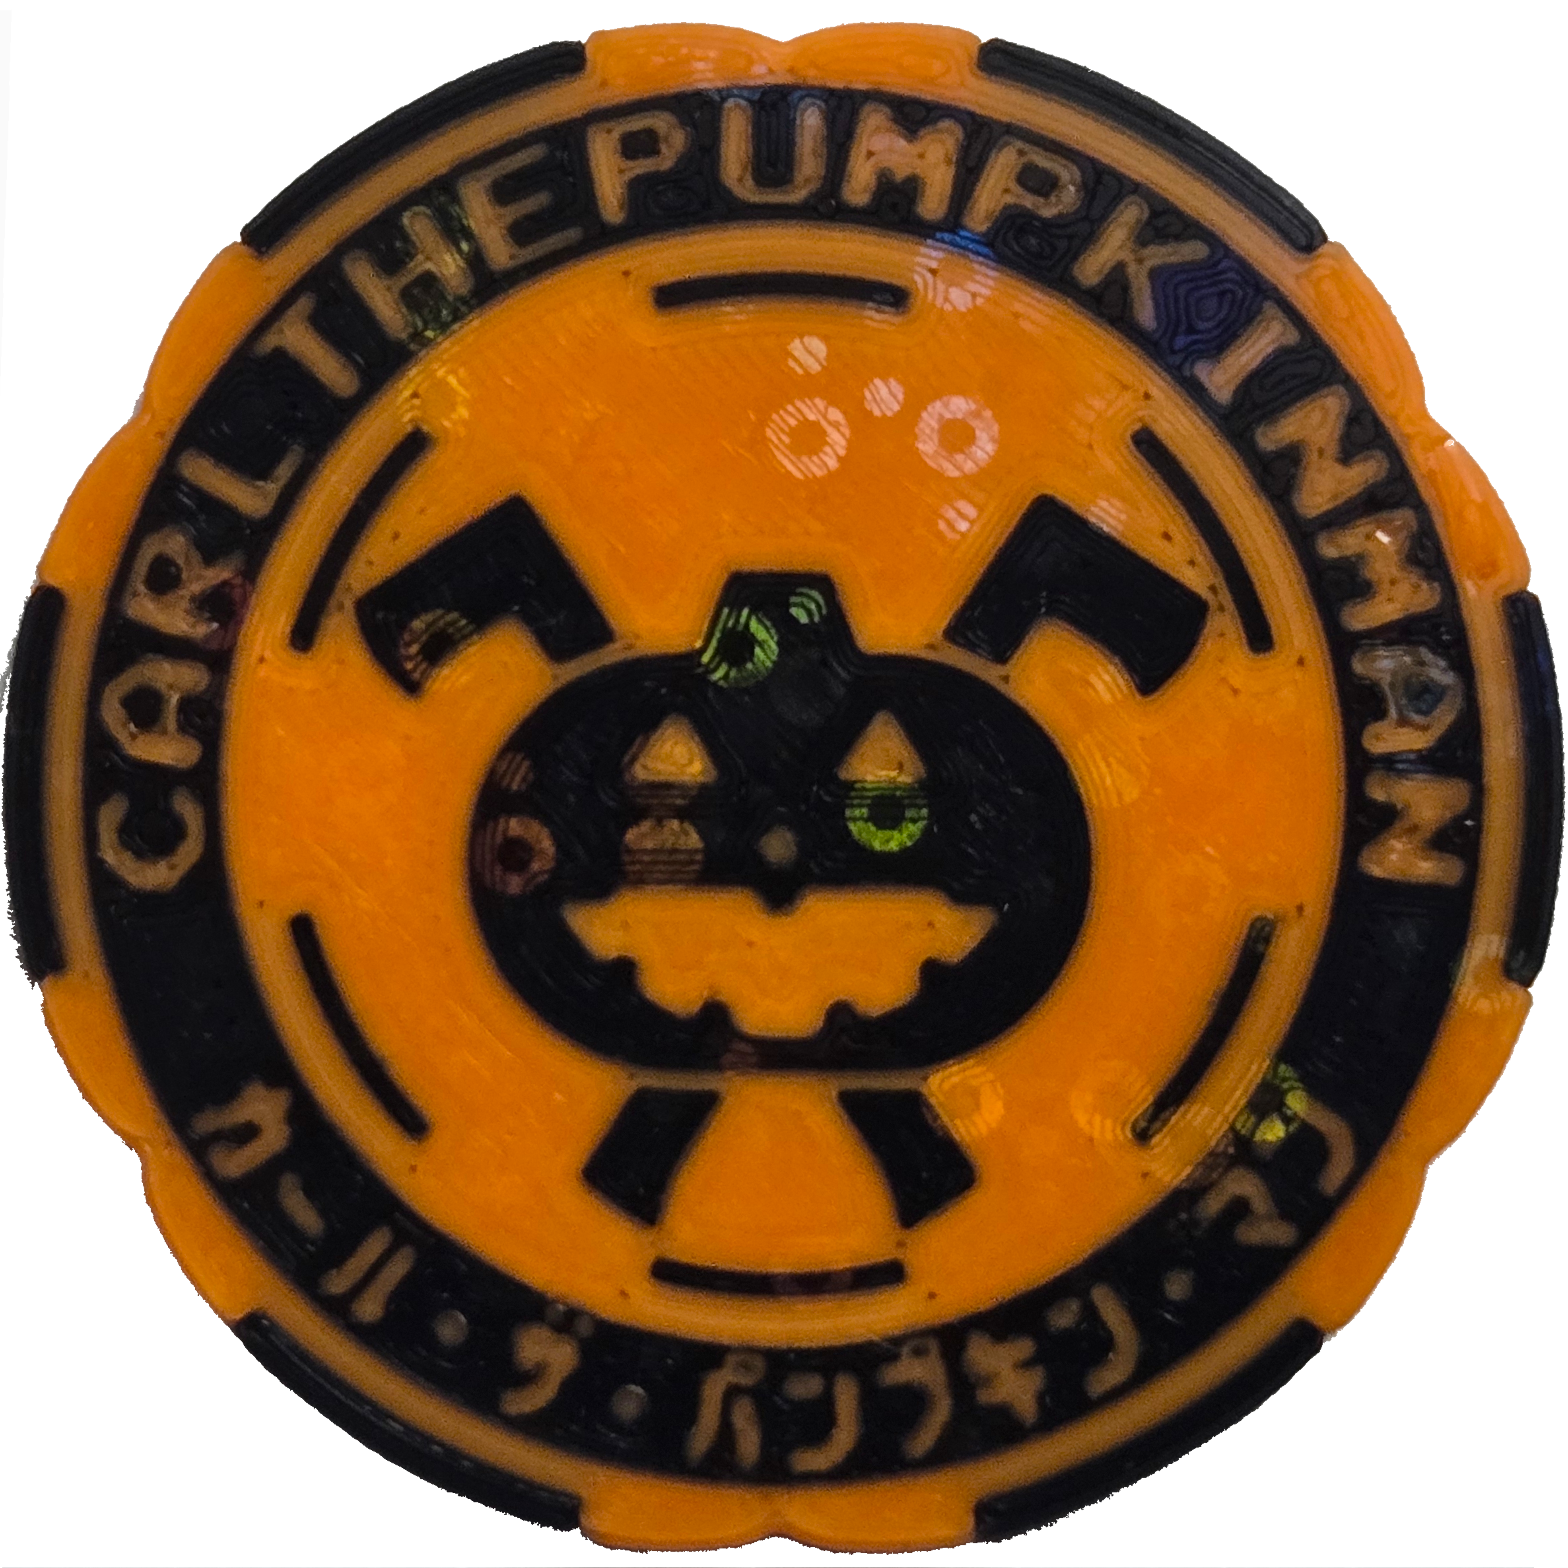
And in my case, while it’s a bit difficult to see at a static angle (and honestly, in this lighting), it has circular sparkles to it. That in and of itself was eye-catching to quite a few people, but if you’ve ever printed on an effect plate before, you know that it’s pretty tough to get a lot of detail since any adhesive added to the smooth PEI plate will most likely ruin the effect.
I, however, have tons of experience with making detailed sparkly Pokemon coins, so for me, all I needed to do was put my design in my pre-existing print profile, and I got Chips like this at this level of detail with a less than 1% fail rate.
To get to the point, if you want your MakerChip to make other people want to learn more about you, you need to make it in such a way that it makes people want to learn more about it. Accordingly, if you as a maker specialize in something, integrate that skill into your MakerChip.
Are you a 2D artist? Put an intricate design on your Chip. Do you make multi-part assemblies? Make your Chip into a mini Transformer. Do you often work with unusual materials? Print your Chip with one of those. Do you have a non-3D printing medium you use? Incorporate that into your design.
A MakerChip is supposed to be a symbolic representation of who you are as a maker, but that doesn’t mean it should just have your symbol printed on it! You have roughly 4 cubic centimeters of space to do pretty much whatever you want. It may not seem like a lot, but you’d be surprised what you can actually get away with.
And if you don’t have anything super remarkable about your creative process yet, that’s ok! I just want to give a friendly reminder that despite all the cutthroat talk in this article about standing out, marketing your stuff, and good branding, at the end of the day, making is all about having fun and being creative. If you just want a simple Chip to show your friends and family, then don’t worry about trying to pour hours and hours into the most revolutionary disc that the world has ever seen. Despite what I’ve been saying, it’s perfectly fine to slap your logo on the front, QR code on the back, and call it a day. But if your goal is to stand out and get eyes on your projects and spread your Chip to the masses, then it’ll probably take a bit (lot) more creative juice than that.
Final Thoughts
All in all, I wrote this article because I really like the concept of MakerChips–a physical manifestation of your creative power as a maker condensed down into a little tiny disc small enough to fit in your wallet, with an entire ecosystem of creators making their own creative designs in order to help you store, distribute, and display them? Sign me up!
But in practice, given how it seems to have been stressed more as a collector’s item than anything, the general vibe around them (at least at JRRF) was that MakerChips were something you just tried to amass as many of as you can, and to that end everyone had to have one in order to fit in. I had multiple people go so far as to apologize to me because their Chip wasn’t up to their standards, because they felt like they had to rush to make one for the event. The emphasis was less on showing off your creativity in a fun way that helps you keep in touch with cool people you met at events, and more about just filling your coffers with as many coins as possible.
So if you think you want to participate in the MakerChip movement, go ahead!
But please, don’t feel pressured into just making one so you have something to exchange with people you meet at events, and don’t feel pressured into accepting one from every single person you meet that has one.
Going forward, I’m unsure as to how I’ll approach distributing and receiving MakerChips in the future. I’ll probably still bring them for those who want them, and still accept them from those who are distributing them, but I’m sad to say that even then I’ll be doing that knowing full well that I’ll be picking a few I like to actually use and putting the rest away for eternity in the back of my closet.
But until then, if you’ll excuse me, I’m going to go design a MakerChip that no one will want to throw away.
