I was honestly surprised by how much attention the previous post about this rechargeable budgie shower received, and I really appreciate all the feedback. So I decided to write a more detailed technical recap about the path from the initial idea to a usable version.
This post is a bit longer, with an estimated reading time of about 5 to 7 minutes. I will mainly cover four topics: why the pump design changed several times, why magnetic coupling and quick-release parts matter, how the ring shower head was optimized for support-free printing, and the final noise reduction, runtime, and real cage testing.
At first glance this project looks like a small pet bird accessory, but once I started building it, the real challenges became very engineering-focused: the pump had to be strong enough, the structure had to be easy to clean, the shower head had to print reliably, and the sound could not be too scary for the birds.
1. The pump was the core challenge
My first prototype used a small centrifugal pump with a 22 mm impeller.
The result was far from the head height I needed. At 3.7 V, a 400 rpm N20 gear motor could only lift the water by around 1 cm, which was clearly far too slow for this centrifugal pump. A 030 motor performed better, around 6 to 7 cm, but it was still not enough.
After that, I tried several directions: improving the centrifugal pump body, increasing the impeller size, using a planetary gear set to increase impeller speed, and testing a peristaltic pump. The peristaltic pump sounded promising because it can move liquid steadily and depends more on torque than high speed. In practice, however, the kit motor did not have enough torque to squeeze the silicone tube when directly driven. Even adding extra gear reduction to increase torque did not work well enough.
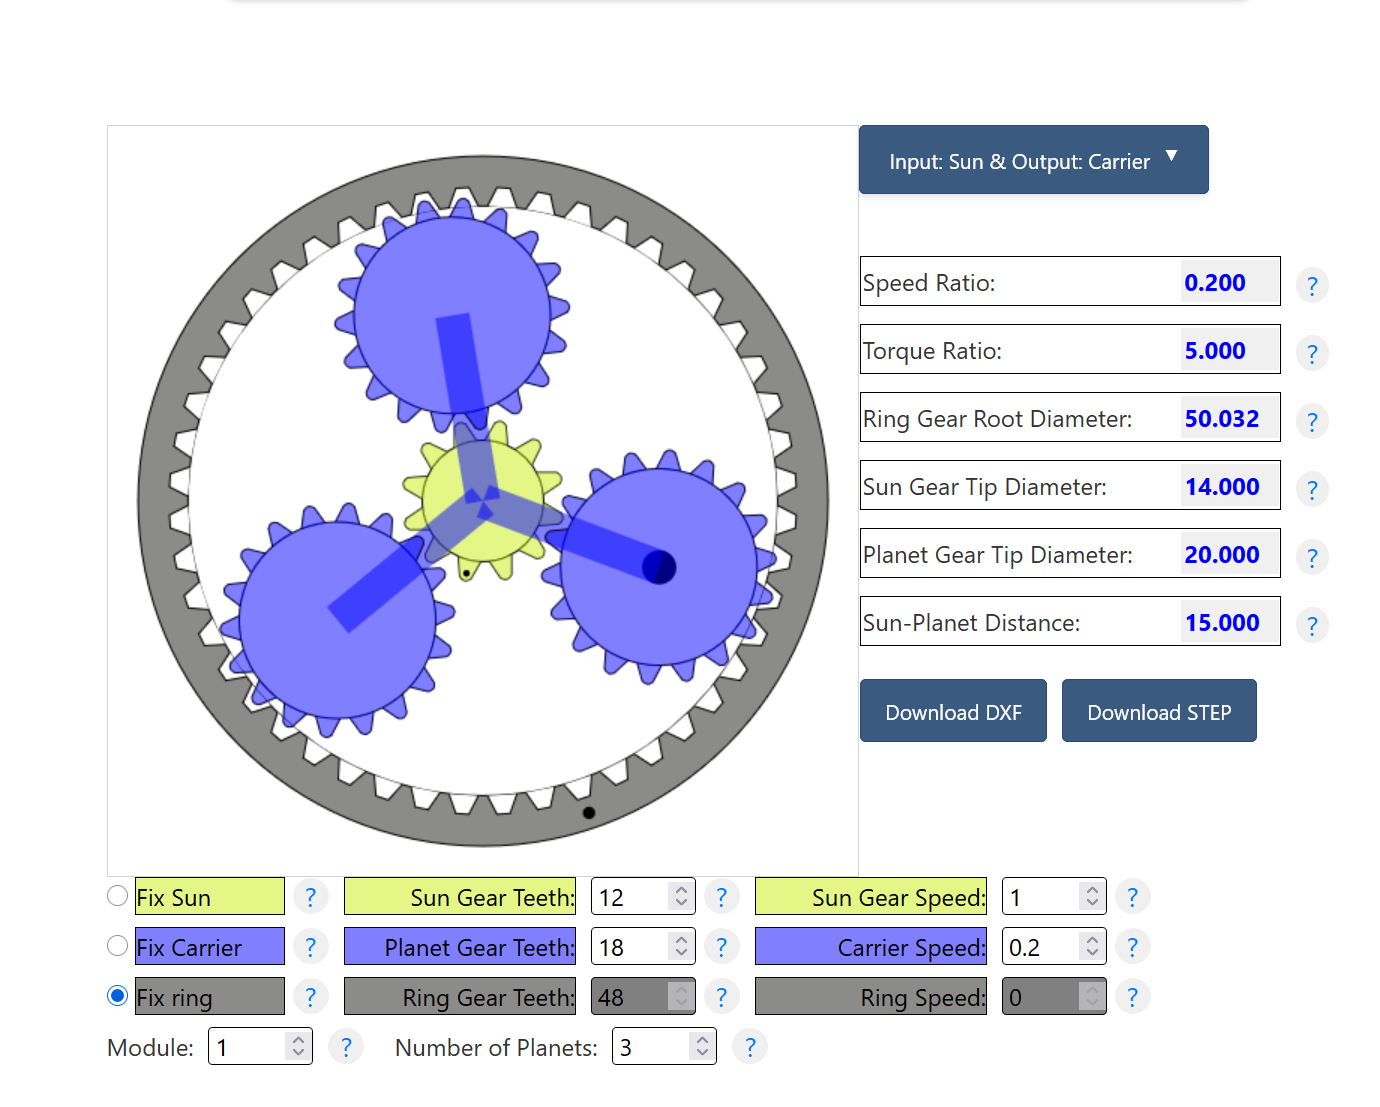
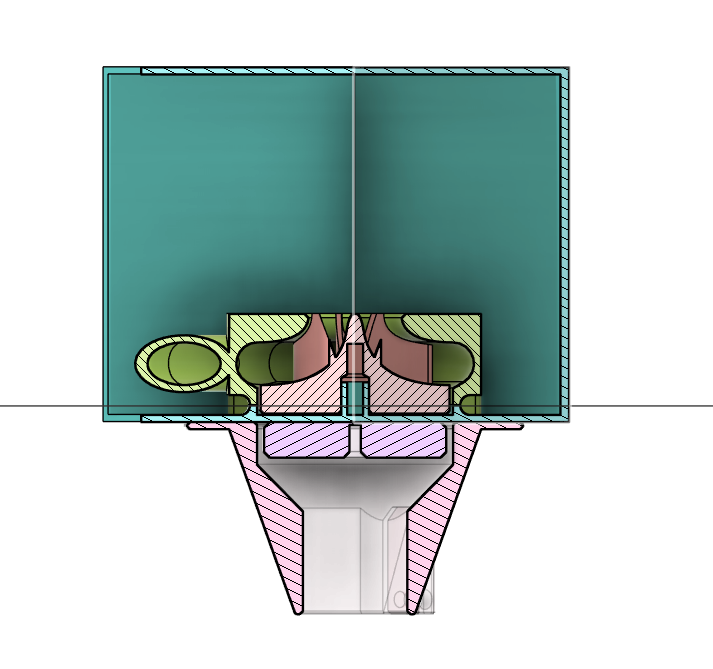
Eventually, I returned to the mechanically simpler centrifugal pump and redesigned the pump body. The key changes included the planetary gear set, a better volute shape, a slightly larger impeller, and an integrated printed water path. The integrated water path removed one connection point, reducing the chance of pressure loss and leakage while also making the structure cleaner.
2. Magnetic coupling and quick-release parts are for maintenance
One of my favorite parts of the final design is the magnetic coupling. The motor module stays outside the water tank, while the impeller inside the tank is driven through the wall by magnets. This keeps the water and electronics better separated, and it also makes the power module much easier to remove.
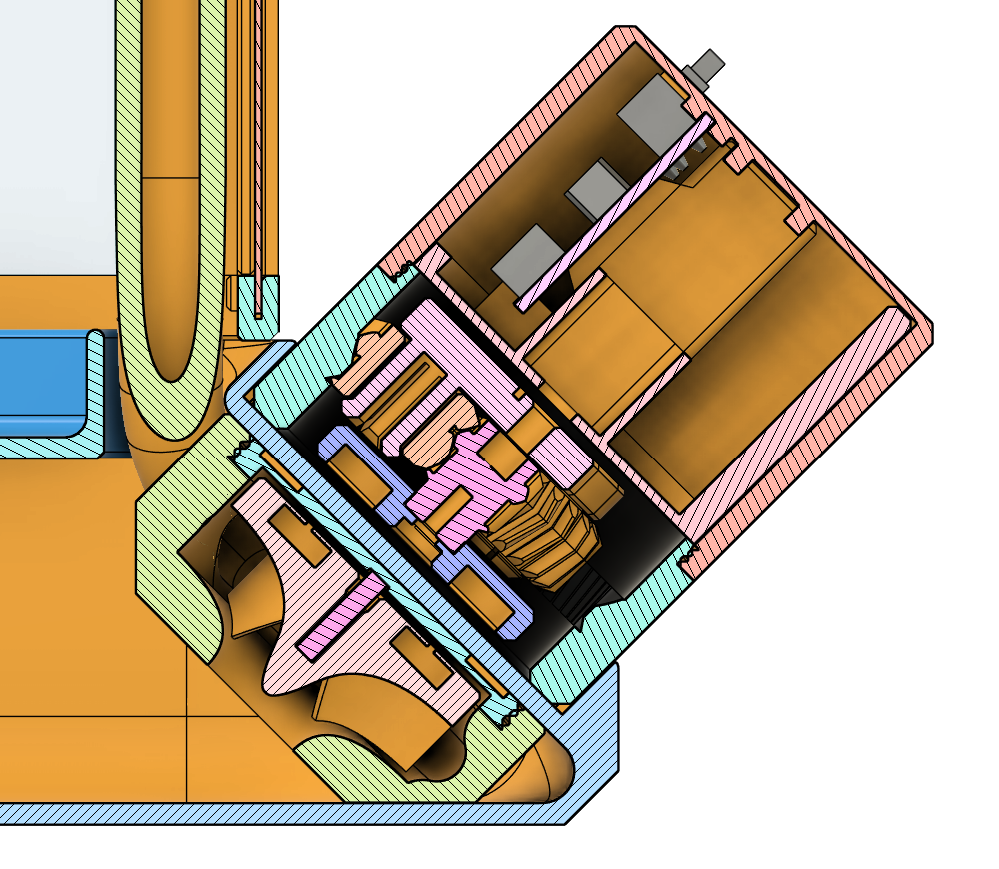
The power module, water tank, and printed filter are all designed as quick-release parts. The filter became especially important during testing: after about 90 minutes of continuous running, one shower hole stopped flowing. At first I was not sure whether the battery voltage had dropped or the pump performance had weakened. After checking, it turned out to be a small piece of debris blocking the hole. Once removed, the water flow recovered.
Magnetic coupling also introduced a small but important detail: the distance between the magnets matters a lot. I found that magnets from different sources can have noticeably different strength. Stronger magnets may need a larger gap to avoid extra friction between the impeller and the base, otherwise the pump efficiency drops.
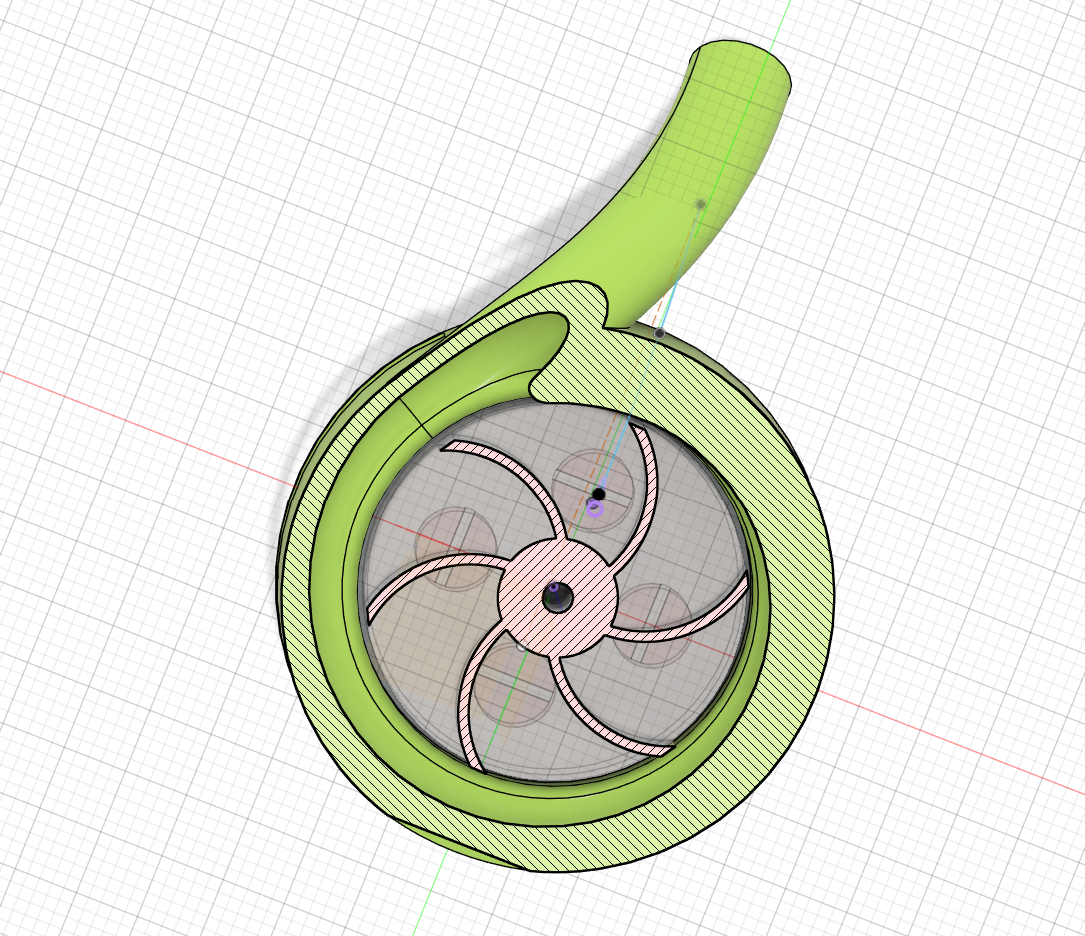
3. The ring shower head was optimized for support-free printing
Besides the pump itself, the shower head also needed several design adjustments specifically for 3D printing. The ring shower head has internal overhangs. If modeled directly, the wall paths near the small holes can become completely unsupported, and the overhang length around the larger ring is uneven, which can cause poor local top-surface quality.
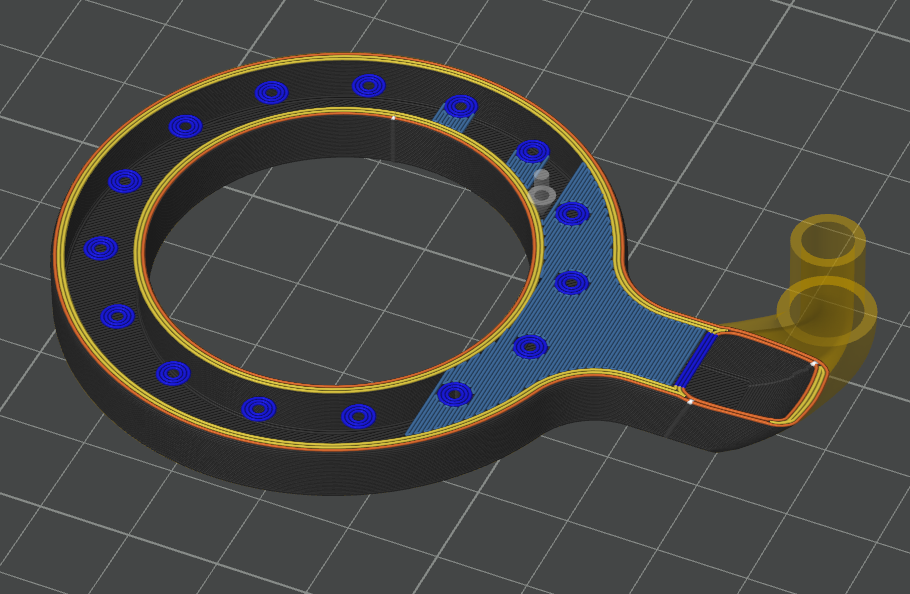
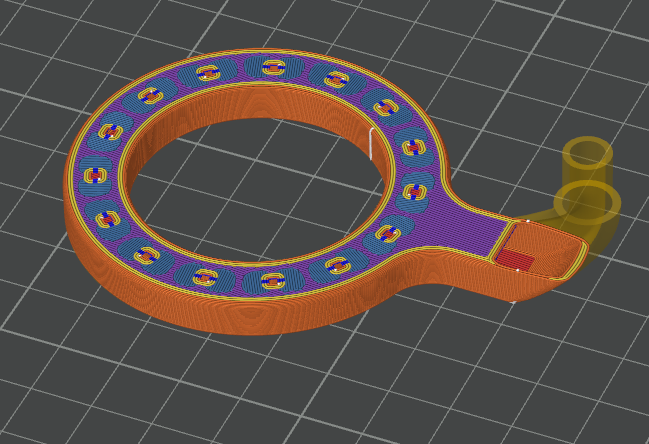
So I did not design it only from the visible geometry. Instead, I checked the slicing paths and adjusted the model around them: large unsupported areas were converted into shorter, more controllable bridges, so the toolpath could span them more reliably. This allows the ring shower head to print very well without supports, with much simpler post-processing.
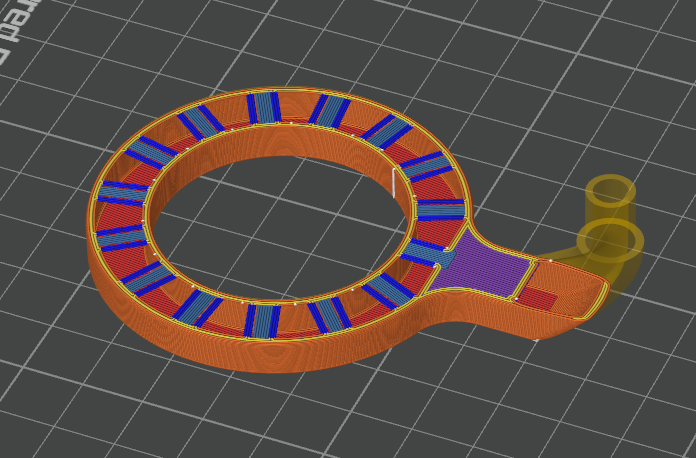
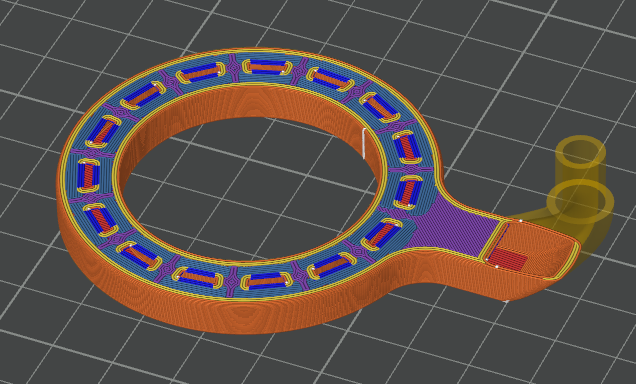
This idea is also something I learned from the community. For some suspended-hole structures, changing the surrounding geometry can turn a completely unsupported toolpath into a short bridge that the printer can handle. This ring shower head is a further application of that technique, because the issue is not just an exposed circular hole. The overhangs are inside the water path and shower chamber.
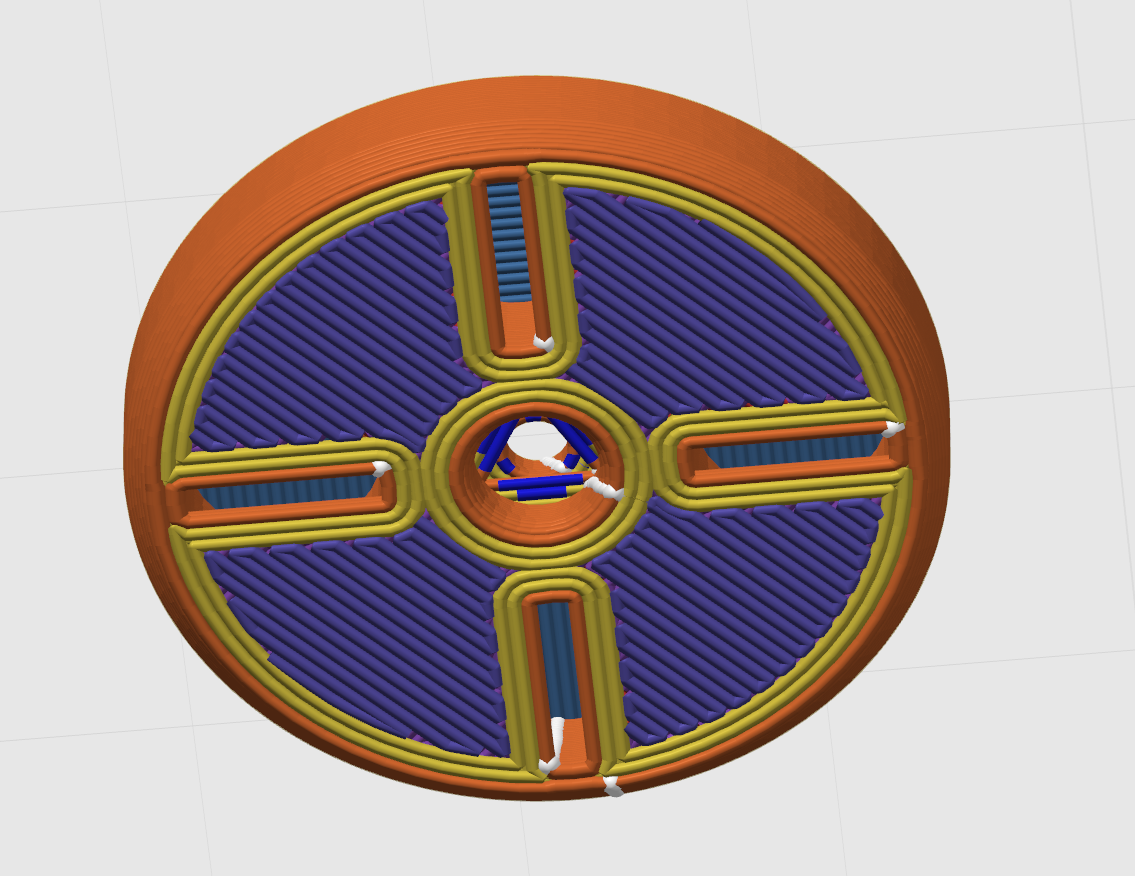
This detail may not be very obvious, but it matters a lot for print reproducibility. Because these overhangs are inside the ring shower head, enabling supports cannot really fix the problem, and post-processing would be almost impossible to clean properly. This part had to be designed for support-free printing from the modeling stage, instead of leaving the issue to slicing or cleanup.
4. Noise and runtime decide whether birds can actually use it
After the pump finally worked reliably, the next question was whether it would be comfortable enough for the birds.
In the first full test, the water output was already good, but the noise was still a bit too loud. I tested TPU parts to see whether softer material could absorb some vibration. The best result came from printing only the gear ring in TPU. The noise dropped noticeably, close to or even slightly below the sound of water dripping into the tank, while the water output did not noticeably decrease.
I also tried replacing more drivetrain parts with TPU, but that made the water flow much weaker. So the final version only uses TPU where it helps the most, instead of making the entire drivetrain soft.
The runtime was better than I expected. On a full charge, the shower ran continuously for more than 250 minutes before the continuous stream gradually turned into dripping. Of course, actual runtime can vary depending on printed-part friction, lubrication, magnet strength, and battery condition.
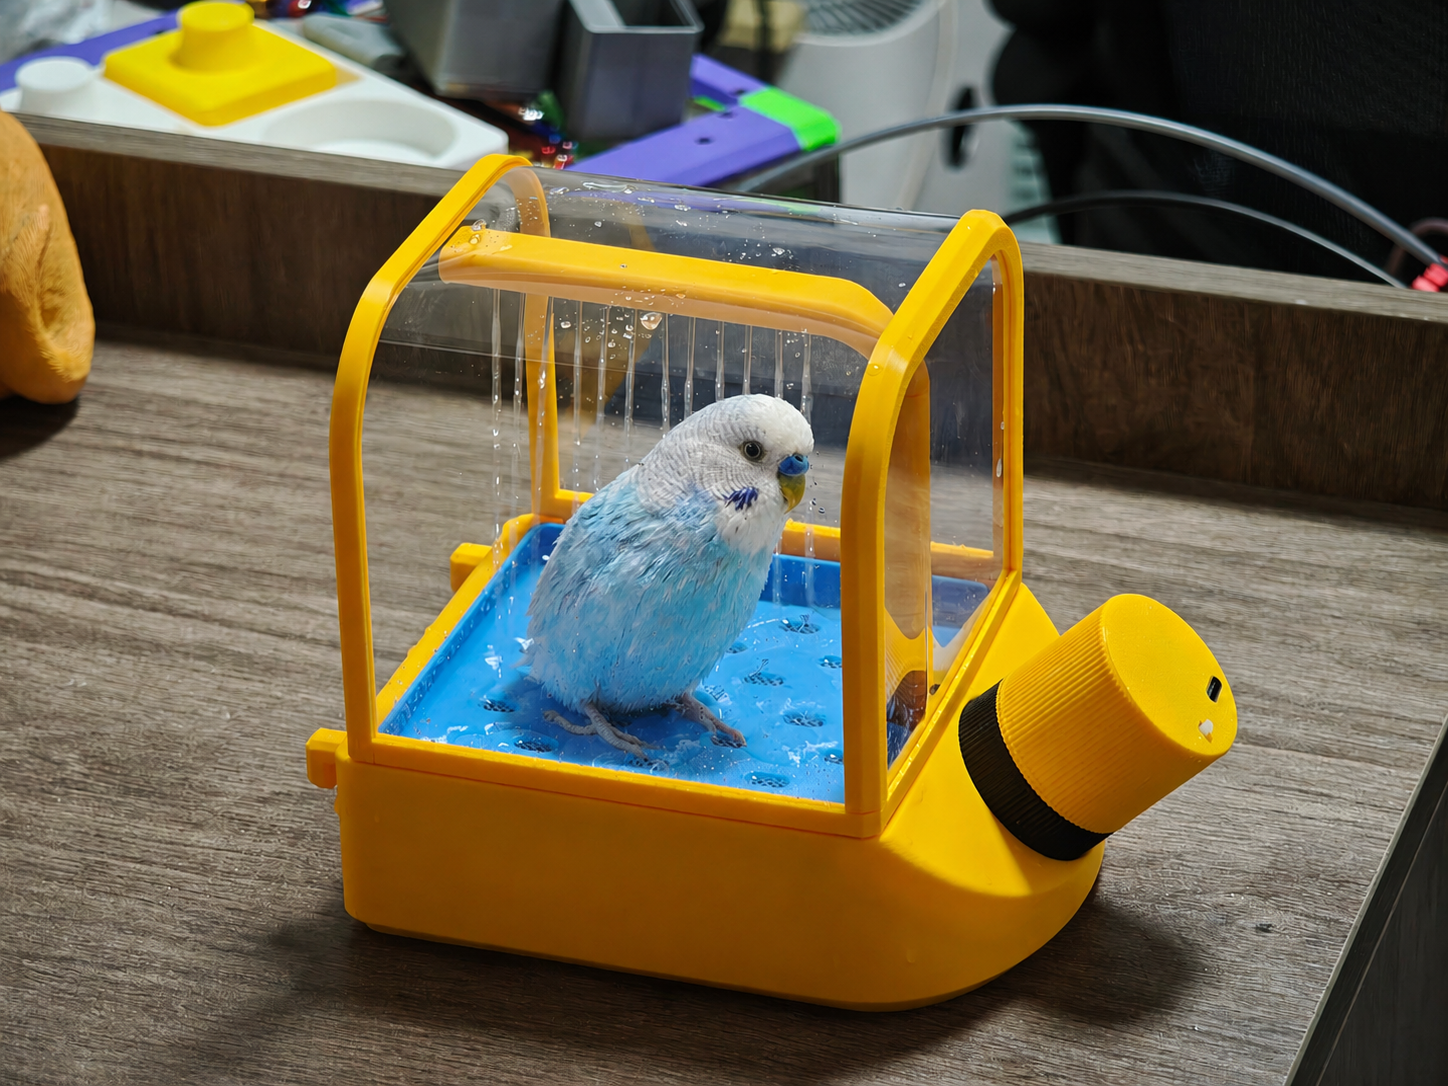
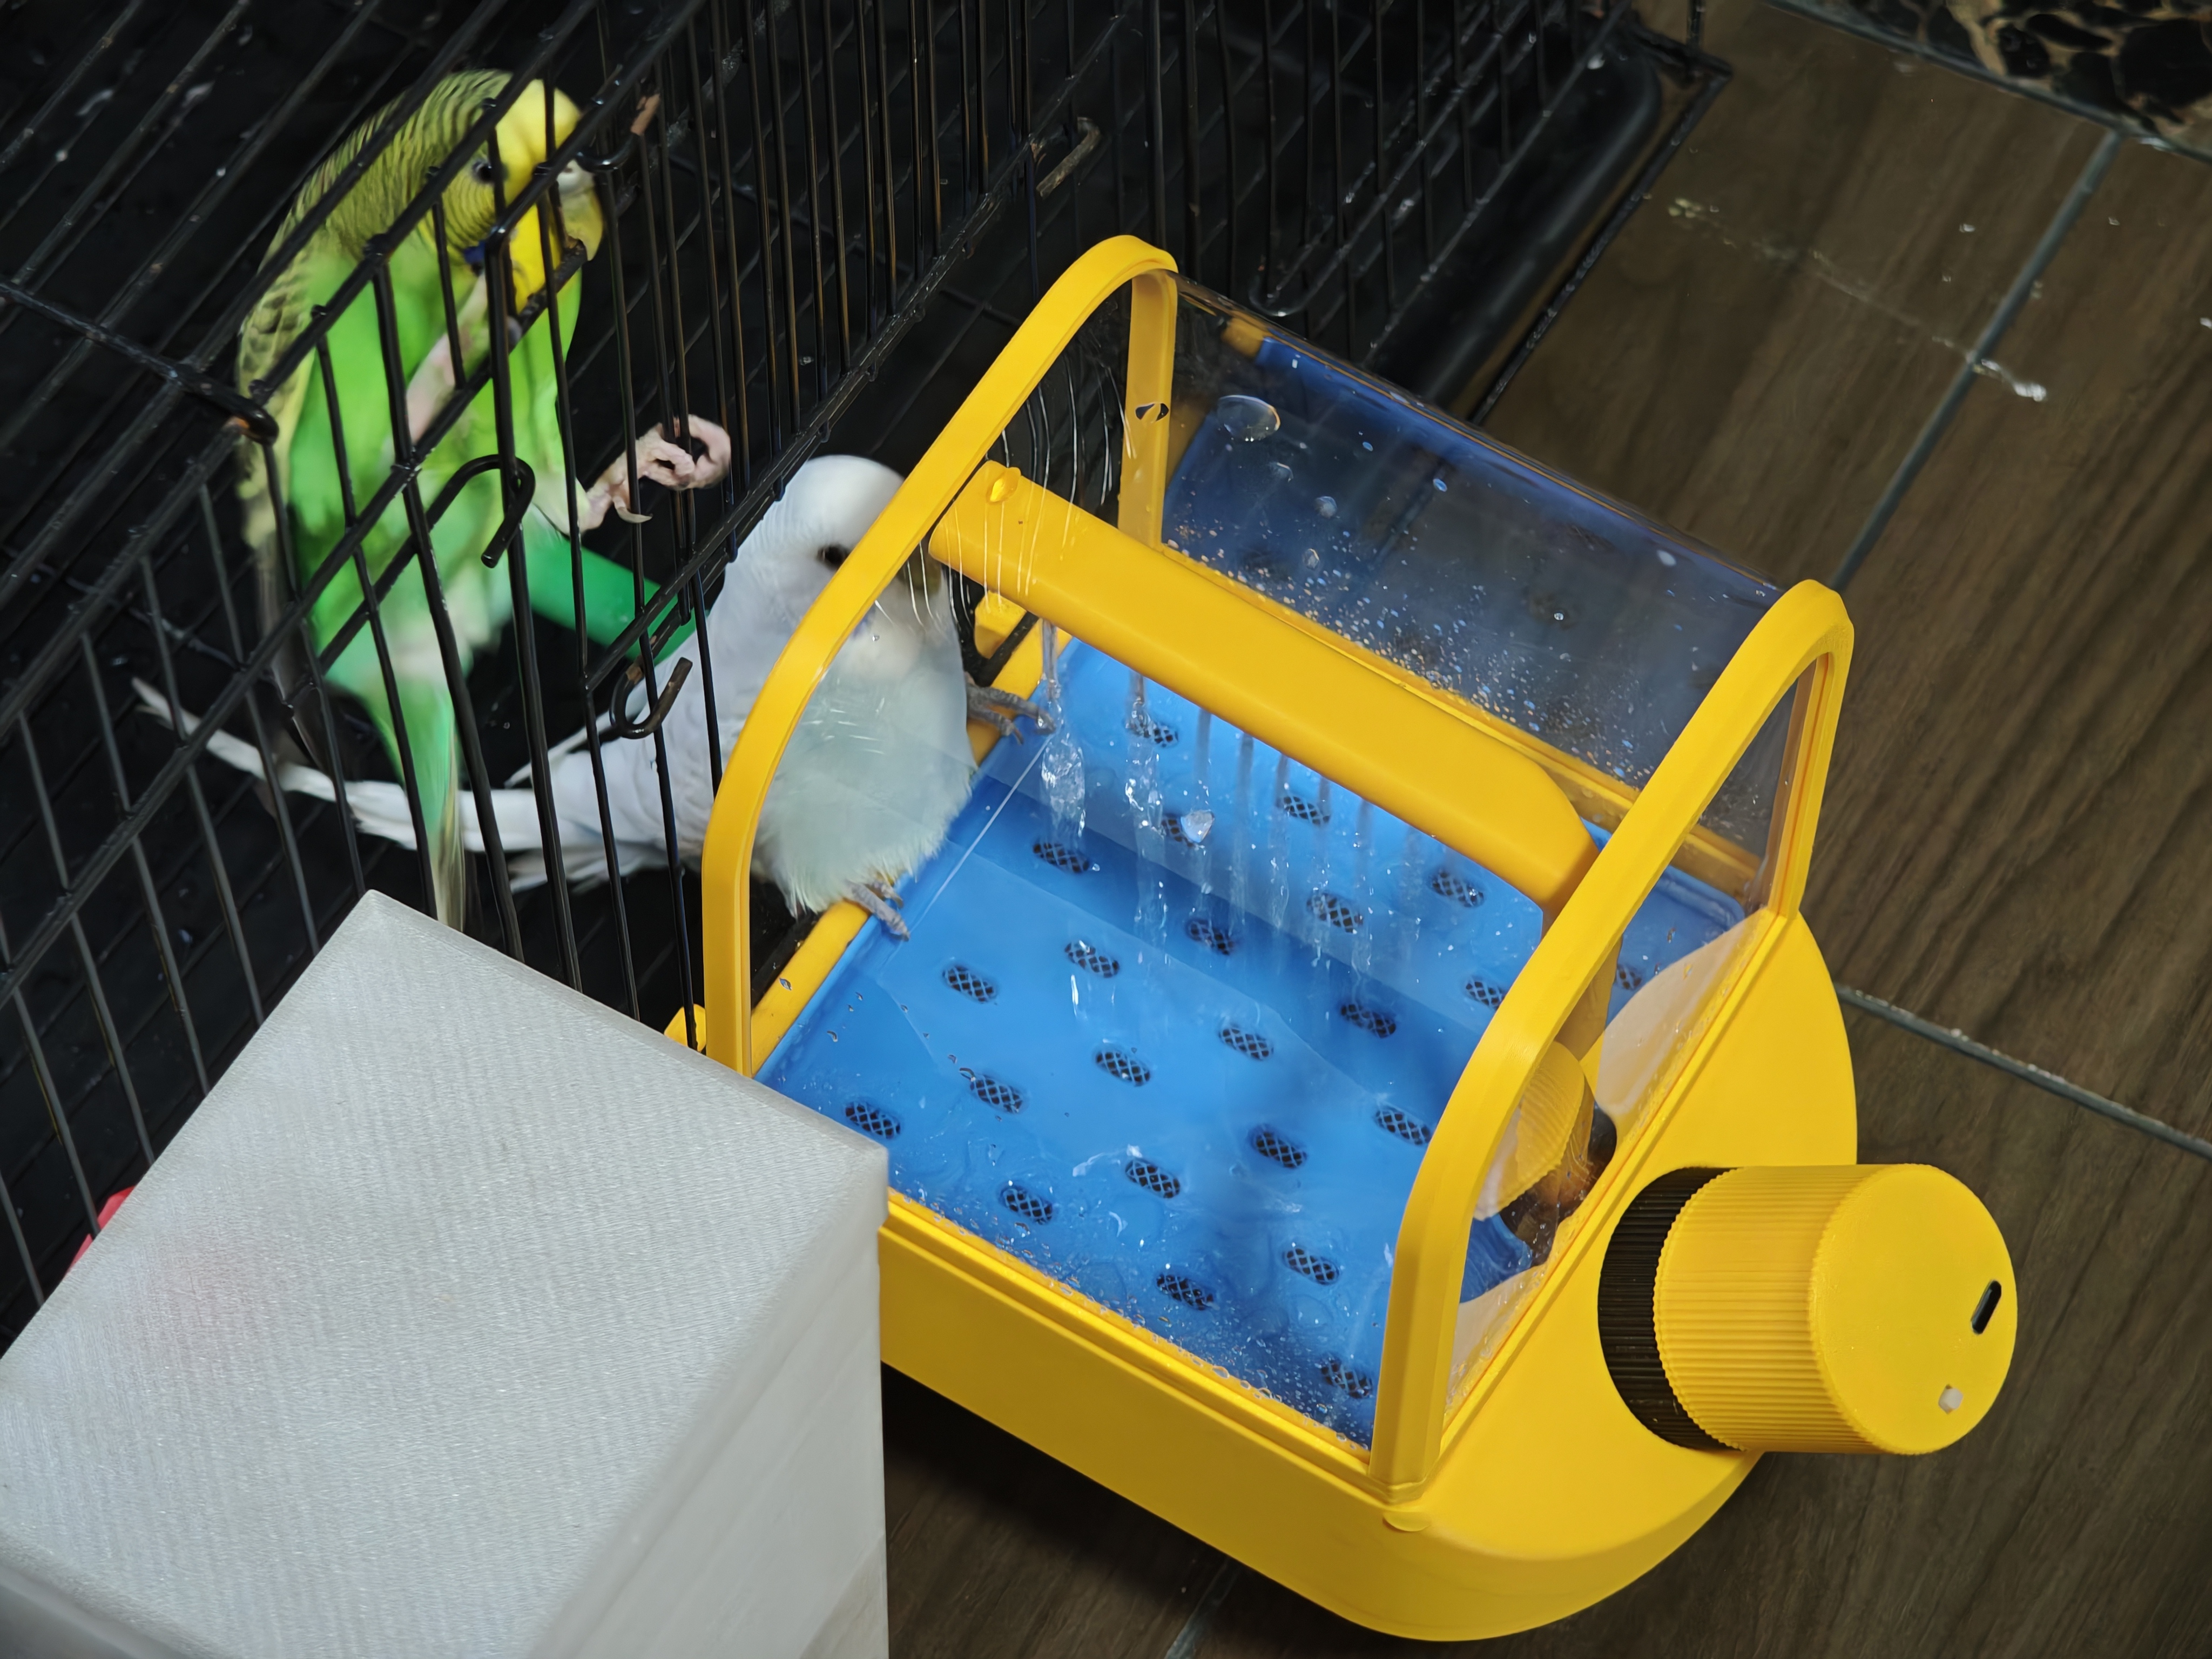
During the first real cage test, both birds were cautious at the beginning. One of them started approaching and interacting with the water after about 20 minutes, while the other needed more time before joining. That reminded me that getting the mechanism to work is only the first step. The real user experience matters too.
I tried leaving the water pump off and just hanging the shower outside the cage for a day or two to give them time to get used to it. After that, when I turned the pump back on, they almost immediately came over to play in the water. But there are individual differences among birds, so I can't say for sure if every one will do this LOL.
This project started as an entry for the Rechargeable Power Kit Challenge, but it became a broader exercise in small pump design, magnetic coupling, support-free printing, noise reduction, and bird behavior. My biggest takeaway is that there are many small details hidden between "it moves" and "it is actually usable."
Model link: https://makerworld.com/zh/models/2934071-budgie-shower-spa-mini-bird-bath-fountain#profileId-3285052