It can take a lot to get a big project off the ground. For this scale in particular, prototyping is important. It can be tempting to jump straight to the final version but, in my experience, this can end up wasting time depending on the scale of your build. This is the classic “go slow to go fast” approach.
The Challenge
When designing a project, I like to take an iterative approach. I'll start with something rough and then slowly add details as I test and learn.
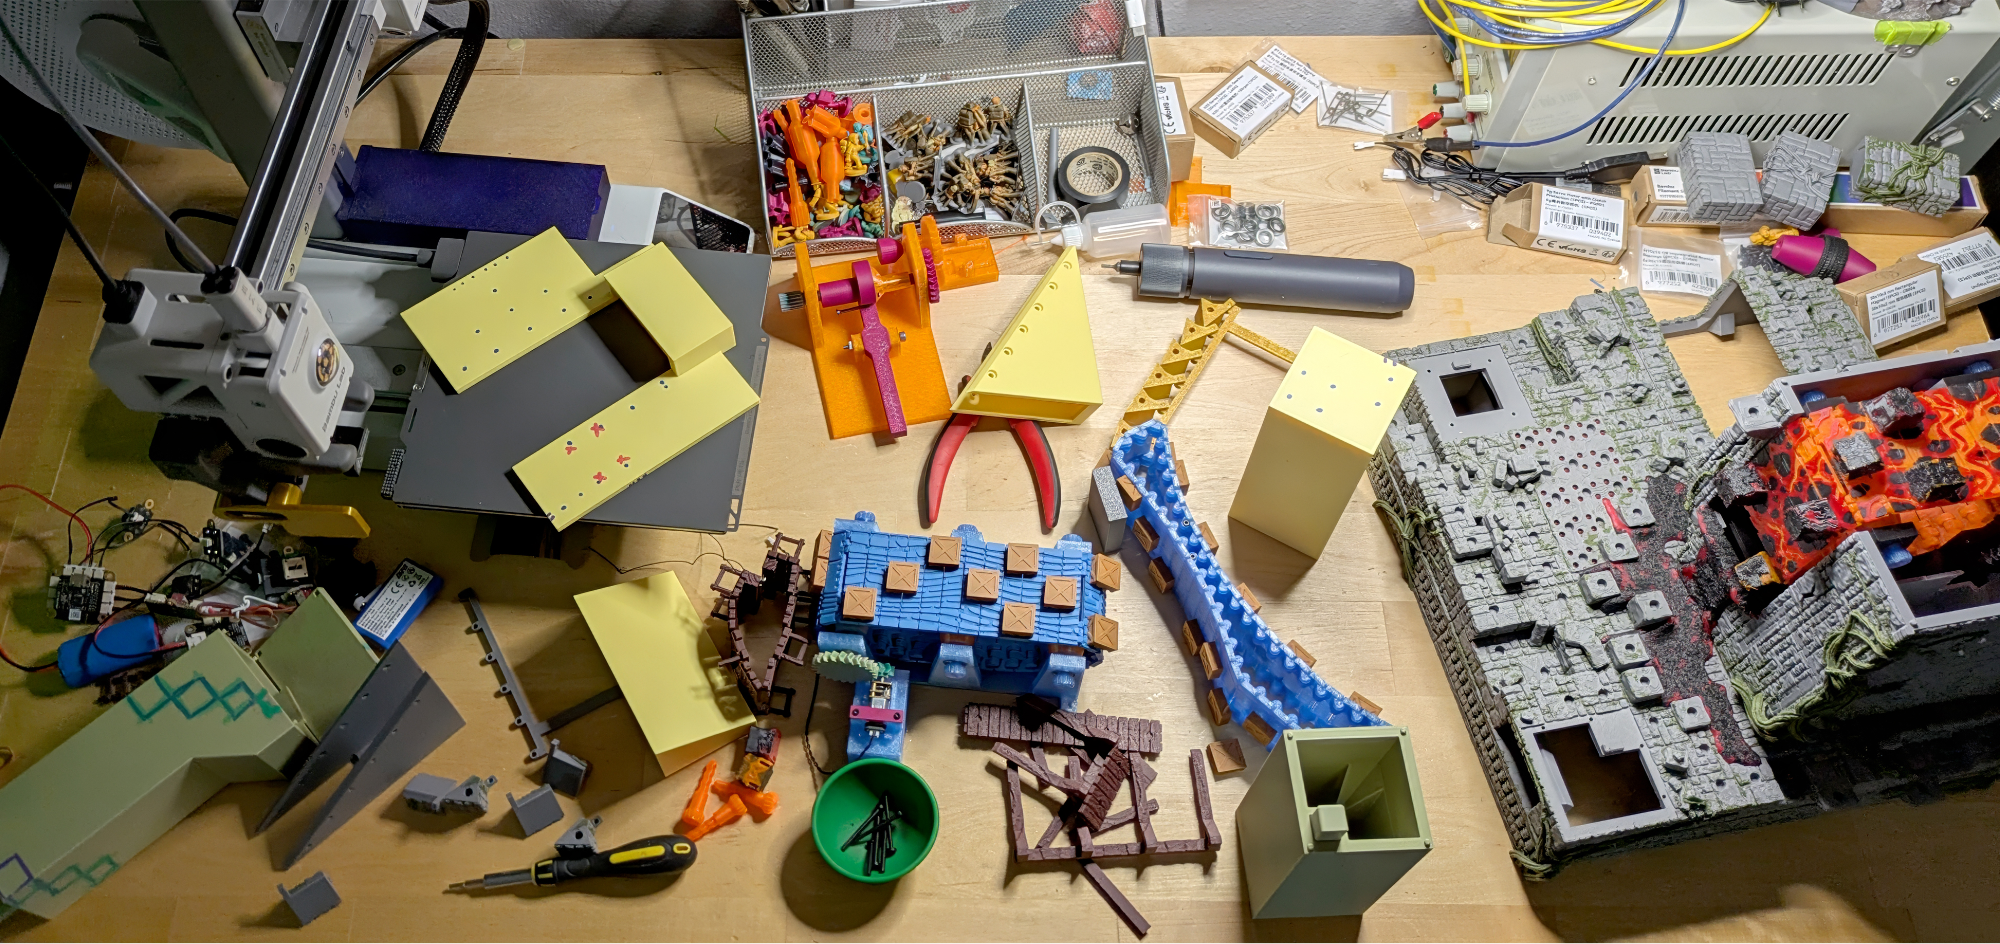
With Relic Rush, I realized pretty early on that I would need to do more planning than usual. Because I was adding lots of details and surface textures, late changes to the overall shape would be difficult and time consuming. Realizing this, I slowed down and was more cautious with my process. As you can see below, this meant lots of parts and lots of printing. Believe it or not, this was my workbench on a fairly tidy day.
Everybody has a process that works for them - I enjoy seeing how people solve problems and so I wanted to share my process on this project. Of course, I'm not saying this is the best way but it did have some benefits for me.
My Prototyping Steps
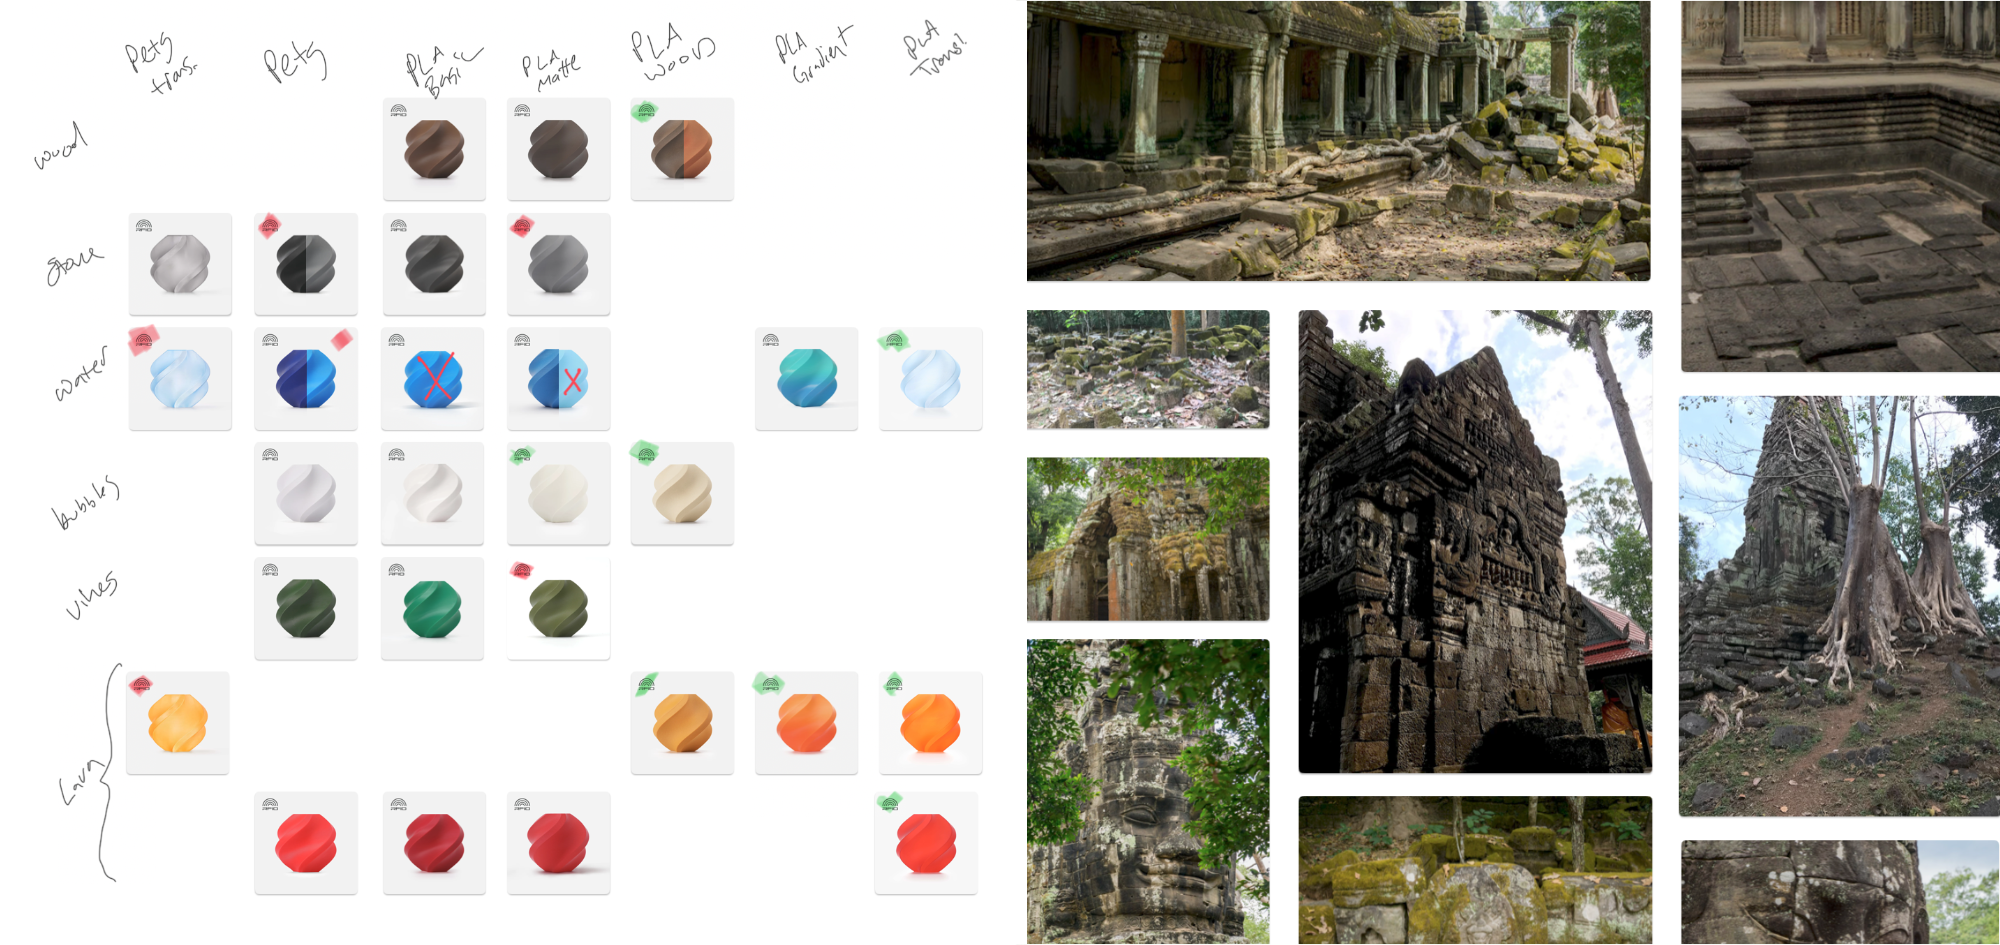
My first step was to determine a theme. I decided on a ruined temple because it would allow me to use just two main colors for the structure - gray for the stones and green for moss and vines. I gathered reference photos and narrowed down colors in Freeform (which I use for brainstorming and sketching). When I started the project, I chose PETG for the translucent parts but ended up moving to translucent PLA.
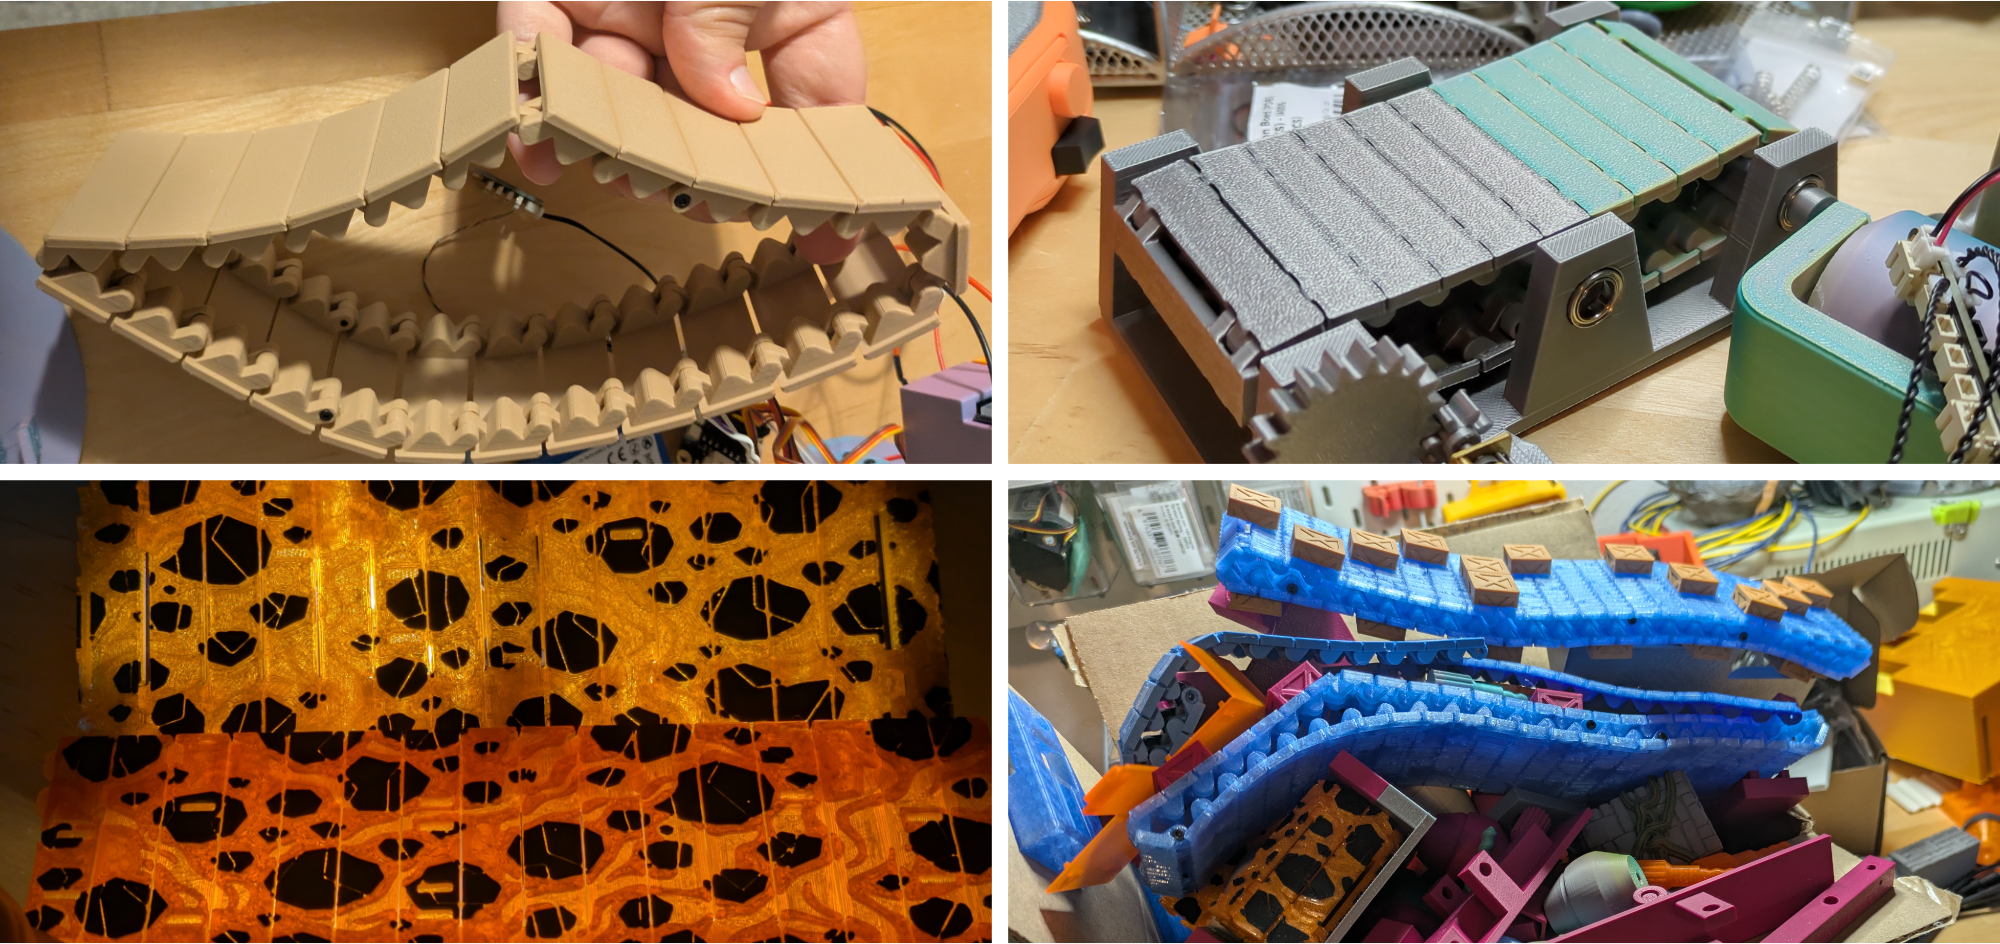
To determine scale of the project, I chose to build around the largest fixed components. In this case, it was the lava and river conveyor belts - these became the first parts I finalized through many rounds of testing and re-printing - a few examples of those:
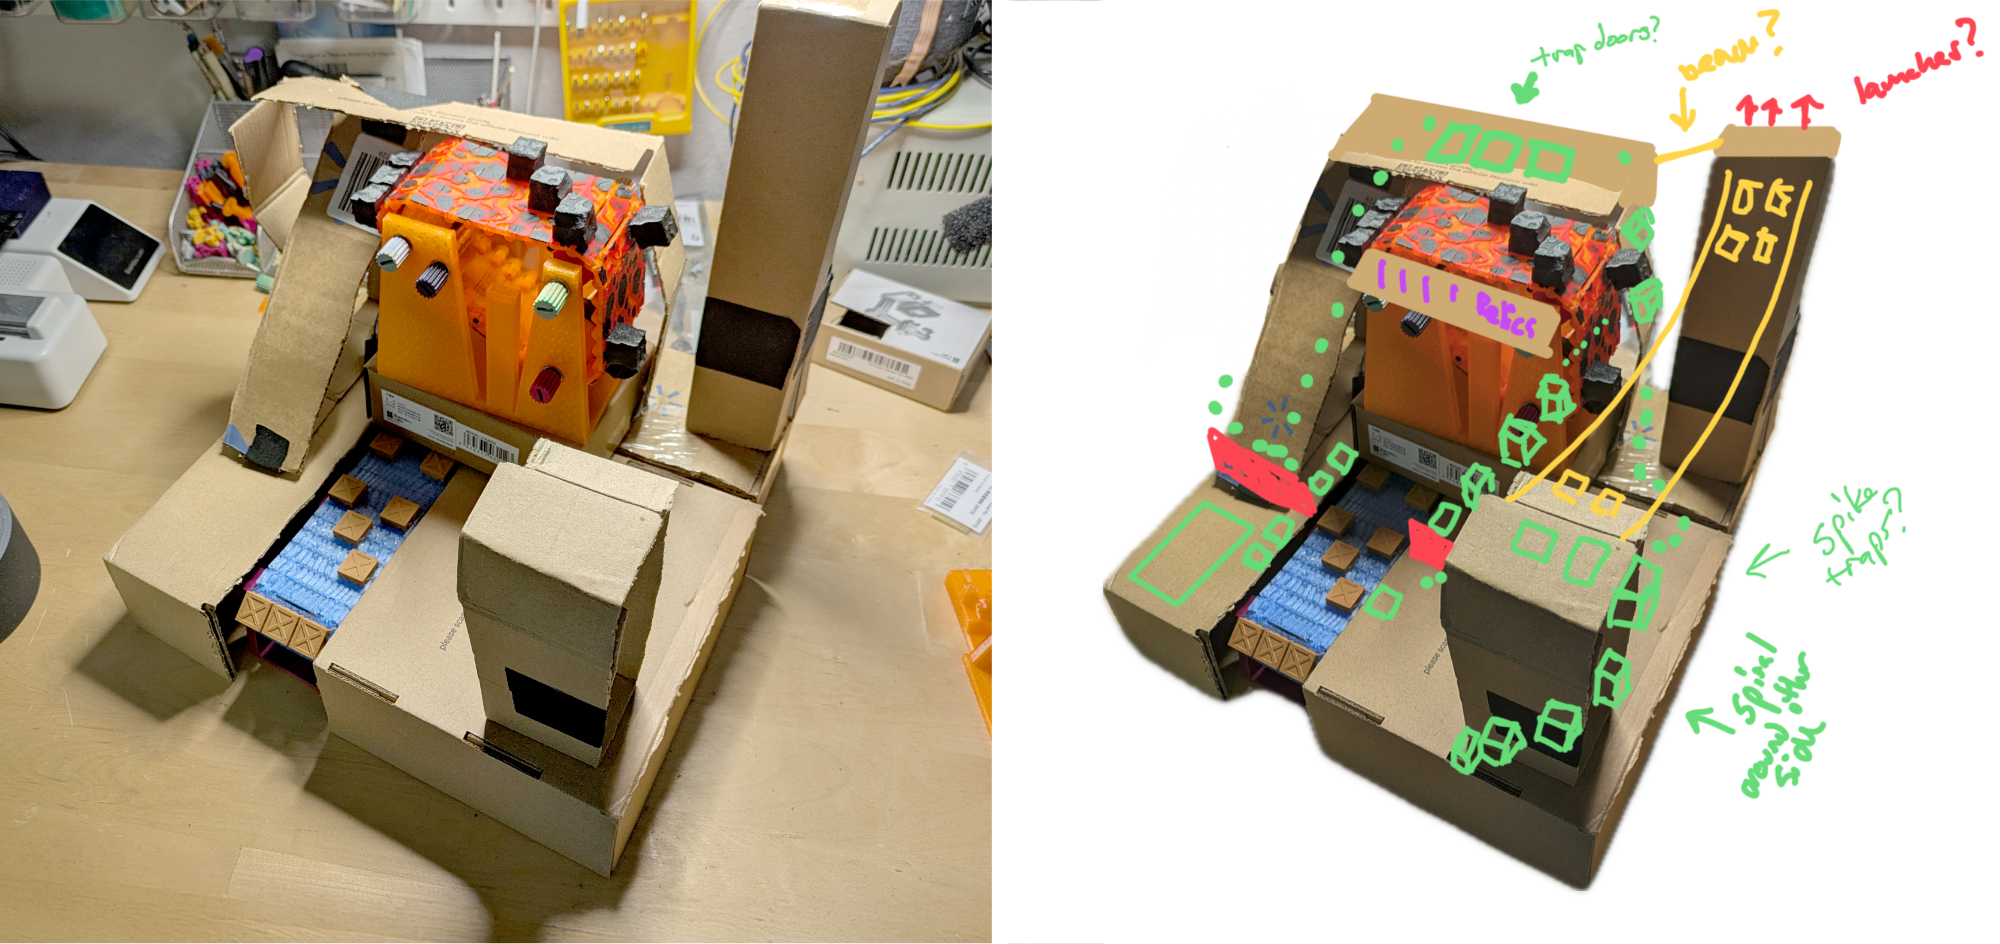
Then, I needed to decide on the overall project size - knowing that I wanted it to be printable on an A1 Mini. To do this, I took the approach of building a cardboard prototype. This incredibly ugly anonymization fulfilled its purpose: it allowed me to quickly get a rough idea of where the parts would split up and the dimensions for each. This is about as ugly as it gets but it was something I could make quickly.
Knowing the overall shape, I sketched the details of traps and movement paths on top of the photo (I use Freeform but any drawing app would work). Duplicating multiple copies of this allows me to quickly work out many options because the first option usually isn’t the best!
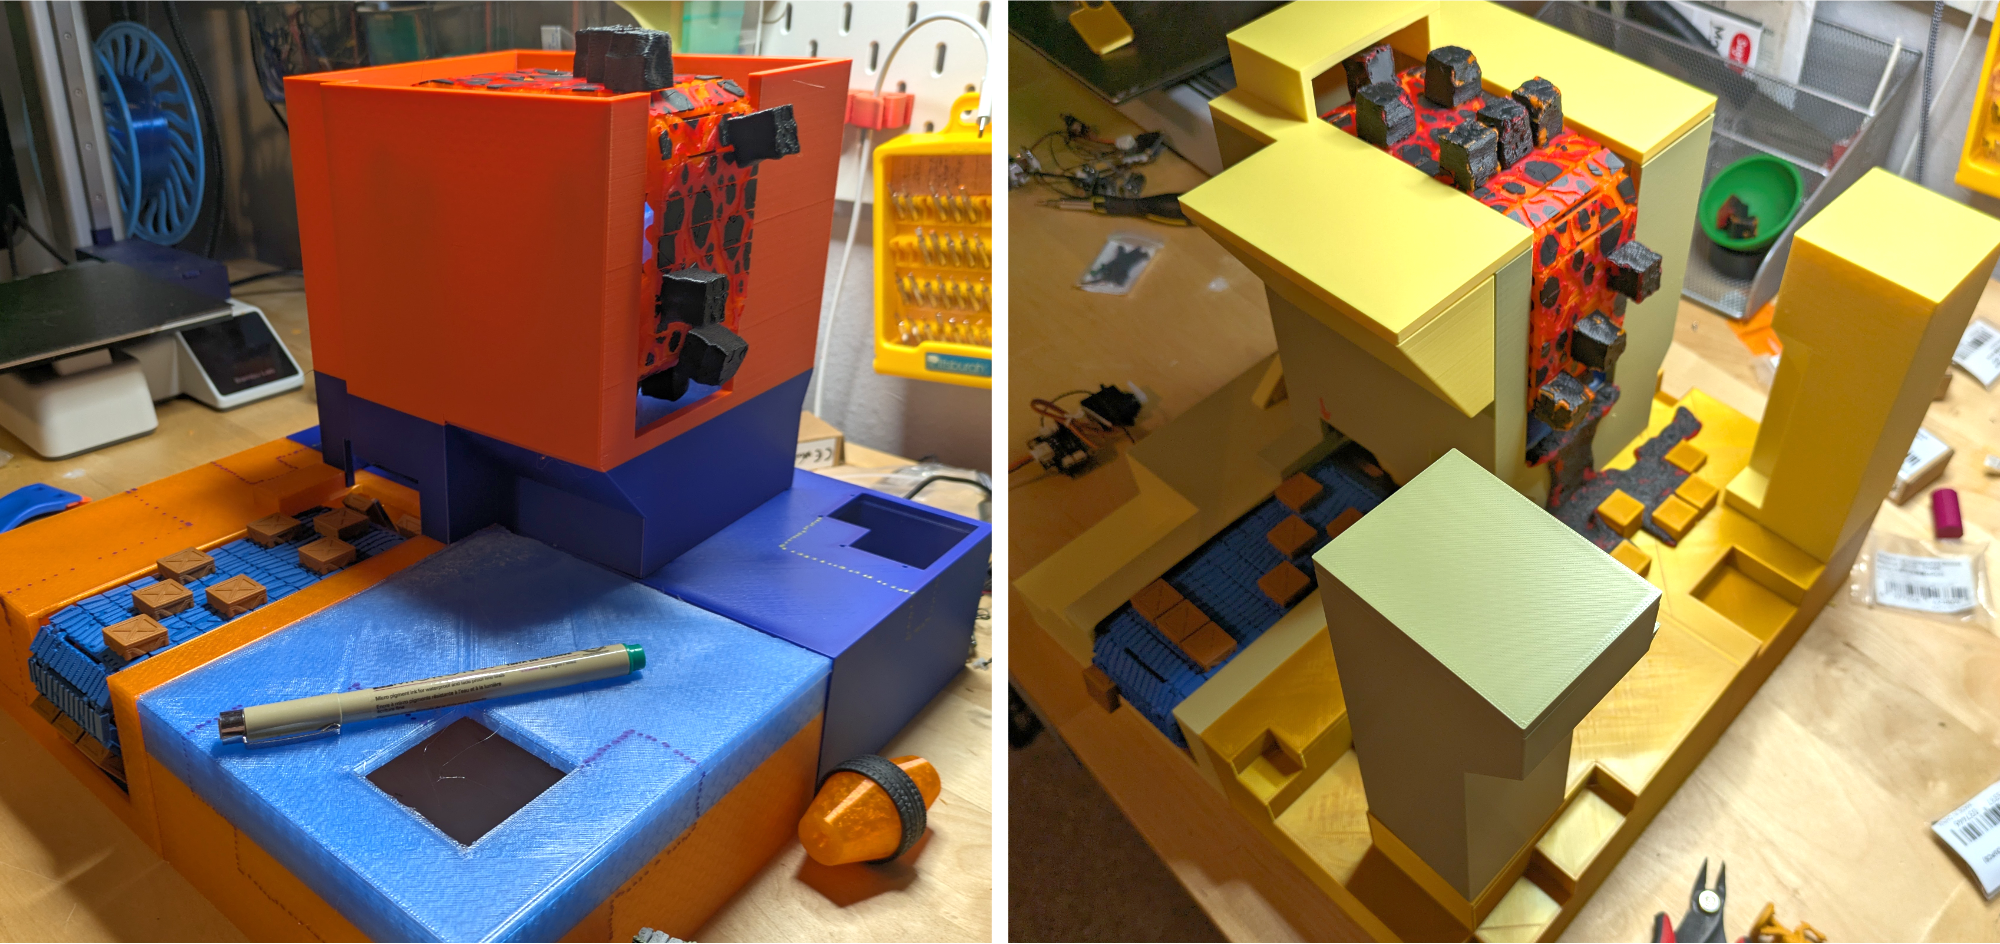
Because of the complexity of this project, I took an extra step that was unusual for me: creating and printing a blockout version. This is a technique sometimes used in video games to allow a rapid way to judge scale and the flow of a game environment. Essentially, I just built out the board with basic shapes & printed them so that I could see how the scale felt in person. This helped to confirm the spacing of paths and also the relative size of the components Along with how they could be mounted to each other.
In many ways, this is a wasteful process - both in materials and time. However, I do feel that it saved me time later in the process by reducing the number of larger-scale revisions - those core elements had already been validated. You'll notice from the filament colors that I actually went through two rounds of blockout after making some substantial changes from the first version.
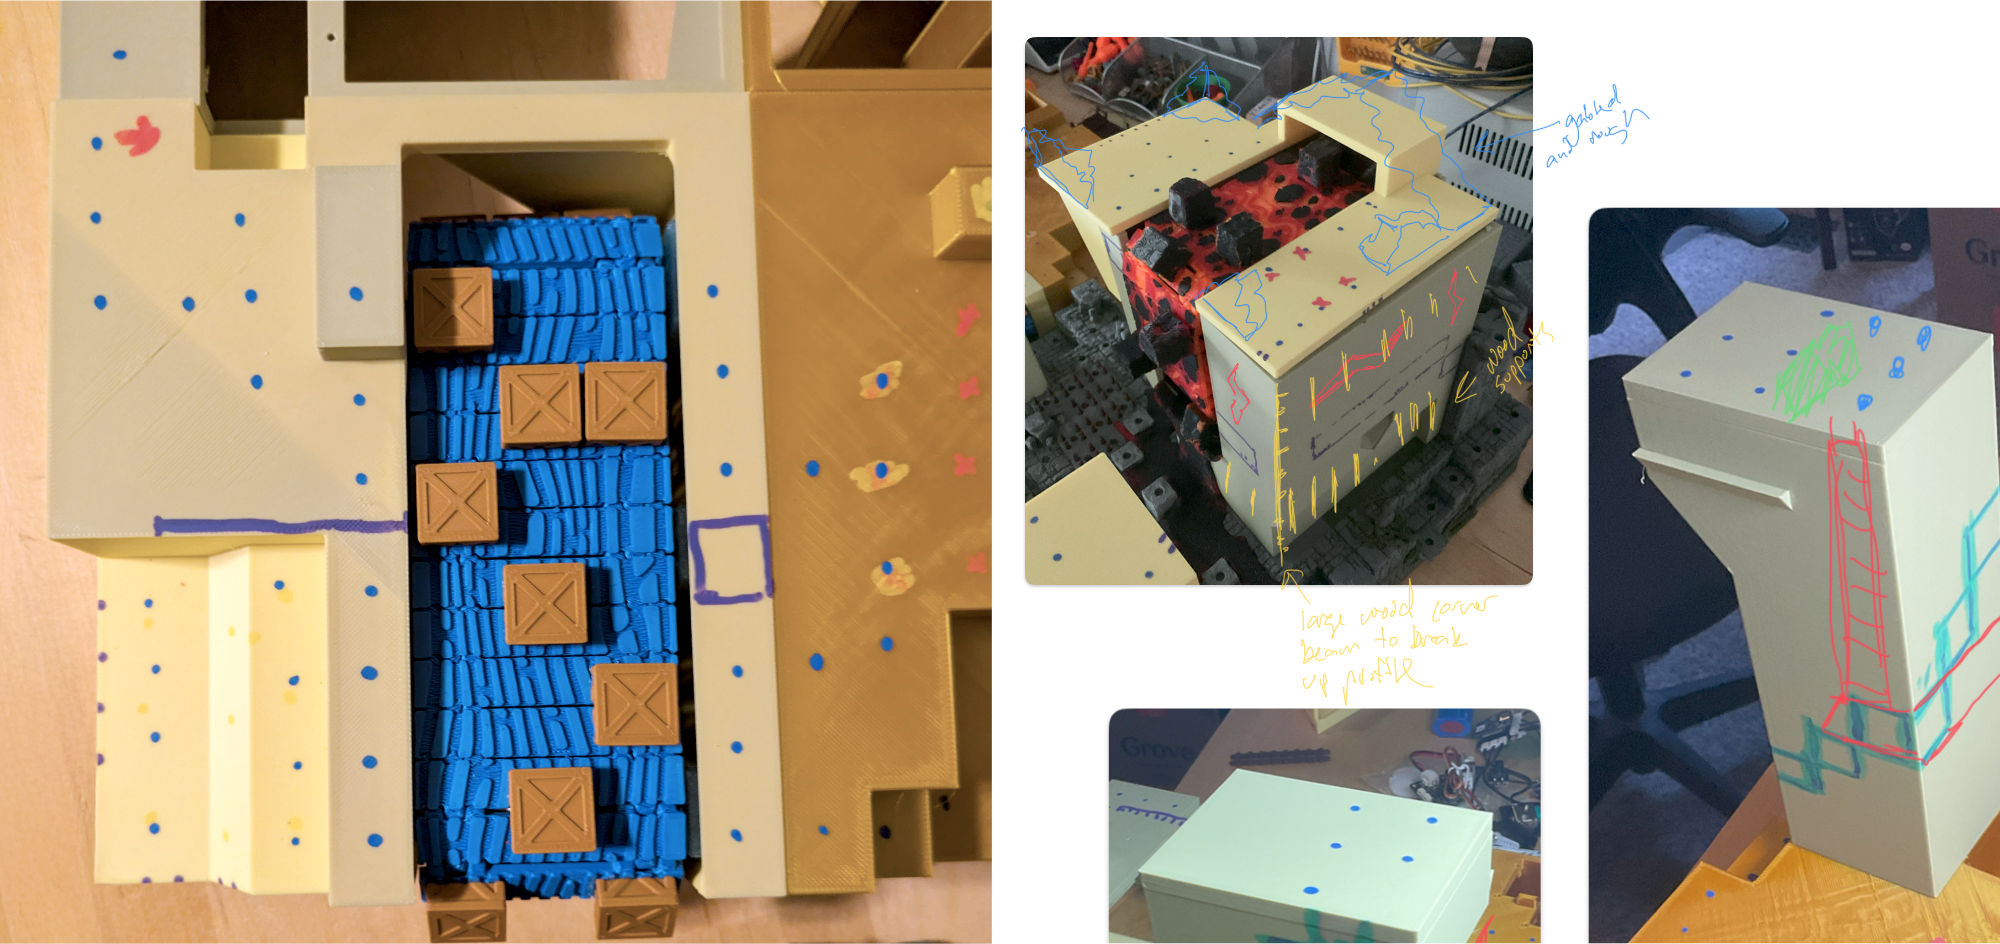
Similar to the earlier sketching step, I then drew movement and layout indicators onto the physical print. Since this project is a game, this step helped me test out the spacing between obstacles and determine the general paths that players might take along with the risks/rewards of each. I like Sharpie Creative markers for this - they have good opacity for writing on many colors.
Remember when I said that it could be tempting to jump ahead? I was feeling it at this point because my deadlines were approaching. However, I decided to keep taking things a step at a time and further sketch on top of the photos of the blockout model. This helped me plan some of the “greebles” and other details that would be used to add detail to the various parts. My time was limited, so I wanted to find efficient ways to add detail to the model and ensure that it was distributed evenly.
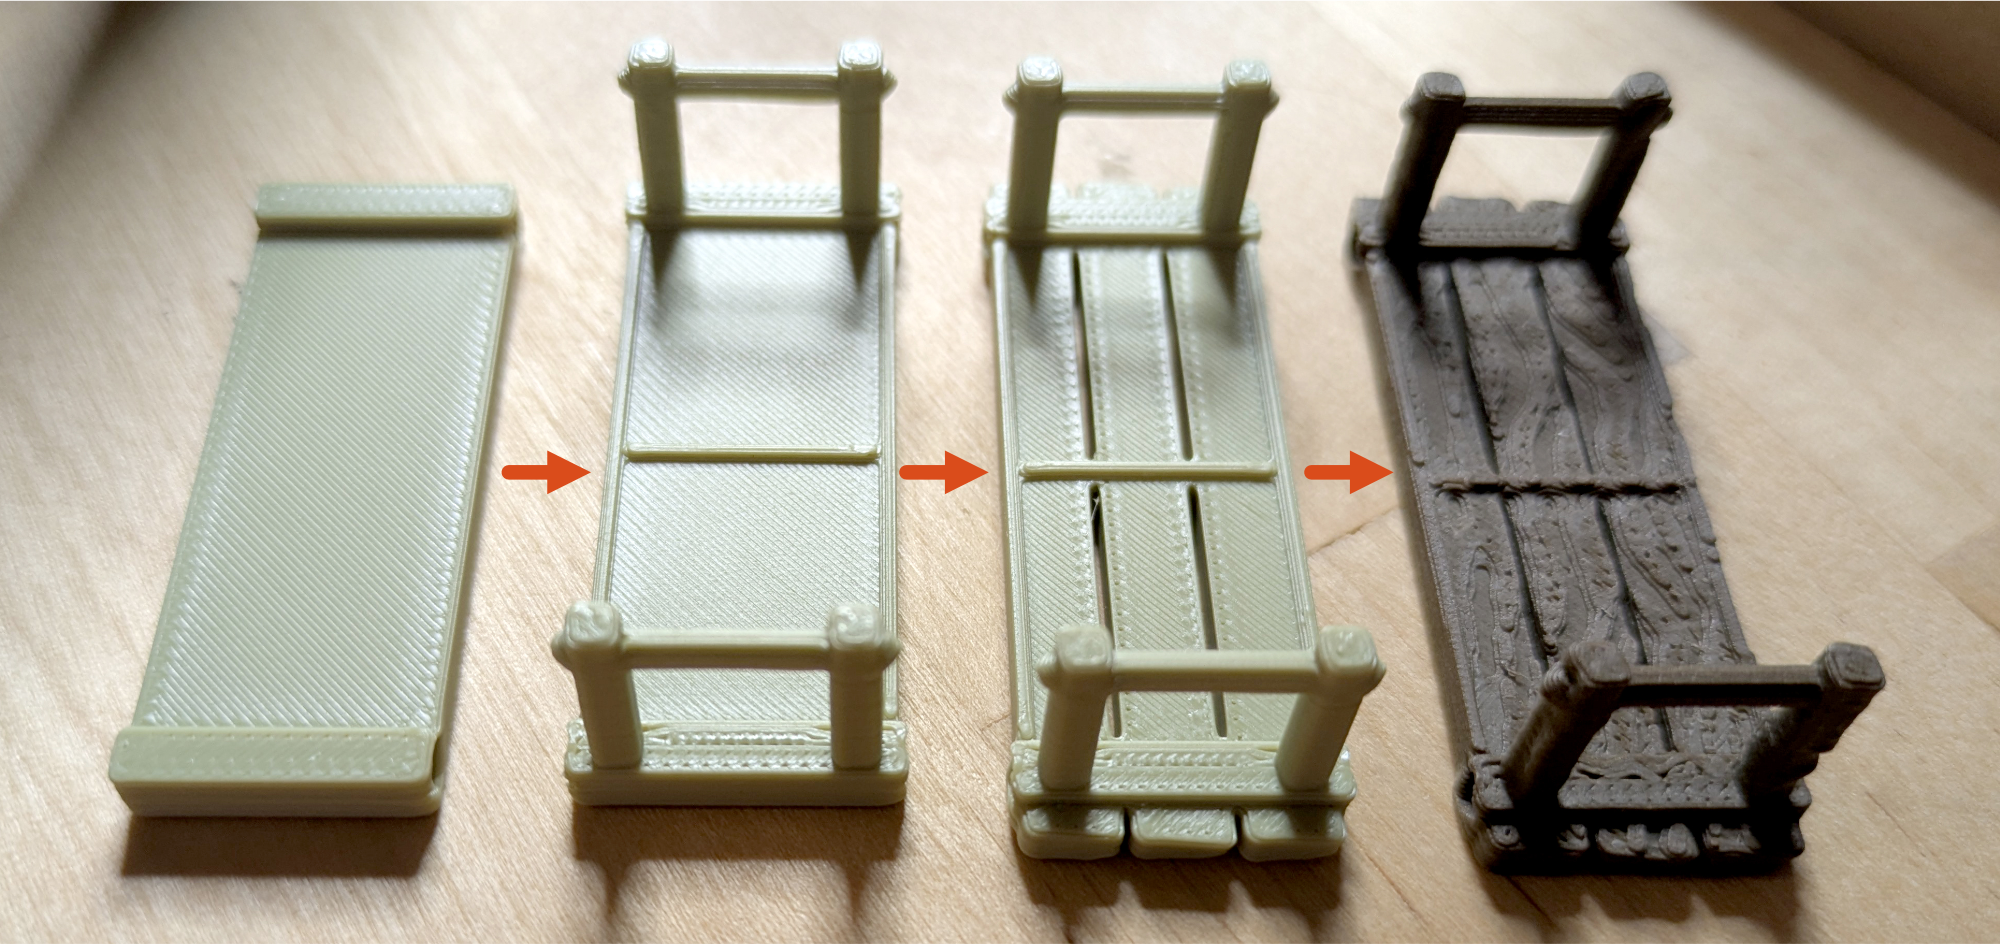
After using all of the steps above, I finally started building out the final geometry for the facades of each piece. In the example below, you can see some of those steps for the slats in the hanging bridge. It moves from blockout (which I printed to validate the scale) through various iterations where I add both detail and the channels needed to support the components.
What I learned
- Forcing myself to slow down and iterate on prototypes took a great deal of time at the beginning of the project - I need to account for this in future project plans because it put me behind schedule.
- The process was wasteful of filament but also meant that I needed to re-print fewer parts later in the process (due to issues). In the end, I think it was a wash for filament usage but saved a lot of time.
- Because my focus was on the overall physical size of the final project, I didn’t focus too much on component placement or wiring during the initial prototype. This led some adjustments and challenges late in the process. In the future, I'll include this as an additional step.
- And… all of this was just to get the shell of a prototype so that I could photograph it for the crowdfunding campaign. After the campaign, I rebuilt every piece although I was able to preserve most of the façade due to the careful planning. It was still a time-saver :)
Support for Big Projects
I was already planning this post when I learned about the new program from Bambu: the Let’s Make It Together Fund. The program lets you submit your big ideas and, if chosen, provides support from the Bambu Lab team to help you out! There are a few projects on in my notebooks that have felt 'too big to tackle' in the past - I may consider submitting a proposal to the program myself.
What about you all? Are you going to give it a shot? You can find out more at https://bambulab.com/en/letsmakeitfund
#bambuletsmakeit #bambulab