EZYStorage Drybox Rack


Print Profile(4)


Description
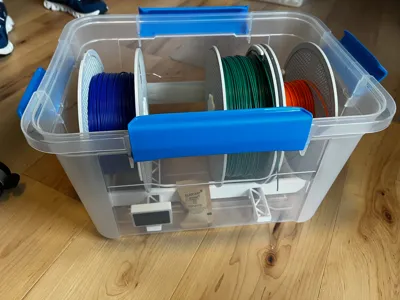
Update 16 Jan 2026: The storage box this is designed for can be found at https://ezystorage.com/collections/water-proof-ip67-1/products/ezy-storage-waterproof-18l-storage-box-ip67 . This item is widely available in the USA but may be harder to find elsewhere.
Update 13 Jan 2025 : VirtualAU has released a remix for the A1 mini here https://makerworld.com/en/models/974244#profileId-946598. This splits the long rail so that it will fit the smaller A1 mini print bed. The split pieces can then be assembled to make the rack as shown.
Update 6 Jan 2025: desiccant boxes designed to fit this rack can be found at https://makerworld.com/en/models/959832#profileId-929576
Update 19 Nov 2024: New bracket for Xiaomi mi Temperature and Humidity Monitor 2 added.
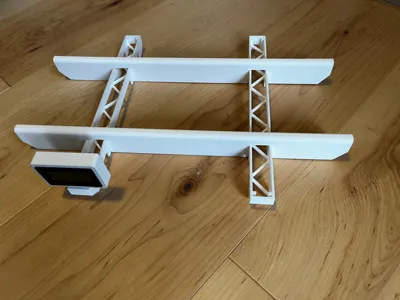
This rack is a remix of FailOften's EZYStorage rack found on Printables at https://www.printables.com/model/870259-easy-ezy-dry-box. There are many things to like about the source model and I do suggest you evaluate that for your needs. I wanted to reduce the filament used as I currently have seven of these boxes and at 185ish grams it was likely to take more than a full spool. This remix comes in at 125 grams per box. Standard spools end up with one side of the spool inside the short rail which prevents them from sliding around if the box isn't full. Smaller spools will also fit based on the 250 g spools I have which are 150 mm in diameter.
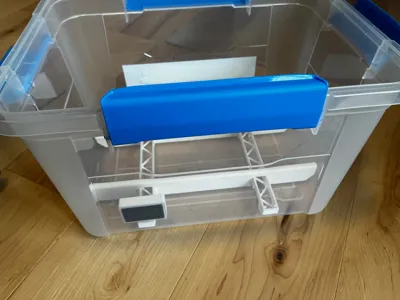
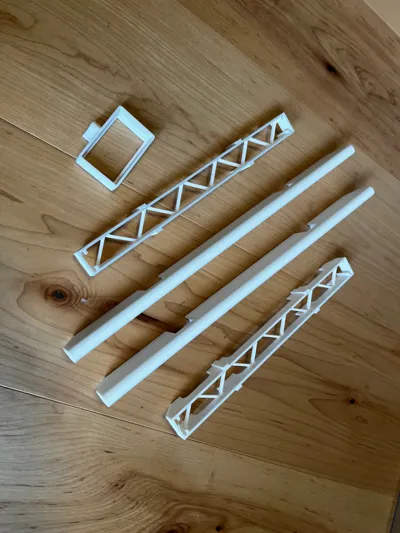
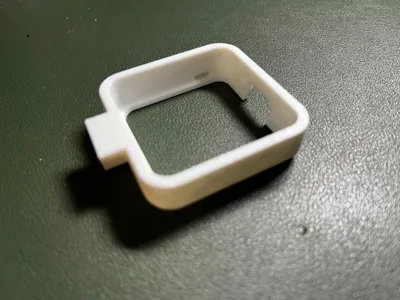
The rectangular hygrometer bracket is unchanged from the source model and fits a standard rectangular unit from Amazon (This would also appear to fit the ones Bambu sells via Maker's Supply, but i don't have one to verify). I have added a square bracket designed to fit the Xiaomi mi Temperature and Humidity Monitor 2, but again I don't have one to verify. Turn off the bracket you aren't using from the object menu.
Attaching the hygrometer bracket to the short rails places the hygrometer near the bottom of the box and close to the outside for better viewing. It also doesn't flop around as you move boxes.
This model does use supports but I used Tree (auto) and found them easy to remove. These are printed diagonally on the bed as the long rails are wider than 250 mm. The short rail prints upside down and the hygrometer bracket prints with the face down.
To assemble, take the long rail and place it over the matching nubs on the short rail, making sure the feet of the short rail are down. Press together slowly and evenly. It will be a tight fit, but does not need to come apart again. Place a second long rail onthe assembly, repeating the process. Attach the final short rail to the assembly, pressing the long rails in evenly. Insert the hygrometer bracket if you are using it in the end of any short rail. It will sit inside the EZYStorage box easily but does not slide around.

Comment & Rating (101)