Bubble machine


Print Profile(1)

Bill of Materials
- 10 mm aluminium tube 1m long x 1:
- PET bottle 0,5L-1,5L x 1:
Description
This is simple bubble machine with parts from Tedi bubble machine (Tedi store is located in most of European countries). It can be used for kids to play with it or for RC or free flight model makers to indicate thermals and wind directions. In case of making more machines, it can locate thermals more precise. Just make sure you place them enough apart from each other.
For build this model you will need Tedi bubble machine (5€ cost, it comes in two shapes, blue whale and green frog. They both fit), some CA glue (5x2g from Tedi works perfectly and costs only 1€), 1m aluminium 10 mm round tube from local hardware store and some double sided tape with foam (Tedi has it for 1€) and 0,5L to 1,5L PET bottle (best fits bottle with narrow throat like coca cola 0,5L or similar).
This print does not need supports, so just ignore bambustudio error message. Parts must be printed out of PETG for outdoor use. I recommend to replace original cables with silicone ones (AWG 24 will be just fine), since original are not best quality and also soldering is not the best.
Assembly guide:
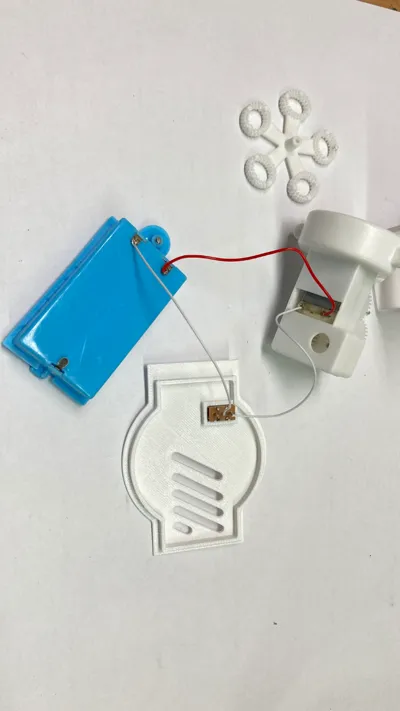
Remove mechanism from original bubble machine. Make sure not to break any of wires and switch. Remove bubble head, apply double sided tape on bottom of mechanism. Insert switch to cover hole, it should be tight fit. If not, apply some CA glue, but make sure glue is applied only to housing of switch. before installing mechanism, push battery holder from top of machine to back hole. Than remove protection from double sided tape. Insert mechanism to housing and align it to holes in front. Install bubble head, insert battery holder to back hole. It should fit tight, if not, just apply some CA glue. At the end glue top cover with switch. Apply only few small drops of CA glue.
On aluminium tube glue small stopper, just make sure it is glued 30mm below top of the tube. Now it is time to insert batteries and use original battery cover to prevent batteries fall out of holder.
Use of machine:
Mix some water and soap or use pre made mixture from Tedi. Here you will need to experiment with perfect mixture to get perfect bubbles.
Now fill PET bottle, screw machine upside down (check photo). Now Stick tube in to the ground and make sure it is in vertical position. Flip over bottle with machine and liquid will fill small reservoir in front of machine. At the end attach machine to the tube and turn it ON. In few seconds you will see bubbles.
Short video of machine test:
Comment & Rating (2)