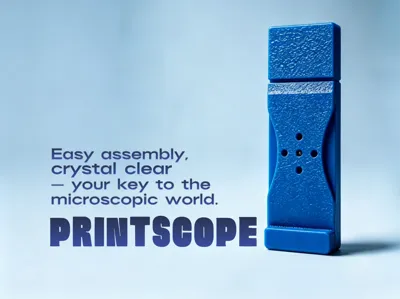
Printscope


Print Profile(1)

Description
We designed and built PrintScope, a 3D printable, extremely simple to manufacture, low-cost microscope, aiming to open the door to the microscopic world for everyone
In the initial design phase, we researched various microscope solutions online, and the renowned Foldscope project greatly inspired us. Foldscope is essentially a Leeuwenhoek-style microscope, using a tiny glass bead to provide significant curvature, serving as a single-piece super magnifying glass to observe samples. It has inherent limitations such as a non-flat field of view and a very short observation distance, but it also boasts outstanding advantages like low cost and super portability
Design Background
After purchasing and testing the Foldscope, we found that it still had some practical pain points: the cost of a set online was about 20 yuan. It used special high-elasticity pre-cut cardstock, and if replicated entirely with readily available A4 paper, not only would processing be time-consuming, but accuracy and performance would also be greatly reduced. Moreover, securely fixing the glass bead onto the paper was a tricky issue. Additionally, the Foldscope required cutting out seven or eight parts, such as the stage, X-axis slider, Y-axis slider, sample holder, lens clip, and ramp, making the learning curve quite steep
So we began to ponder: Is it possible to further reduce material costs? Is it possible to significantly lower the learning cost of manual replication? In an era where 3D printers are becoming increasingly common and printing is easier than ever, could we create a 3D printed, simple microscope that anyone could download and replicate themselves from maker websites
Thus, PrintScope was born
As members of an iGEM competition team, we often need to quickly observe bacteria, yeast, and plant tissue samples in synthetic biology experiments. Traditional laboratory microscopes, while precise, are bulky and expensive, making them difficult to bring to classrooms, outdoor settings, or public science events. This PrintScope is a tool we specifically designed for educational scenarios and iGEM outreach activities, allowing every student, enthusiast, and even children in resource-scarce regions to personally see the microscopic world that once only existed in textbooks
Main Features
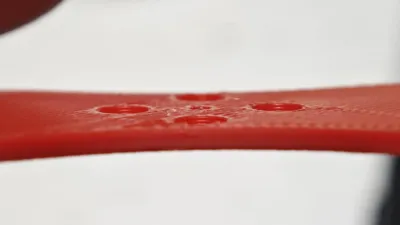
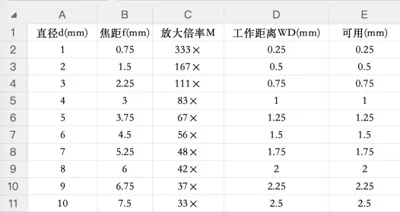
For the optical system design, we adopted the Leeuwenhoek/Foldscope-style single-piece construction. We purchased glass beads of various diameters online (1mm, 1.5mm, 2mm, 4mm, etc.) and quantitatively calculated core parameters such as focal length, magnification, and working distance using optical formulas. Complete comparative data can be found in the table below (Table 1). Through systematic testing of multiple lens specifications, we found that the 2mm glass bead was the optimal compromise
Combining parameter analysis: If a 1mm glass bead is selected, the theoretical magnification can reach 333×, but the working distance space of only 0.25mm is extremely narrow, making specimen placement very difficult and debugging highly challenging. For 4mm and larger diameter glass beads, the working distance is sufficient, but the magnification significantly decreases (4mm is only 83×), leading to insufficient detail in observation. The 2mm glass bead provides an effective magnification of approximately 167 times, with a working distance (distance from sample to lens) of about 0.5mm. This preserves sufficient magnification while leaving enough operating space for conventional biological specimens, balancing imaging results with ease of assembly and viewing. Larger diameter beads have insufficient magnification, while smaller diameter beads are difficult to install and observe due to their overly narrow working distance

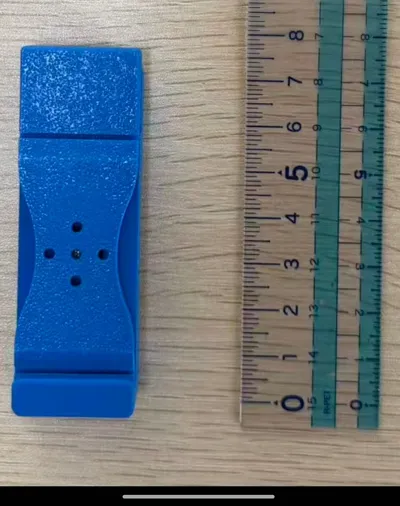
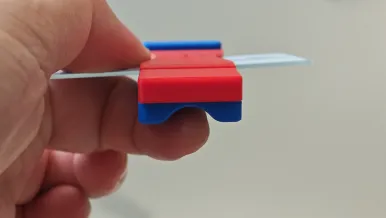
Based on this, we optimized the entire microscope to require only two 3D printed components: the main body base and the flexible snap-fit lens holder (FlexiLens). We also made the following targeted optimizations to address the pain points of the Foldscope:
Integrated snap-fit body—no glue, no extra parts, easy assembly, only 2 printed parts
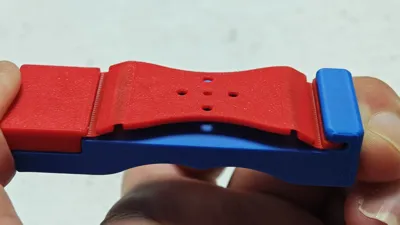
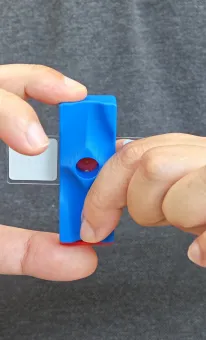
Slide-rail focusing—by pinching the two "princhbridge" press bridges with your fingers, you can deform the flexible focusing film of the FlexiLens, which is part of the central Flexi Origami structure, easily achieving precise focusing

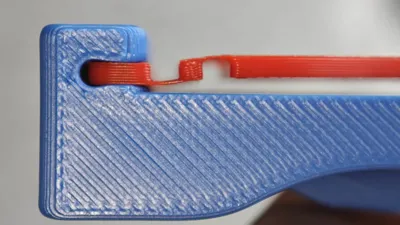
Figure 2

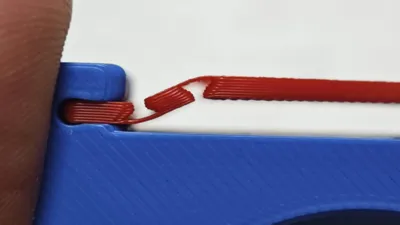
Figure 3

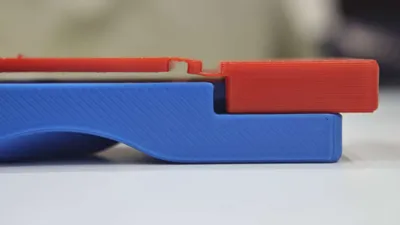
Figure 4

Figure 5
Focusing slide rail: Assembling the snap buckle and the left half of the pinchbridge (Figure 2), the right half of the pb and the assembled focusing slide rail (Figure 3) (corresponding to actual left and right)
The lowest/highest two states of fl: lowest (Figure 4), highest (Figure 5)
Four-way auxiliary observation ports—sample centering observation holes are opened in the top, bottom, left, and right directions, making it easy to quickly position the sample to the center of the lens
Finger-fit groove and slide recess—the inwardly recessed area on the left side accommodates the thumb, increasing the range and flexibility of manually controlling the slide position

Figure 6
Analysis of the four-way auxiliary observation ports, thumb-fit area, and pressing method (Figure 6)
Left-right symmetrical design—suitable for both left-handed and right-handed users
Ergonomic grip design—the concave-convex structure on the back of the microscope body has been carefully optimized to fit the natural curvature of the index finger. When in use, one hand holds the device while the other pushes the slide to focus. The focusing action is performed entirely from the side, not obstructing the view, allowing for comfortable observation without repeatedly adjusting eye position

Figure 7
Back structure adapted for the index finger (Figure 7)

Figure 8

Figure 9
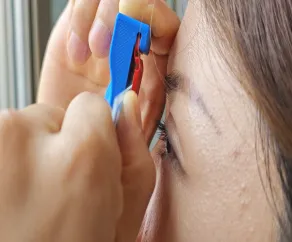
Two recommended observation methods: (It is advisable to remove glasses before observation for a clearer image)
① Hold the microscope in one hand and the slide in the other, observing against light/sky (Figure 8)
② Use a phone flashlight as a light source (lowest brightness), observing close to the desktop (Figure 9)
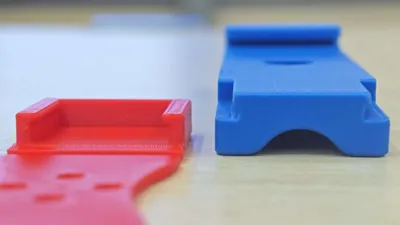
Compatible with standard microscope slides—existing consumables in school laboratories can be used directly

Figure 10

Figure 11
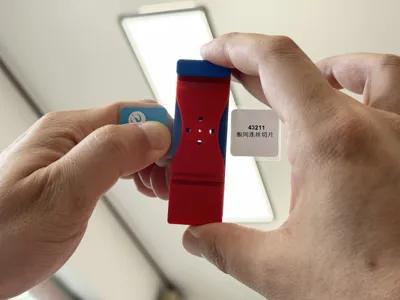
Supports standardized glass slides: Figure 10, Figure 11 (the red slot shows the adaptation position for standard microscope slides)
Extremely lightweight—suitable for classroom group activities, outdoor sampling, and science popularization roadshows
Optimized flexible structure—withstanding multiple folds, and the entire device can be printed using only PLA Basic, eliminating the need for flexible TPU material, further lowering the barrier to entry
Components Included
Base: Provides stable support, with a central circular hole serving as a light-transmitting channel to illuminate the sample with natural light
Slide holder: A platform for placing the sample to be observed, with a small central hole for the bead lens installation and surrounding small holes for auxiliary light transmission
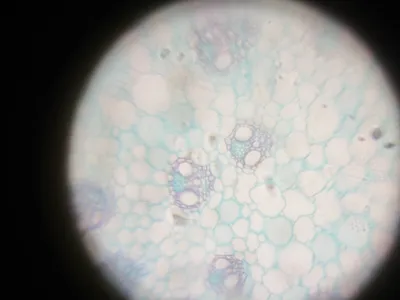
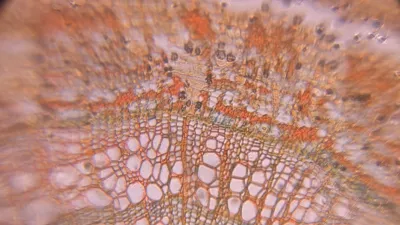
Bead lens: The core magnifying component, installed in the central small hole of the black slide holder to achieve microscopic imaging
Assembly Notes
1. Gently snap the slide holder into the base's slot, ensuring the central light-transmitting hole is aligned
2. Insert the highly transparent bead into the central small hole of the slide holder and secure it firmly. (It is recommended to place the bead on the desktop, with the slide holder face down, aligning the central small hole with the bead and pressing down)
Precautions:
1. This holder relies on a 0.2mm ultra-thin flexible hinge for bending and clamping. Avoid forceful, large-scale, repeated bending, as excessive twisting can cause hinge breakage, permanent whitening of creases, and fragments that can easily scratch fingers. If cracking or damage occurs, stop use immediately and do not continue to use the damaged holder to clamp lenses and specimens
2. This product is made of PLA plastic, which is prone to softening. Do not place it near high-temperature light sources such as windowsills, heaters, or desk lamps to avoid deformation
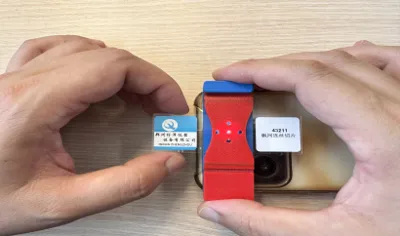
3. The accompanying biological sections are thin glass slides with sharp edges. When handling or inserting them into the holder's slide slot, pinch the label area. Do not directly touch the cutting edges of the slides to prevent skin cuts
4. When loading slides, push them gently into the holder's slot; do not force them, to prevent the slides from cracking under pressure. After observation, first remove the section, then store the holder; do not store glass slides clamped within the holder for extended periods
5. Prioritize observation using soft, natural indoor light transmission. If using a desk lamp for supplementary lighting, maintain a distance of at least 10cm between the lamp and the holder. Strong, close-range, prolonged illumination will heat the PLA structure of the holder, causing softening and deformation. Do not use lasers or strong flashlights to directly illuminate the lens and eyes, as strong light can damage the retina
Comment & Rating (0)