Basic Raspberry Pi Workstation / Breadboard Holder


Print Profile(1)
Description
============= BREAK NOTICE =========================
Hello 3D printing friends!
Due to work requirements, studies and home renovations we will be little to not active on MakerWorld for the next coming weeks. Should there be remarks / feedback that you would like to share and would love to see implemented in our work or certain models, please send us a DM as those will be much easier to find and read after coming back. General comments etc on models tend to get buried which is unfortunate and is something we would like to avoid as we take your feedback seriously.
We apologize for any inconvenience our absence might cause but rest assured all messages will be addressed upon our return to designing!
Cheers!
====================================================
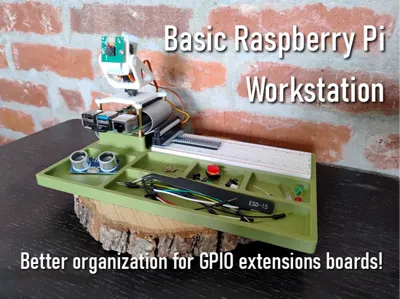
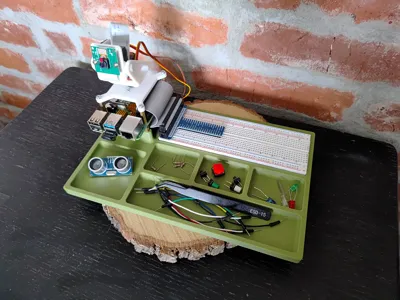
Basic Raspberry Pi Workstation / Breadboard Holder / Prototyping Station
Say hello to a new but simple entry for learning (and organizing) electronics and programming :)
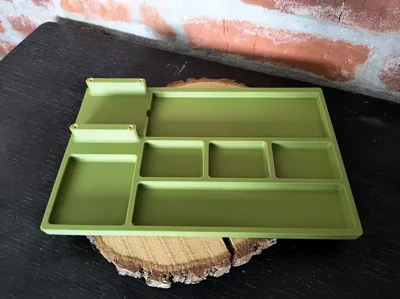
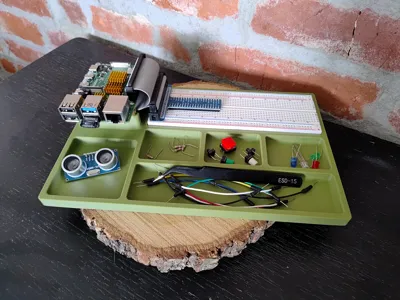
This basic workstation / breadboard holder will help keeping your components together a little better as well as provide compatibility with the GPIO extensions boards that are often provided in starting kits. The ribbon cables can be quite stubborn and force your breadboard to sit in a certain position.
No more! Now everything is neatly tucked away whilst providing full access to all GPIO pins on the Raspberry Pi.
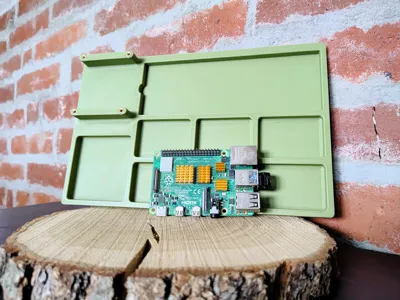
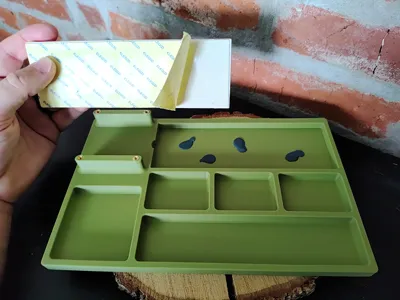
Size of workstation = 240mm x 152mm
Compatible with Bambu printers: X-series, P-series, H-series and A-series (except for A1 mini due to size restrictions, sorry)
Instructions
- Make sure you printer is calibrated and the build plate is clean! (Large object)
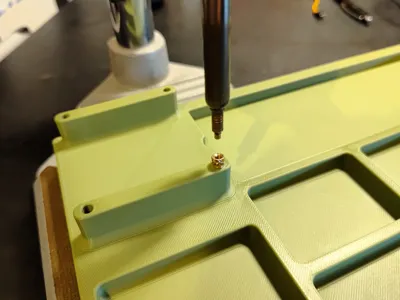
- Inserts 4x M2,5 threaded inserts into the workstation (M2,5 is the default screw size for the Raspberry Pi)
- Use standoff to mount the RPi (often included with starter kits)
- Insert a breadboard by using the sticky pad or use some putty for easier future removal.

Tips
- None, just hit print :)
Print Settings (recommended)
- Standard settings with 3 walls (for inserts)
- No supports needed
- Gyroid infill
Looking for the Pan / Tilt mount as shown in the pictures? Click on the image below :)

If you like the model, please consider leaving a like and a rating with pictures of your makes! It is encouraging to see my creations out there.
Also consider leaving feedback regarding the models as it will help improve my overall skills as a beginner 3D designer!
Want to support me with some coffee? :)

Boost Me (for free)
Your support is much appreciated :D
Membership
Interested in selling physical prints of my work? The commercial license is now available!
License
You shall not share, sub-license, sell, rent, host, transfer, or distribute in any way the digital or 3D printed versions of this object, nor any other derivative work of this object in its digital or physical format (including - but not limited to - remixes of this object, and hosting on other digital platforms). The objects may not be used without permission in any way whatsoever in which you charge money, or collect fees.
Comment & Rating (0)