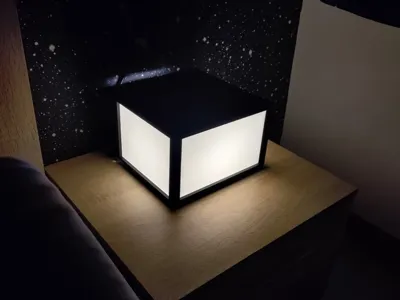
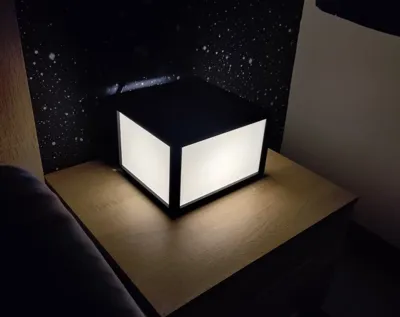
Nightstand lamp


Print Profile(1)
Description
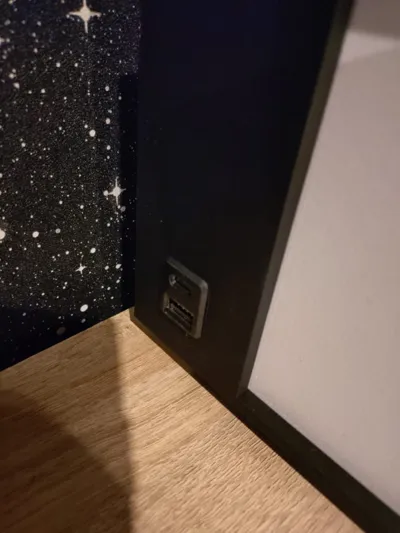
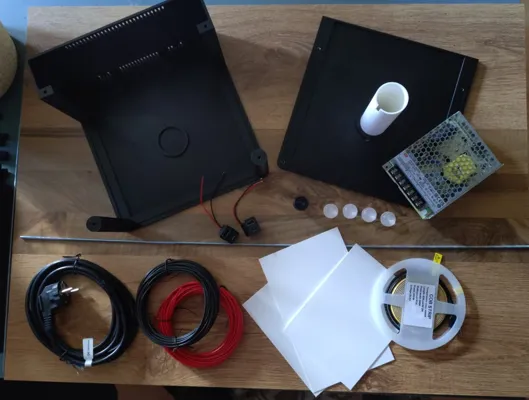
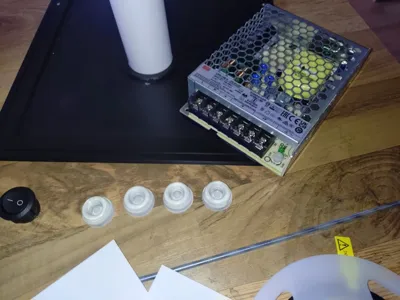
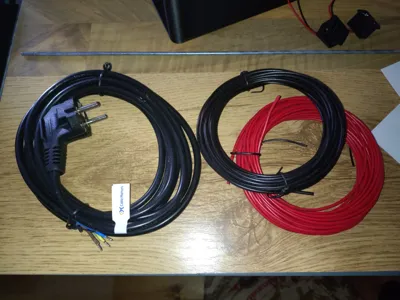
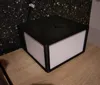
This bedside lamp is a self-developed design with integrated USB charging sockets. Of course, you can also use it as cozy lighting, for example, in the living room. No one says the project is tied to the bedside table ;) I wanted to design a lamp to my taste that simultaneously includes 4 USB charging sockets and supplies them with power properly, so that devices with large batteries can also be charged quickly. The power supply feeds the charging sockets with 3 A, allowing smartphones, smartwatches, power banks, etc., to be charged stably, with maximum power, and especially simultaneously. Furthermore, the power supply has enough power reserve to stably power the light source, which draws up to 1 A and thus 10 W, of course
All my models and associated material lists can also be found on my page at
https://pat3d.mc-reloaded.de/Kat01.php
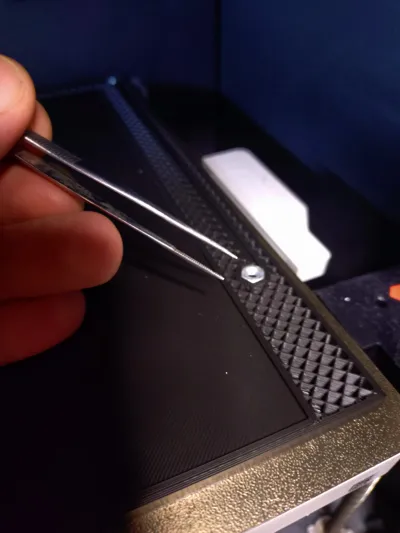
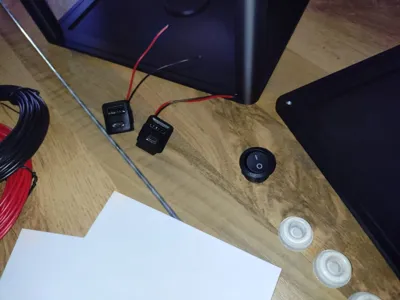
I chose this size (dimensions of the lamp in mm (L × W × H): 240 × 240 × 136 or 146 mm height with the rubber feet I used) because there is still enough space on the lid to, for example, place or even attach printed figures or other decorative items. I haven't been able to decide on a suitable figure yet, but when I do, I'll let you know. I printed the panels from white PLA. Of course, you can also use other colors here, although I cannot provide information on how this affects brightness. However, if you print the panels with transparent filament, which ultimately strongly resembles frosted glass, I could imagine that an even higher light output could be achieved – even with colored panels. There is sufficient space for air circulation in the housing. This is supported by ventilation slots on the back of the housing, which prevents heat buildup from the light source and power supply. Note 1: I printed the panels with a layer height of 0.16 mm and a first layer thickness of 0.2 mm. This results in a total thickness of 0.84 mm. If you want to change the layer height, make sure that the total thickness of 0.84 mm is not exceeded if possible. Note 2: This involves working with electrical components. This is fundamentally feasible for everyone, even if you don't have extensive knowledge of electrical engineering. Nevertheless, I want to point out that careful work is required, especially on the 230V side of the power supply, as errors there can lead to significant property damage or injuries. If you are unsure, it is not shameful to ask someone for help
License
You shall not share, sub-license, sell, rent, host, transfer, or distribute in any way the digital or 3D printed versions of this object, nor any other derivative work of this object in its digital or physical format (including - but not limited to - remixes of this object, and hosting on other digital platforms). The objects may not be used without permission in any way whatsoever in which you charge money, or collect fees.
Comment & Rating (0)