Kitchen Paper Holder - Push Button


Print Profile(1)

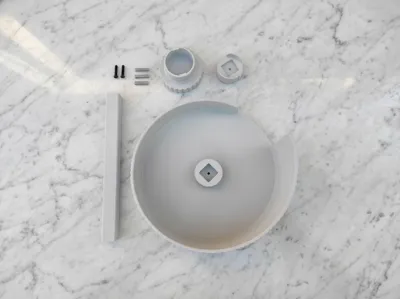
Bill of Materials


Description
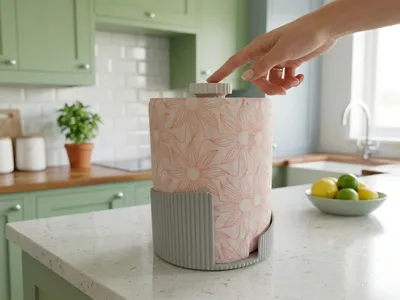
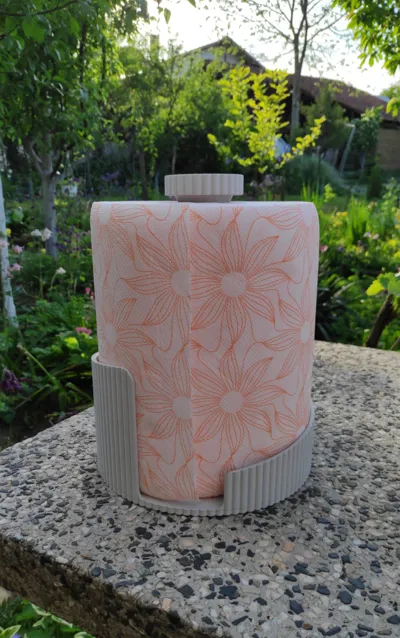
Kitchen Paper Holder - Push Button
A stylish and practical kitchen paper holder with a sleek, modern design that fits perfectly in any kitchen.
The special top button locks the roll in place and allows you to easily tear off paper with just one hand—no unrolling or unnecessary hassle. Very convenient if your hands are wet, keeping the rest of the roll dry.
Advantages:
- push button to lock the roll in place
- modern and sleek design
- adjustable stand height
- the button also serves as a carrying handle
- suitable for most kitchen roll sizes
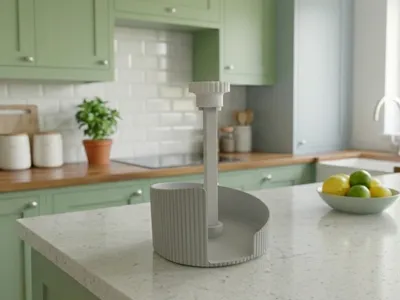
Model description:
This model is designed for rolls with an outer diameter of up to 190 mm and an inner roll hole of 43 - 45 mm. The roll height is 223 mm
Adjust the stand height according to the roll height. To do this correctly, measure your roll and subtract 14 mm. Use the resulting number to set the correct length of the holder in the slicer. Be careful when entering the number. The holder must be positioned on the long side. Turn off (uniform scaling) and set the given value only along the X or Y axis, depending on its orientation.
Required additional accessories:
- M3 Socket Head Cap Screws (SHCS) - M3x16 - 2 pcs
- Compression Spring - 0.5x5x20 - 3 pcs
Assembly Instructions:
Use the drawing for easier visual orientation of the parts.
1. Place the locking mechanism on one side of the holder. Use an M3x16 screw to secure it.
2. Place the opposite side of the holder in the center of the base. Use an M3x16 screw from the bottom to secure it.
Note: Before proceeding to step 3, insert the springs into the 3 holes of the locking mechanism. Then insert the paper roll.
3. Position the button so that it slides into the groove of the locking mechanism (there are arrows on the button for easier positioning). Then press it and turn it clockwise until it stops turning. A full turn is 90 degrees. Release the button. It is now locked, and whenever you pull the paper before tearing it off, simply press the button below to lock the roll.
To insert a new roll of paper, follow the reverse procedure by pressing the button and turning it counterclockwise to release it.

You can Follow me, so you will always be among the first to experience the next unique project.
Boost Me (for free)
Every model starts with an idea, a piece of white paper and inspiration.💚 If you like this model, Boost me and turn the next idea into reality.
License
You shall not share, sub-license, sell, rent, host, transfer, or distribute in any way the digital or 3D printed versions of this object, nor any other derivative work of this object in its digital or physical format (including - but not limited to - remixes of this object, and hosting on other digital platforms). The objects may not be used without permission in any way whatsoever in which you charge money, or collect fees.
Comment & Rating (0)