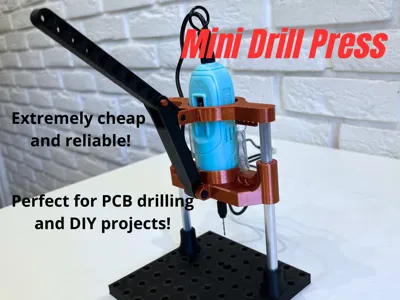
Mini Drill Press


Print Profile(1)

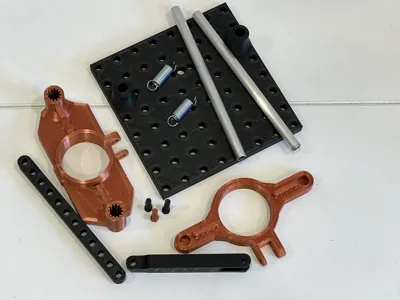
Bill of Materials
- Tension Spring (approx. 8x31.5mm) x 2:
- Aluminum 8mmx140mmtube x 2:
- M3 Bolt & Nut x 1:
Description
Precise Mini Drill Press Stand for Rotary Tools (Perfect for PCBs!)
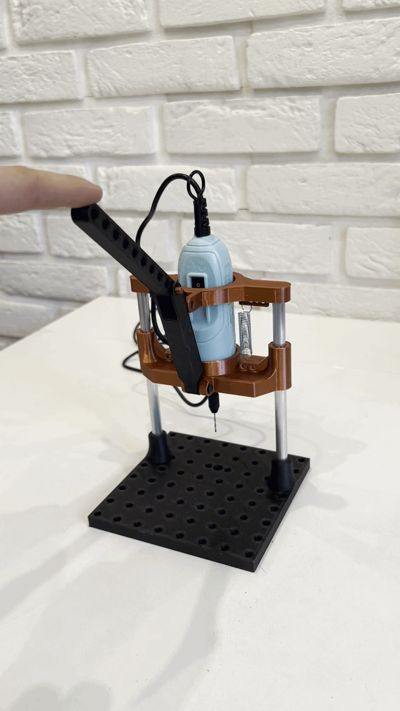
Transform your handheld rotary tool into a precise vertical drilling station with this lightweight, stable, and low-cost mini drill press. Designed specifically for electronics enthusiasts and model makers, it provides smooth vertical movement for drilling accurate holes in PCBs or fine craft projects.
This design is optimized for minimalism. It uses very little filament, requires minimal non-printed hardware, and boasts a stable parallel linkage mechanism that ensures vertical precision.
🔥 Features
- No Supports Needed: Designed for a completely hassle-free printing experience right off the build plate!
- Minimalist & Fast Print: Uses very little filament; print only what you need.
- Stable & Precise: Smooth vertical guide movement with no side-to-side play.
- Parallel Linkage Mechanism: Provides ergonomic leverage and consistent vertical alignment.
- Adjustable Leverage: The linking arm offers multiple pivot points to adjust the drilling depth and operating force.
- Quick Mount: Secure your tool with a simple M3 nut and bolt.
- Low Cost: Built using cheap aluminum tubing from a local hardware store.
🛠️ Technical Specifications
- Designed for: Action Ferm rotary tools (and similar generics).
- Tool Holder Inner Diameter: 37 mm (Please check your tool before printing).
- Main Materials: Requires 8mm aluminum tubing for guides.
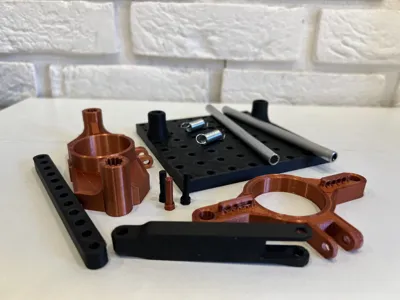
🏗️ Bill of Materials (BOM)
3D Printed Parts:
- Base.stl
- Tool_Holder.stl
- Top_Cap.stl
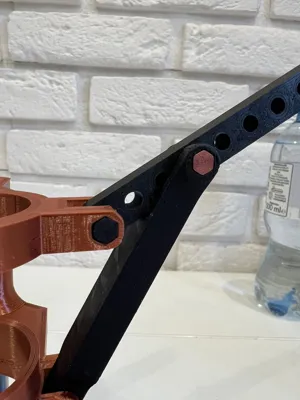
- Lever_Arm.stl
- Linking_Arm.stl
- Connecting_Pins.stl (x3 required)
- Drill_Press_Assembled_model.stl (Optional: Use this as a 3D visual reference for assembly)
Non-Printed Hardware:
- Aluminum Tubes: x2 (Diameter: 8mm, Length: 140mm / 14cm). Available at most local hardware/DIY stores.
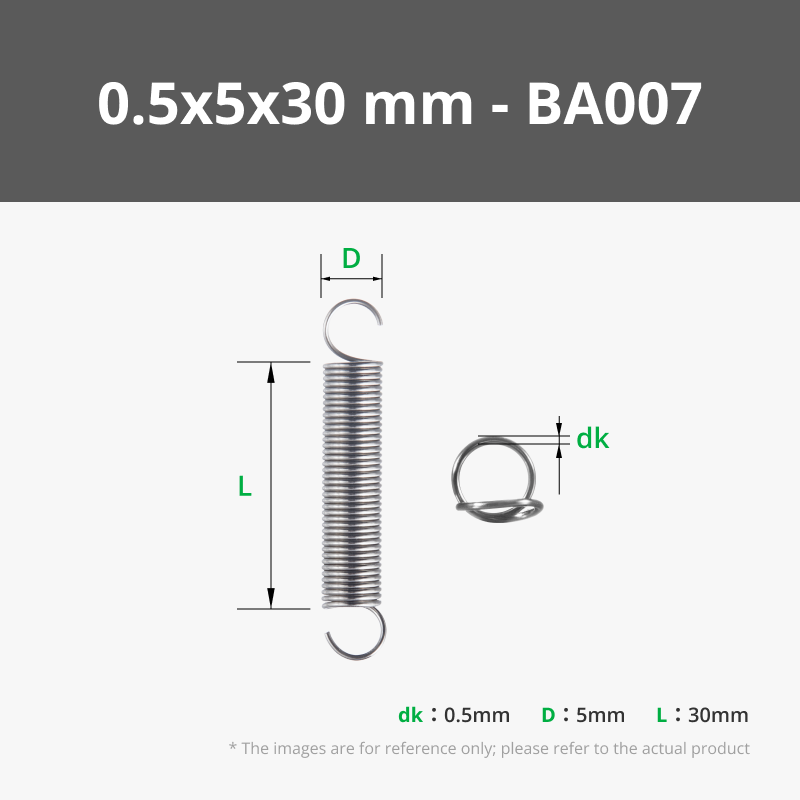
- Tension Springs: x2 (Approx. 8.0mm diameter x 31.5mm length). Most similar tension springs of this size will work.
- M3 Bolt & Nut: x1 of each (For securing the tool in the holder).
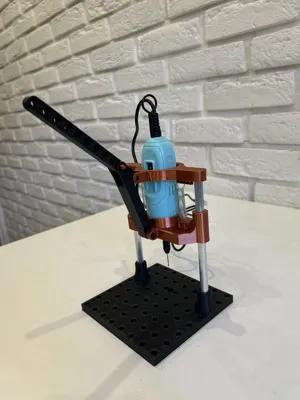
🚀 Assembly Instructions
Assembly is incredibly straightforward. No complex tools required! (Tip: If you are unsure about any step, just open the included Drill_Press_Assembled_model.stl in your slicer to see exactly how all the parts fit together).
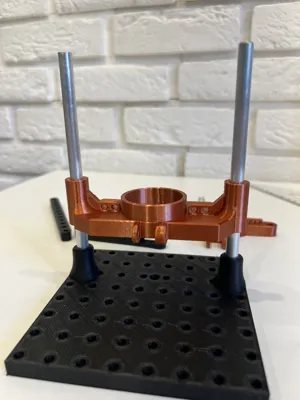
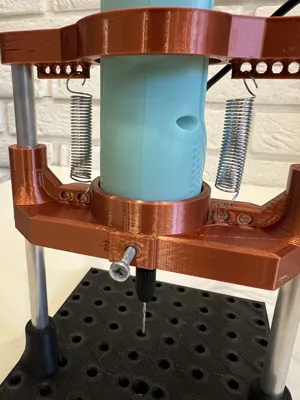
- Guide Installation: Press the two 8mm aluminum tubes firmly into the holders on the Base.
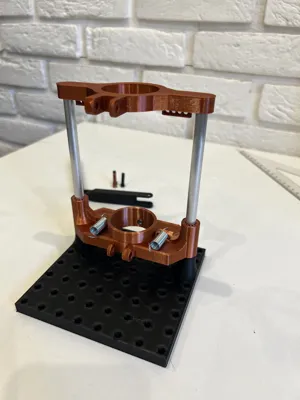
- Holder & Top: Slide the Tool Holder onto the tubes, then press the Top Cap onto the top of the tubes.
- Springs: Connect the Top Cap to the Tool Holder using the two tension springs.
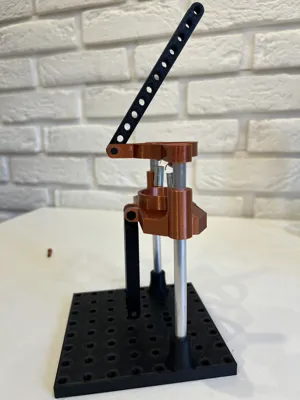
- Leverage System:
- Attach the Lever Arm to the Top Cap using one printed pin.
- Connect the Linking Arm between the Lever Arm and the Tool Holder using the remaining two pins.
- (Recommendation: For optimal balance, mount the linking arm in the 3rd hole of the Lever Arm, counting from the pivot point. Feel free to experiment for different depth/force settings).
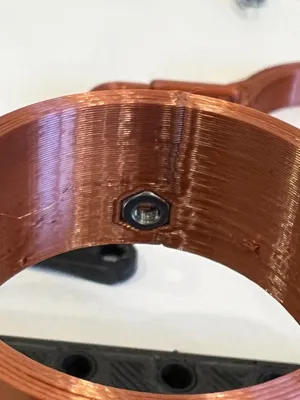
- Tool Mount: Install the M3 nut into the hex slot on the inner ring of the Tool Holder (see photos).
- Finalize: Insert your rotary tool, tighten the M3 bolt, and you are ready to drill!
🖨️ Printing & Materials
Recommended Materials:
While the prototypes in the photos are printed in Professional Lab PLA Silk Copper and PLA CF Black (for a sleek look!), the mechanism experiences very low stress. Any standard filament (PLA, PETG, ASA) will work perfectly fine.
Print Settings:
- Supports: NONE! All parts are designed to print perfectly without any supports.
- Infill: 20-30% (for stability).
- Walls/Perimeters: 3-4 (for rigidity on the tube mounts and lever).
📬 Need a Custom Size?
If your rotary tool has a different body diameter and does not fit, don’t hesitate to ask for a custom adapter file! Just drop a comment with the precise diameter of your tool, and I will do my best to upload a modified holder as soon as possible.
Happy Drilling! If you like this design, please consider giving it a 👍 and uploading a photo of your print!
Comment & Rating (1)