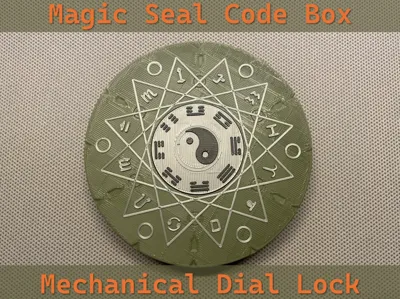
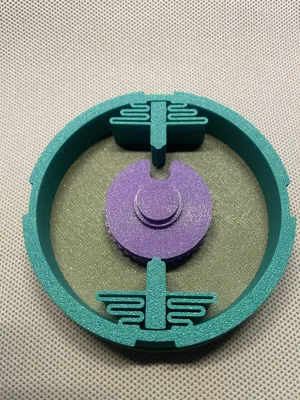
Magic Seal Code Box


Print Profile(2)
Description
A magic box combining Eastern Bagua and Western constellations, blending magic and mechanics, awaits your opening
You can place a ring, a coin, a TF (MicroSD) card, a secret message, or simply your WiFi password inside
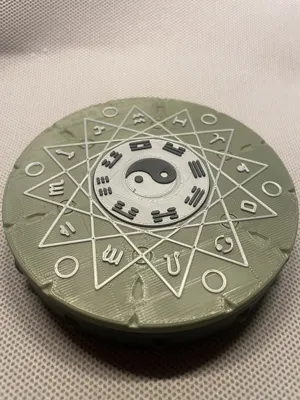
Requires only 85g of filament, 3 and a half hours of printing time (A1 mini). No supports needed. If your material's sinkage rate is similar to mine, no glue is necessary
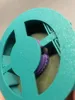
It is highly recommended to print an additional ”observation box“ in the second print profile. The hollow bottom makes it easy to calibrate the password and understand the opening method when you first use it
If you are interested in challenging more passwords, you can print the “custom password” Wheel Pack and set your own password by adjusting the positions of the driving pins (“Fly”). (This part is an additional exploration; the principle is correct but not guaranteed)
Basic Logic
A mechanical dial lock, similar to those found on safes, consists of three discs: A is the Drive Cam, which drives the rotation of B and C, aligning their Gates to the same position, allowing the Fence to be pushed and the box to open
Installation and Password Setting: (I wrote this using Chinese with some English words. If anything is unclear, please leave a comment, and I will try to reply as soon as possible, usually within the same day)
1. Install the Fence into the support ring, then install the latch into the Fence

2. Install the driving pins (“Fly”) onto dial wheel A and dial wheel B. Wheel A has a hexagonal side, and wheel B has driving pins on both sides. Please install both facing the opposite side
Then pass wheel B, wheel C, and 3 spacers through the Wheel Post in sequence: spacer-C-spacer-B-spacer ---A
Important! Please place the print surface of disc B (i.e., the print bed contact surface) facing disc C, otherwise the password will be different from my demonstration


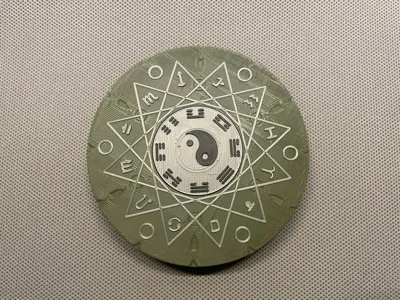
3. Important! To use my demonstration password, arrange the outer ring disc and the Bagua middle disc as shown, aligning 乾 (☰) qian with Gemini (icon updated). The Gate on the reverse side of disc A needs to be in the same direction as them

4. Align and install the 4 connecting protrusions of the support ring. Please ensure the Fence and the Gate are aligned in the same direction

5. Hold the disc assembly consisting of dials B and C by hand, install it into position A, ensuring the Gate remains in the same direction
Install the bottom box. It is highly recommended to first test with the “observation box” from print profile 2, as shown below
After pressing vertically downwards, rotate clockwise (to the right) to lock the box

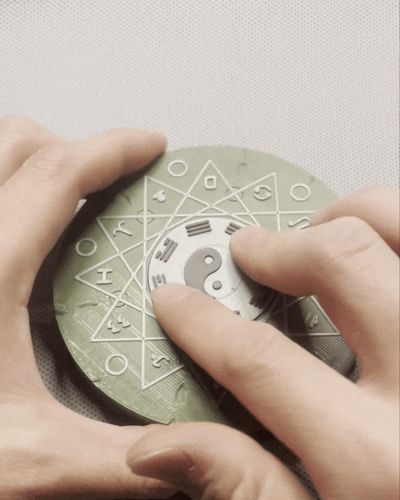
6. Observe the relationship between the password and the dials
a. After randomly moving the discs, the Fence and the Gate no longer align, so the box cannot be opened

b. Rotate the Bagua clockwise. After hearing and feeling a click, and 乾 (☰) qian aligns with Gemini (icon updated), rotate clockwise one more full turn, letting 乾 (☰) qian align with Cancer
At this point, the Gate of disc C aligns with the Fence

c. Then, rotate counter-clockwise (to the left). After hearing and feeling a click, and having passed Gemini, stop between Aries and Taurus. At this point, the Gate of disc B aligns with the Fence
Then rotate clockwise a short distance until 乾 (☰) qian aligns with Gemini. At this point, the Gate of disc A aligns with the Fence
All 3 Gates are now aligned
You can now open the box by rotating counter-clockwise

Notes:
1. It is recommended to print the dial assembly and shaft using PETG, as I find it smoother and it helps prevent binding. You can use some lubricant. It might feel a bit sticky at first, but it will improve with a few turns
2. If you make a wrong turn at any step, you must restart, which means turning clockwise past Gemini after hearing the click, then turning one more full rotation
3. If, during initial assembly, 乾 (☰) qian does not align with Gemini but with something else, then the positions (1 to the right, 1.5 to the left) are similar (this relationship changes if the print surface of disc B is incorrectly oriented towards A). Other symbols from Bagua can also be used
4. For more advanced play, use the dial assembly from print profile 2 to redefine the positions of the driving pins (Fly) yourself. This will change the password relationship, and you can experiment using the observation bottom box
The video is on Bilibili
Magic Seal Code Box_bilibili_bilibili
License
You may create derivative works based on this object, provided that all such derivative works are published exclusively on the MakerWorld platform and include proper attribution to the original creator. You may not share, upload, host, distribute, or publish this object—or any derivative work of this object—on any other digital platform, marketplace, or distribution channel. Commercial use of this object and any derivative works is strictly prohibited. This includes, but is not limited to, selling, renting, sublicensing, or using the object in any context in which you receive monetary compensation or other financial benefits.
Comment & Rating (0)