Search models, users, collections, and posts
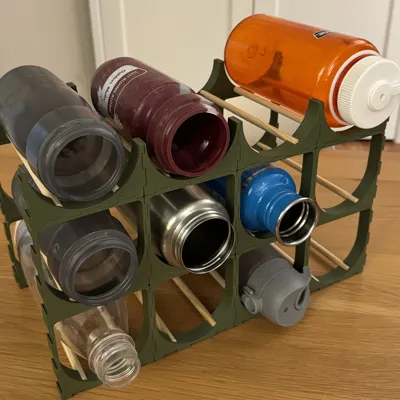
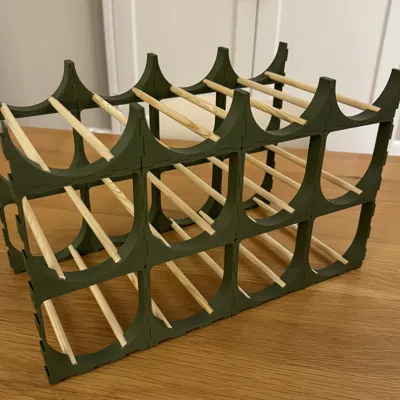
Bottle rack
IP Report


Print Profile(3)

Stacked for 12 water bottles on 1 build plate - POOR SURFACE QUALITY
Designer
10.6 h
1 plate
Unstacked Version - Clean Surface
5.7 h
4 plates
12-Bottle Stacked Rack (PLA/PETG Support) - Non-Mini
14 h
2 plates
Open in Bambu Studio
Boost
281
1191
82
71
785
365
Released
Description
I wanted to challenge myself to design a water bottle rack that could hold 12 water bottles and also be printed/assembled in less than 1 day.
Note: pictured 32oz Nalgene only fits on top row
Non-Printed Parts
- for each bottle x2 - 5/16" (8mm) wood dowels cut to 7.5" (190mm)
- UPDATE: there are now remixes for printed dowels if thats your jam.
Print Settings
I suggest printing a couple of the smaller top models to test tolerances/fit before full send. The parts off my printer fit fairly tight and took some force to assemble.
*Stacked print settings*
- Layer Height: 0.2mm (required for stacked model stls)
- Perimeters: 2 is sufficient for structure
- Infill: 10-15%
- Bottom shell layers: 4
- Ironing: (Optional) All top surfaces
Example of sliced plate printing in 10hrs for 12 bottles (no ironing)

Assembly
- Assemble both printed part sides
- Attach cut dowels to one side
- Set the dowel side on a flat surface with dowels facing up
- Install the other side - place second assembled side on top aligning the dowels and getting them started into the holes. Start from one side pressing the dowels until they are fully seated.
License
This user content is licensed under a
Creative Commons Attribution-Noncommercial
Comment & Rating (82)