


Print Profile(1)

Description
BOLD — Where Function Meets Elegance - Welcome!
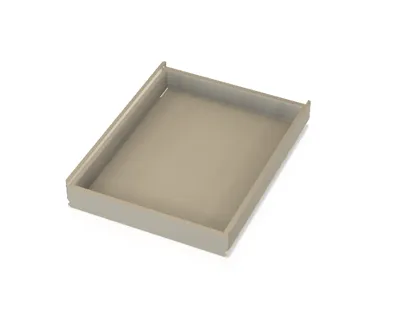
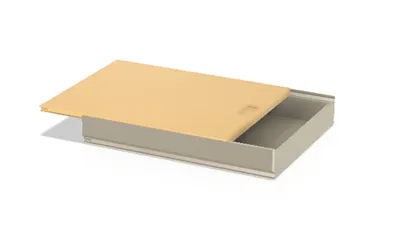
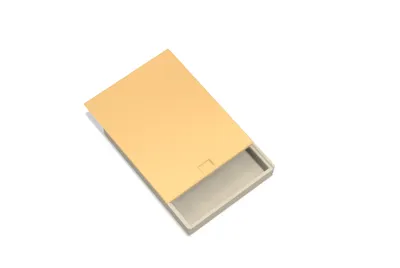
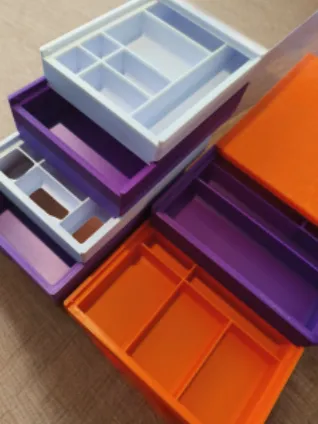
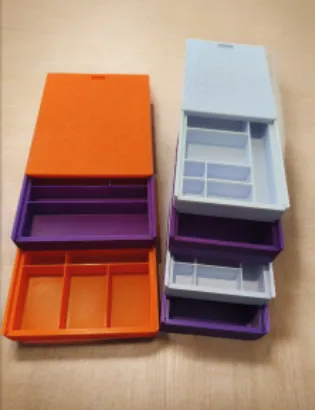
Versatile, Slide-Out, and Customizable Organizational Case
This case serves to enhance convenience in organizing and safeguarding a multitude of articles pertinent to our daily existence, whether within the confines of our homes, professional offices, or productive workshops, including but not limited to:
- rings, earrings, bracelets, and various other adornments
- fasteners, washers, and threaded nuts
- haberdashery, artistic pigments, and artisanal provisions
- compact electronic constituents, printed circuit substrates
- gaming tokens, dice, and various board game components
- angling requisites – including hooks, bobbers, fishing lines, weights, and artificial lures
- assorted seeds and general grains
- compact implements
- horological constituents
- stationery and office requisites
- USB flash drives, solid-state drives, SD cards, and other computing paraphernalia
- minor additive manufacturing constituents, implements for your Bambu Lab 3D Printer
- tea sachets or culinary seasonings
- electrical terminals, connectors, fuses, binding posts, and other electrical constituents
- miscellaneous items
You have the option to print one of the pre-configured versions or to fashion your own bespoke organizational case
Project Advantages:
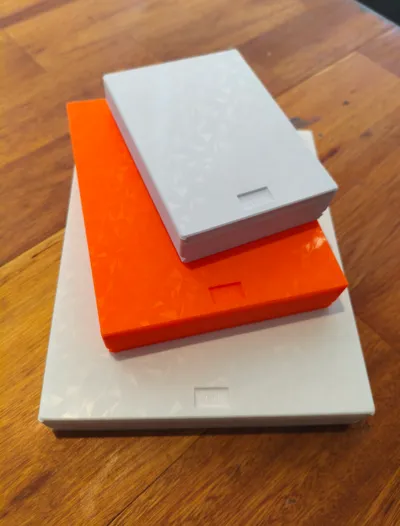
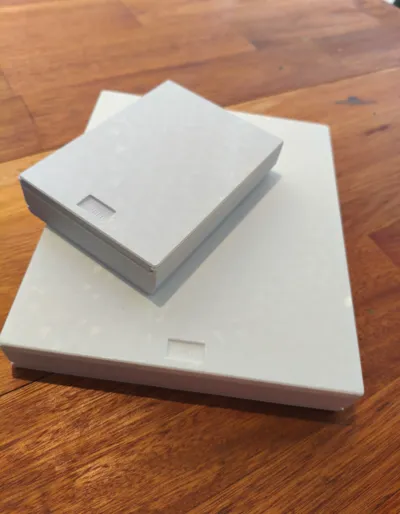
- The case is offered in three distinct sizes and two varying heights, culminating in a total of six possible configurations
- The internal compartments are entirely adaptable: you retain the autonomy to specify both the quantity and dimensions of the dividers, even allowing for an amalgamation of diverse sizes within a single case
- You are empowered to self-assemble (DIY) the case assembly by interlinking the compartment pieces, reminiscent of a Tetris-like configuration
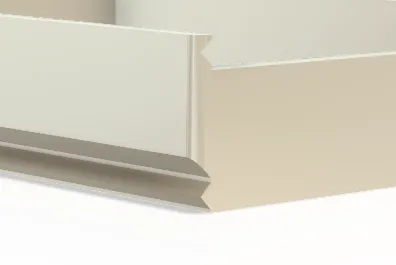
- The cases are designed for convenient vertical stacking
- You may configure your cases with varying heights and nonetheless retain the ability to stack them efficiently
Assembly Instructions:
You may select and print one of the pre-customized plate options provided within the Bambu Studio project. Alternatively, you are at liberty to modify one of the DIY plates according to your specifications, thereby crafting a fully personalized case
A further alternative involves importing the STL files into your favored CAD software, constructing your case within that environment, and subsequently generating your own bespoke STL file
Dimensions Offered:
- The case has been engineered with the subsequent internal dimensions: 120x80, 160x120, and 200x160 mm (the final external measurements will be 10mm greater)
- For each of the aforementioned dimensions, you are afforded the choice between two internal compartment heights: 20 or 30 mm (the ultimate external height will be 5mm greater)
- To configure the interior of the case, you may select from the subsequent compartments in any desired permutation: 20x20, 40x20, 60x20, 80x20, 120x20, 40x40, 60x40, 80x40, 120x40, 120x80 mm
- Ultimately, you possess the option of an unpartitioned case (devoid of compartments) or one partially furnished with your preferred compartments, arranged in any desired configuration


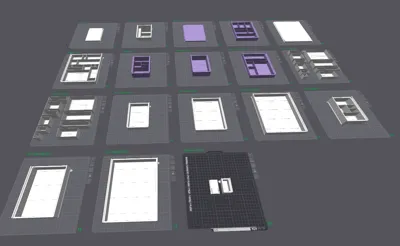
The subsequent models are pre-configured within the Bambu Studio project, allowing for direct printing:
- Plate 1: Lid 120x80
- Plate 2: Case 120x80x20 (internal dimensions) with mixed compartments
- Plate 3: Lid 160x120
- Plate 4: Case 160x120x20 (internal dimensions) with mixed compartments
- Plate 5: Lid 200x160
- Plate 6: Case 200x160x20 (internal dimensions) with mixed compartments
- Plate 7: Case 120x80x30 (internal dimensions) with mixed compartments
- Plate 8: Case 120x80x30 (internal dimensions) empty – without compartments
- Plate 9: Case 160x120x30 (internal dimensions) partially empty, with some compartments

Do-It-Yourself Components
The ensuing models serve as Do-It-Yourself (DIY) components. Should you desire to print a case devoid of internal dividers, simply select and initiate printing of one of the models found on plates 9, 10, 11, 12, 13, or 14
- Plate 10: Compartment kit with 20mm height - do not print in isolation
- Plate 11: Compartment kit with 30mm height - do not print in isolation
- Plate 12 DIY – Case 120x80x20 (internal dimensions)
- Plate 13 DIY – Case 120x80x30 (internal dimensions)
- Plate 14 DIY – Case 160x120x20 (internal dimensions)
- Plate 15 DIY – Case 160x120x30 (internal dimensions)
- Plate 16 DIY – Case 200x160x20 (internal dimensions)
- Plate 17 DIY – Case 200x160x30 (internal dimensions)
- Plate 18: Tolerance Test – print this to ascertain if your printer's tolerance is suitable for the design; should the lid exhibit resistance or jamming during sliding, an adjustment to the tolerance (User Customized Offset parameter) will be requisite


It is advisable to conduct this test prior to printing the full-scale models, thereby preempting any wastage of time or filament should tolerance discrepancies arise
Should you desire an interior configuration featuring personalized divisions, please refer to the subsequent instructions
Personalization Protocol:
Procedural Steps for Constructing Your Personalized Case in Bambu Studio:
- Ascertain the optimal compartment height to fulfill your specific requirements: available options encompass 20 or 30 mm in elevation
- Determine the case dimensions that best accommodate your necessities: 120x160, 160x200, and 200x240 mm
- Select the DIY plate that exhibits compatibility with your prior selections – for instance, if your preference is for a case with a 20 mm height and a 120x160 mm dimension, you are advised to utilize the compartments from Plate 10 for the customization of Plate 13
- On Plate 13, perform a right-click on the case, and then proceed to select the “center” option

Kindly note: I have already imported the models in a pre-centered state, therefore this option may appear unavailable – in such an instance, this step may be bypassed
Subsequently, click upon Plate 13 to ensure its selection, which will be indicated by a darker hue
- From Plate 10, choose one of the compartments, then click ‘clone’ (the cloned item will manifest on Plate 13, which was previously selected); proceed to right-click the newly cloned compartment on Plate 13 and select ‘center’ (always centralize compartments prior to initiating any movement)
- Click the compartment newly positioned on Plate 13 and activate the ‘move’ tool, ensuring that the ‘object measurements’ option is enabled
- While still within the ‘move’ tool, input the requisite displacement values into the X and/or Y fields to precisely position the compartment as desired; a helpful tip: all compartments are dimensioned in multiples of 10 mm, therefore, for precise placement, employ displacement increments of 10 mm; with continued practice, you will acquire proficiency in navigating greater distances
- Should an additional compartment of the same dimensions be required, simply clone it anew, centralize it, and then reposition it
- Replicate the aforementioned process, encompassing steps F through I, to either fully or partially complete the case assembly
- Upon the culmination of your customized model, select all constituent objects on the plate (by holding SHIFT and dragging your mouse over them), then right-click and choose the ‘Merge’ option
- Preserve the project and commence printing


Observe that the object has been accurately situated within the upper right vertex
Procedural Steps for Constructing Your Personalized Case in CAD Software:
- Import the STL file into your CAD environment
- Replicate steps A through D, precisely as delineated previously
- Utilizing the functionalities within your CAD software, precisely position each compartment within the case to your desired arrangement
- For printing, export a fresh STL file encompassing the case, now personalized with the compartments you have incorporated
Helpful Recommendations:
- Employ a layer height of 0.2 mm and an infill density exceeding 10 percent
- It is advisable to utilize materials exhibiting minimal warping tendencies, such as PLA or PETG
- Print the lid with its upper surface facing downwards, in direct contact with the build plate, to achieve a superior finish (within the Bambu Studio project, I have already pre-positioned it correctly; however, if printing from the STL, remember to invert the lid's orientation)
- Print the cases in their upright orientation (as per the standard STL configuration), which negates the requirement for support structures; avoid inverting their position
- Subsequent to printing, allow the build plate to cool completely before attempting to remove the printed component (particularly the lid), as premature removal may lead to warping
- Refrain from employing support structures
Potential Issues:
- Slicing Anomalies:

This notification arises due to the compartments overlapping the frame, thereby occupying identical spatial coordinates. In this particular scenario, such an occurrence is entirely normal (as can be verified by observing the slicing ‘preview,’ which confirms proper integrity). You may safely disregard this advisory

This message might manifest because certain portions of the object do not fully make contact with the build plate. The design incorporates minor integrated supports that are adequate for stabilizing suspended elements, hence this message can be safely overlooked
Furthermore, it is crucial to recall not to enable support structures during slicing, as their activation would result in certain movable components of the design becoming fused
Nevertheless, ensure your printer possesses optimal settings for the successful execution of bridge printing
- Lid Warping:
This phenomenon occurred to me on one occasion, subsequent to the removal of a 200x160 lid without allowing the build plate to sufficiently cool. Therefore, I advise exercising prudence in this particular aspect
- Excessively Tight Fit of Components:
In such an event, it becomes necessary to augment the design’s tolerance (via the User Customized Offset parameter). Following this adjustment, I suggest proceeding with the printing of the tolerance test, which is located on Plate 18 of the project
Verify that the layer height is set to 0.20 mm
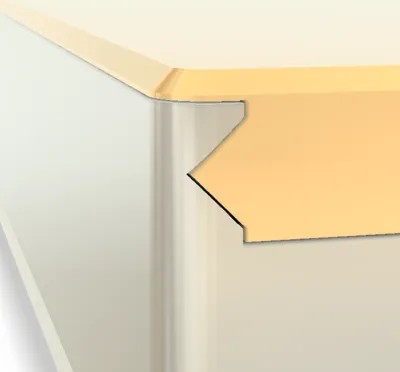
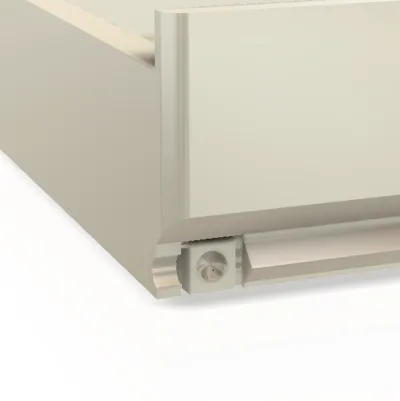
- Challenges in Fitting the Lid and Cases
A specific orientation is required for sliding the components into their designated interlocking rails, owing to the presence of a locking mechanism at the rail's terminus designed to prevent inadvertent lid opening. Observe with meticulous attention and, if necessary, attempt to reverse the orientation
Liked the design? Drop a like — it motivates me to create more!
Not printing yet? Save it to your collection so you don't lose it. And if you do print it, show me! I love seeing my creations come to life on the other side.
Want to support my work? A Boost makes all the difference — think of it as a little coffee for creativity!
And don't forget to rate with stars and leave a comment. Honest feedback is always welcome.
Thanks for stopping by — happy printing!
For commercial use, check out the licensing options:
https://patreon.com/BoldGifts?utm_medium=unknown&utm_source=join_link&utm_campaign=creatorshare_creator&utm_content=copyLink
The USER & SELLER LICENSE lets you commercialize all models here on MakerWorld.
Thank you,
Bold Team / Decio
Comment & Rating (0)