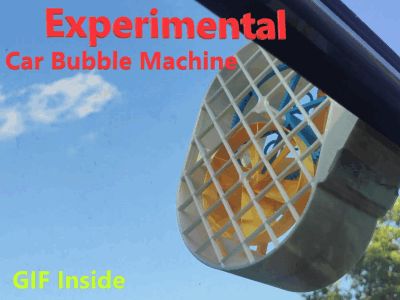
Car Bubble Machine


Print Profile(1)

Bill of Materials


Description
⚠️Safety Notice: Use this device entirely at your own risk. The creator accepts no liability for damage to your vehicle, other vehicles, or for any operation that conflicts with traffic regulations. Do not use on public roads.
⚠️Experimental prototype: Print this model only if you truly need it. In real-car tests, the soap splashes out quickly over bumps—this is a fundamental limitation. Still, the unit works well as a bubble machine in strong, steady wind or in front of a household fan.
Car Bubble Machine is a wind-powered bubble blower that sandwiches between your car window and door frame. The 90 mm fan spins in the slipstream and, through a 6:100 gear train, turns a 12-ring bubble wheel while the same airflow inflates a cloud of shimmering bubbles behind you.
💧 Lubricate all moving parts during assembly; silicone oil works well.
✨ Key Features
- Window-mount design: clamps to your car’s door window glass.
- No electronics: pure wind power — zero motors, batteries, or wires.
- Right- or left-side install: the model ships for the right door; mirror the body along the Y-axis to mount on the left door.
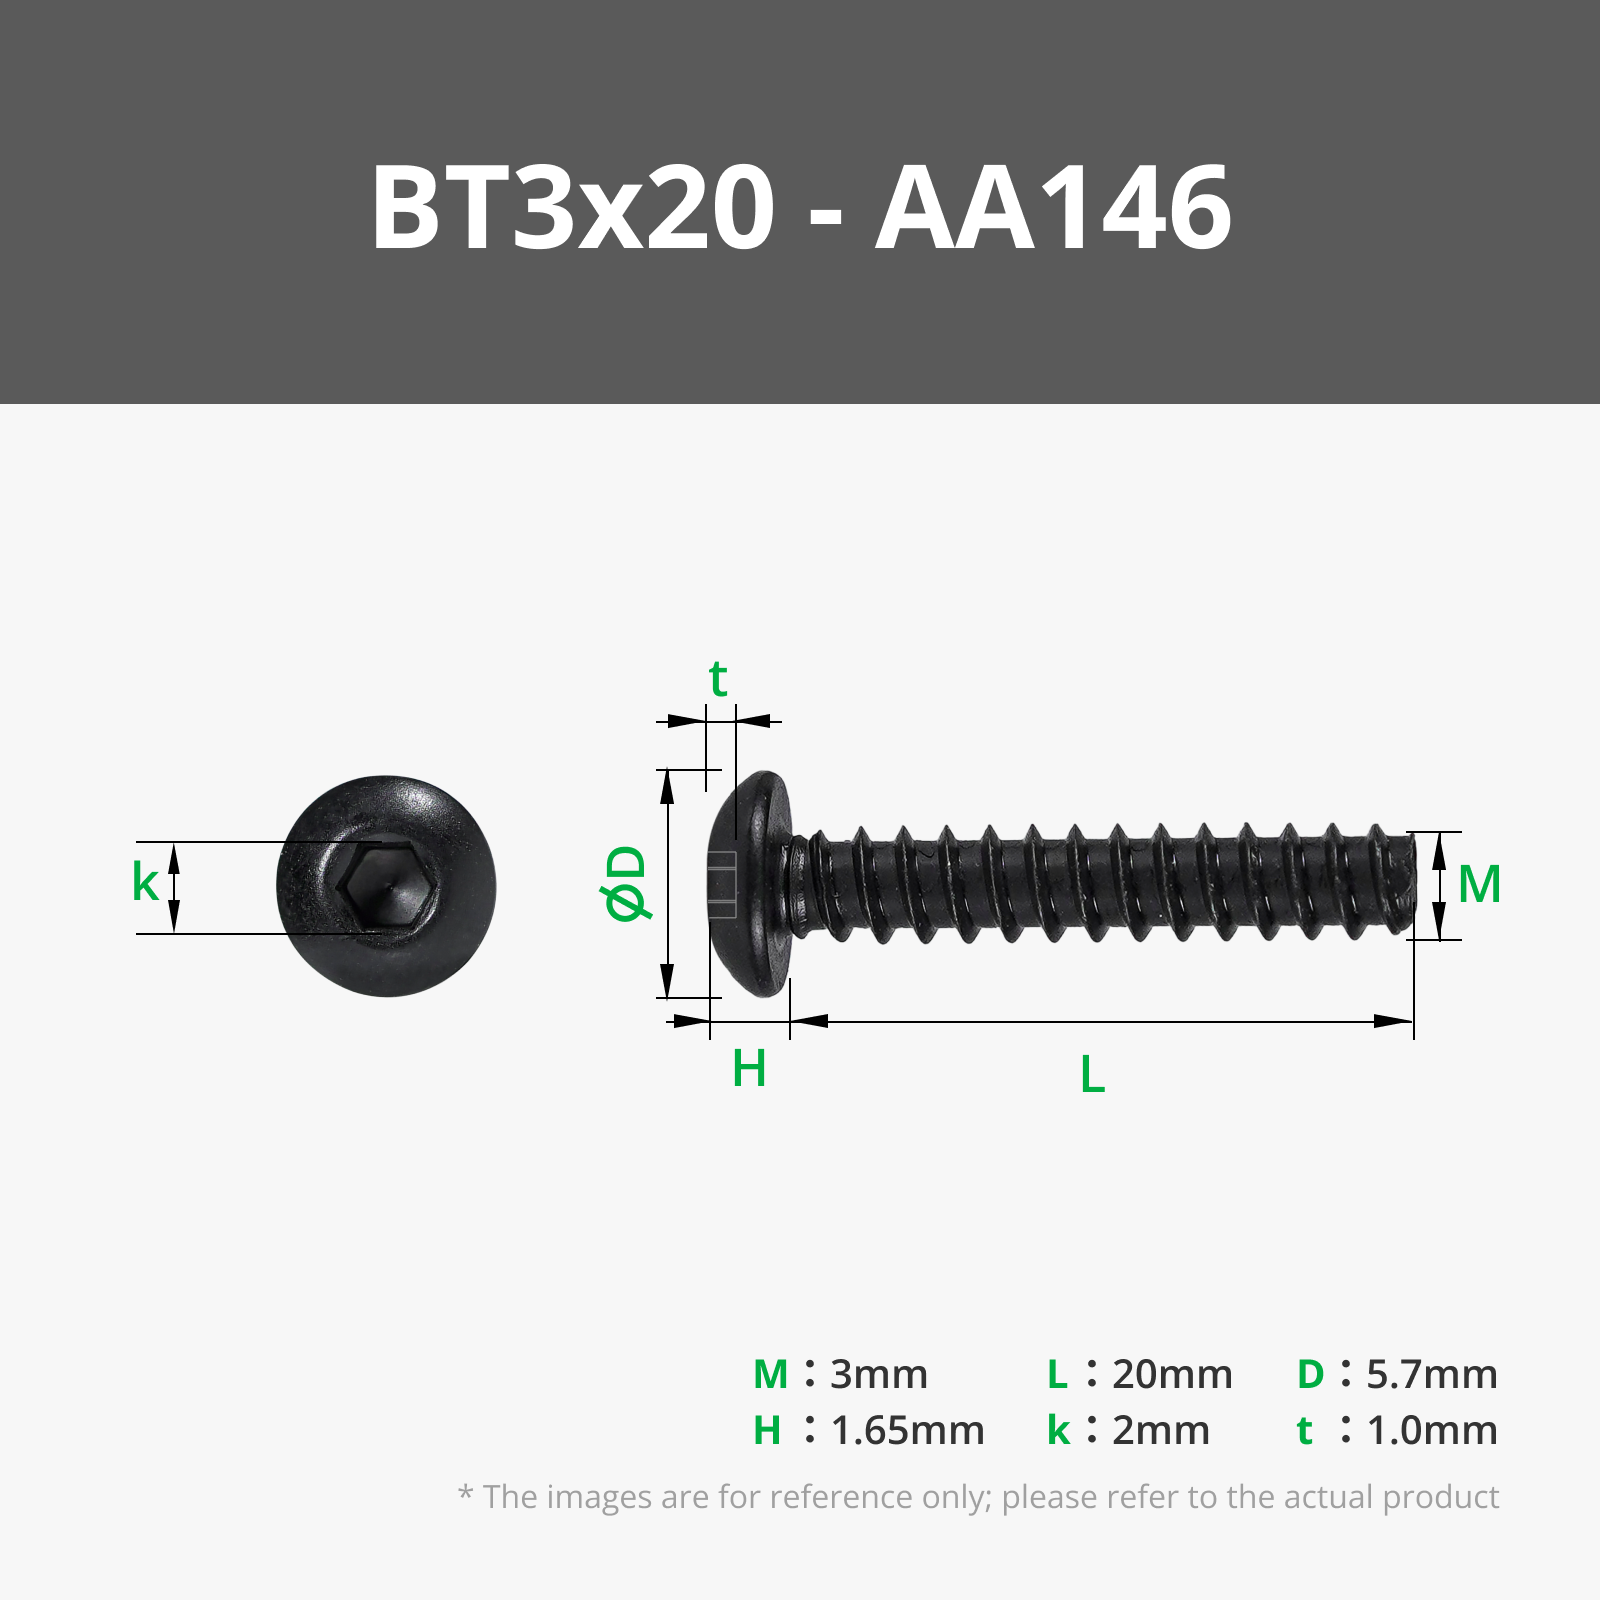
- Minimal hardware: only six 3 × 18 mm self-tapping screws and a strip of double-sided tape.
- Replaceable bushings: printed bushings can be swapped out easily when worn.
- Quick assemble
🚀Before You Start
- Always dry your filament before printing.
- Thoroughly clean the build plate before printing (especially for the bubble wheel).
- Review the required hardware list and read assembly tips.
- Watch the assembly and usage video tutorial.
🔧Required Hardware
- x6: 3 × 18 mm self tapping screws
- Double-sided adhesive tape.
- Silicon oil or another compatible lubrication oil.
🛠️Assembly Tips
- Lubricate all moving parts during assembly.
- Pre-use check: give the fan a strong puff of air; it should spin freely and engage the gear train.
❓FAQ
What are the potential hazards?
The device adds weight to the window glass; I can’t guarantee the glass won’t crack, especially on rough roads. Bubbles may also distract other drivers — do not use the machine on public roads.
How long does the reservoir last?
On a car, seconds before it splashes. In front of a household fan, for a couple of minutes.
What vehicle speed is the bubble machine designed for?
It starts working after 15-20 km/h. I didn't test it faster than 50 km/h.
Which filament is better, PLA or PETG?
PETG is preferable; hot weather can soften PLA.
Why would anyone want this?
If it is improved, to create a bubble trail behind a moving car—fun for kids, or to decorate a wedding convoy.
The reservoir seems too small.
This is a working prototype built to evaluate safety, functionality, and demand.
License
You shall not share, sub-license, sell, rent, host, transfer, or distribute in any way the digital or 3D printed versions of this object, nor any other derivative work of this object in its digital or physical format (including - but not limited to - remixes of this object, and hosting on other digital platforms). The objects may not be used without permission in any way whatsoever in which you charge money, or collect fees.
Comment & Rating (7)