Make your own Layered Sculpture - TUTORIAL


Print Profile(5)


Description
You want to make your own Layered Sculpture / 3D Art Picture? I have uploaded the negative part, which you can use to create a layered model of all models you want.
NOW With Samples from me:
R2D2 ( .3mf Template )
Batman ( advanced )
Mickey Mouse with flying ears ( very advanced :p )
https://makerworld.com/de/models/1143214#profileId-1145930

1of2: Workaround: If you download the .stl File
Update 04.03.2025: there are 2 Files now:
1. 1mm slat thickness & 2,5 Space
2. 1mm slat thickness & 1,5 Space

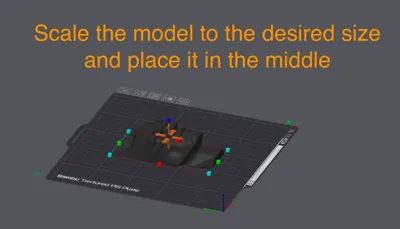
Load your desired model and crop it

Scale the model to the desired size and place it in the middle

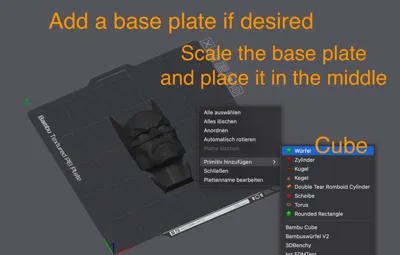
Add a base plate if desired. Scale the base plate and place it in the middle

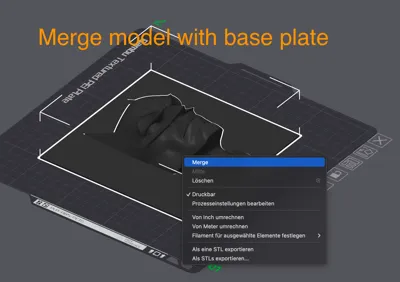
Merge model with base plate

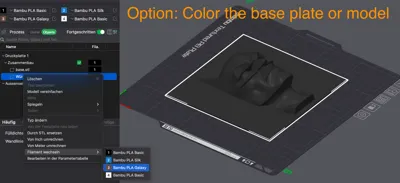
Option: Color base plate or model

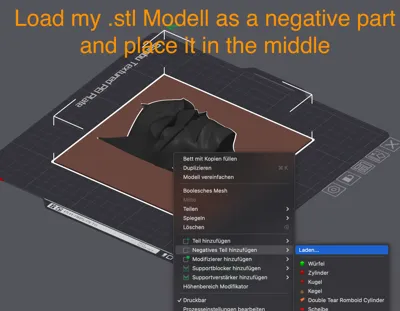
Load my .stl Modell as a negative part and place it in the middle. If necessary rotate it 90°

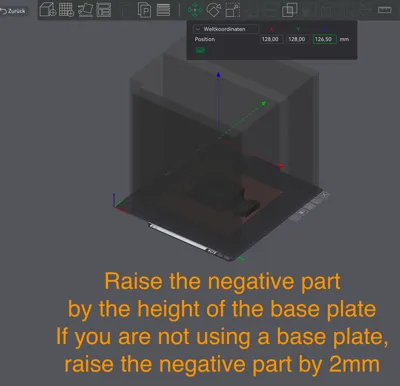
Raise the negative part by the height of the base plate. If you are not using a base plate, raise the negative part by 2mm

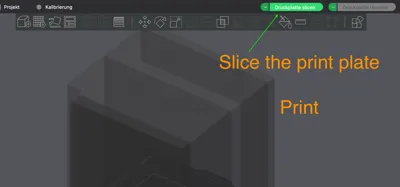
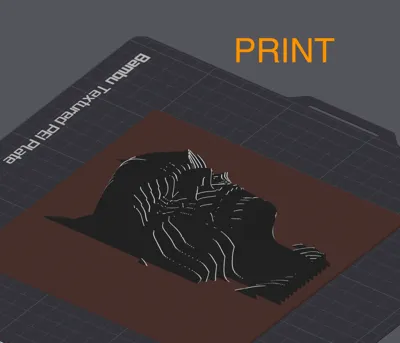
Slice the print plate

- Print it
2of2: Workaround: If you download the R2D2.3mf File
Please don't use the batman or Mickey files. They are just for Advanced users. For more information see my comment 2025-03-04
- Download the R2D2.3mf file.
Delete “model ( Change this )” and “geometry ( to Close holes )”

Load your model as geometry

Push the negative part to the side

- Scale your model if necessary and put it in the middle
- Merge it with the base. Otherwise delete the base
- Color base or model, if desired
Pull the negative part back onto the plate and place it in the middle

- Slice the print plate
- Print it
Note: The negative part has a distance of 2 mm to the printing plate. If you want a thicker base than 2 mm, you have to lift the negative part accordingly
Now with Samples from YOU <3
- https://makerworld.com/de/@Imagin3DInnovat Profil with a 175x175 Frame

License
You shall not share, sub-license, sell, rent, host, transfer, or distribute in any way the digital or 3D printed versions of this object, nor any other derivative work of this object in its digital or physical format (including - but not limited to - remixes of this object, and hosting on other digital platforms). The objects may not be used without permission in any way whatsoever in which you charge money, or collect fees.
Comment & Rating (91)