Search models, users, collections, and posts

Nest Planter

IP Report
GIF

Print Profile(4)

All
X1 Carbon
P1S
P1P
X1
X1E
A1
A1 mini
H2D
H2D Pro
H2S
P2S
H2C
X2D
A2L

Standard Profile - 0.2mm layer
Designer
10.4 h
7 plates
4.7(300)

Fast print 80mm version
1.6 h
1 plate
4.6(116)

Fast Print 120mm version
3.7 h
1 plate
4.7(35)

CORRECT Insert Size - 120 mm
12.3 h
2 plates
5.0(8)

Open in Bambu Studio
Boost
6892
18371
560
449
11.5 k
4 k
Released 

Description

VIDEO of insert change / assembly 
For me the assembly process is really simple without a lot of force. Nevertheless after some feedback I also changed the design a little  for people that really have problem with the last assembly step. I’ve created a new variant of the insert specifically for those who are still having trouble (V3). This version includes two chamfers that should make the final assembly step easier.

Please note: Due to these changes, the slot is no longer fully closed. I would recommend using this version only if the standard insert remains too difficult to assemble.


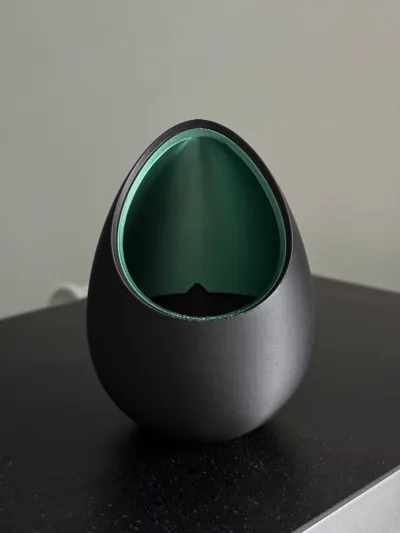
Introducing the NestPlanter, a beautifully crafted 3D-printed plant pot with a separate color insert, designed for a stunning two-tone effect. Inspired by nature’s curves, this planter creates a cozy, nest-like enclosure for your favorite succulents and small plants.

Key Features:

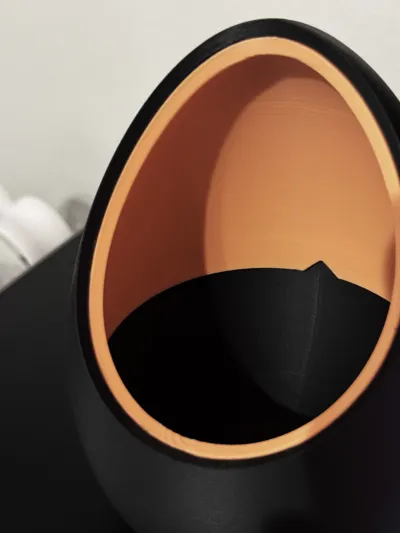
  • Two-Part Design: The insert is printed separately, allowing you to mix and match colors for a unique look. Be bold and experiment with different color combinations!
  • Smooth, Rounded Form: A natural, pebble-like shape that blends seamlessly with any decor.
  • Simple Assembly:
    1️⃣ Align the bottom cut of the insert with the corresponding part of the shell.
    2️⃣ Press the edges together until the insert slightly "rolls" itself.
    3️⃣ Insert it into the base opening and release.
    4️⃣ Align the triangle at the back and firmly press the lower edge of the insert against the base around the entire circumference – this may require some force.
    5️⃣ Once secured, the front overlapping part will naturally adjust and lock into place, making the opening between the insert and shell nearly invisible.

This assembly method ensures a seamless and sturdy fit while maintaining the elegant, organic aesthetic of the planter.

Which color combination would you try first?


For more details and exclusive models check out my Instagram & Patreon ;)
https://www.instagram.com/hpinvent.design/
https://www.patreon.com/user?u=79128277


Due to many requests for commercial licenses for my 3D models I created a patreon page. You can become a member to get permission for commercial use or just want to support my work : https://www.patreon.com/user?u=79128277
There you can also find exclusive Models for Patreon Subscribers only ;)


If you Just want to give a one time Support you can buy me a coffe here ;)
https://buymeacoffee.com/hpinvent


Here is a small Sneak Peak of a coming Bathroom Set
More Information about the launch date and early acces can be found on my Patreon.


Also check out my other Designs!

I have a bunch more stuff in my profile!!
https://makerworld.com/en/u/3624704578


Happy printing!

Comment & Rating (560)

(0/1000)

Beautiful design, unfortunately, despite the video instructions, it could not be assembled. I then scaled the inner part to 99%, and it fits perfectly! A photo with 100% and one with 99% are attached
Show original
15
Reply
exact problem I am having. thanks for the tip!
0
Reply
I've been in the same problem. but I cut it with plier, I will follow your tip by reduce to 99% thank you so much
0
Reply
Wonderful design, but I can't for the likes of me, get the insert to go in and unfurl.
The designer has replied
5
Reply
Update: After a lot of pushing and squeezing, I was able to squeeze it in , pushing more around the bottom lip., but it took a massive amount of pressure. I've assembled 6 of them now, but one of them I still can't get the insert to completely line up and unfurl. My thumbs are very sore LOL . I'd strongly suggest you update this with a much easier way to install these, especially if you're advertising this as modular, mix and match. There's not way i can even get them out after they have finally attached. I love this design so much, so I'm really hoping you take this constructive criticism to heart and update it.
(Edited)
4
Reply
Hey there, sorry to hear that you had some difficulties. I uploaded a short video (gif) to the images and also to the descripton where you can see the assembly process and change of the insert. For me the assembly process is really simple without a lot of force. Nevertheless I also changed the design a little for people that really have problem with the last assembly step. I added a chamfer but this leaves a small gap so only those people with the problems should use it ;)
3
Reply
Replying to @HpInvent :
Ok thanks! Looking forward to trying the new design, but i don't see it in the print profile yet.
0
Reply
Boosted
Printed at 100% on A1 with Bambulab Matte PLA. Assembly took 30 seconds and a bit of wiggling. Thanks for the model!
6
Reply
PLA is not waterproof though 🤔
Show original
0
Reply
awesome
Show original
0
Reply
Print Profile
Standard Profile - 0.2mm layer
A truly magnificent print, it looks absolutely fantastic, however, the assembly is a complete disaster :( Unfortunately, I am unable to assemble the components. One part is even broken. Perhaps the inner part should be scaled down slightly?
The profile uploader has replied
Show original
4
Reply
It takes a really strong squeeze down in the bottom lip. I was finally able to do mine, but it was really difficult. I'm hoping the designer will take note and update this with a much easier assembly method.
(Edited)
1
Reply
Hey there, sorry to hear that you had some difficulties. I uploaded a short video (gif) to the images and also to the descripton where you can see the assembly process and change of the insert. For me the assembly process is really simple without a lot of force. Nevertheless I also changed the design a little for people that really have problem with the last assembly step. I added a chamfer but this leaves a small gap so only those people with the problems should use it ;)
(Edited)
2
Reply
ys so hard to assembly, but eventually yoi will find out the model is just perfect fit
0
Reply
Great model, but unfortunately after more than 4 failed prints, i am still unable to get a clean print. the bottom layers are sagging and stringing. I noticed that the wall print sequence is inner/ outer, i changed to outer/ inner, alas, still not working. Black one is printed with PETG and the white one is with PLA +. Even tried with a brand new filament. Would appreciate the help. BTW, I am printing on Bambu Lab A1
(Edited)
The designer has replied
1
Reply
Ohh, that looks like a cooling issue . What printer are you using ?
0
Reply
Replying to @HpInvent :
I am using Bambu Lab A1.
0
Reply
Replying to @HpInvent :
do you have any recommended settings for this issue with a Bambulab A1. I am running into the same issue, but just at the bottom. the rest of the print is completely fine.
0
Reply
Every vase I print has this problem around the base What could be causing it
Show original
3
Reply
Set fan to 100%
Show original
0
Reply
Boosted
Print Profile
Standard Profile - 0.2mm layer
I printed the 80 mm version without issues
4
Reply
I had to scale the inlay to 99% to achieve proper positioning within the pot. Otherwise, the piece is truly excellent
Show original
3
Reply
Nice avocado :)
2
Reply
Print Profile
Fast Print 120mm version
version 3 is where it's at
3
Reply
Print Profile
Standard Profile - 0.2mm layer
A truly magnificent model, I had to resize it to accommodate my plants
Show original
2
Reply

License

This user content is licensed under a Standard Digital File License.

You shall not share, sub-license, sell, rent, host, transfer, or distribute in any way the digital or 3D printed versions of this object, nor any other derivative work of this object in its digital or physical format (including - but not limited to - remixes of this object, and hosting on other digital platforms). The objects may not be used without permission in any way whatsoever in which you charge money, or collect fees.