


Print Profile(1)

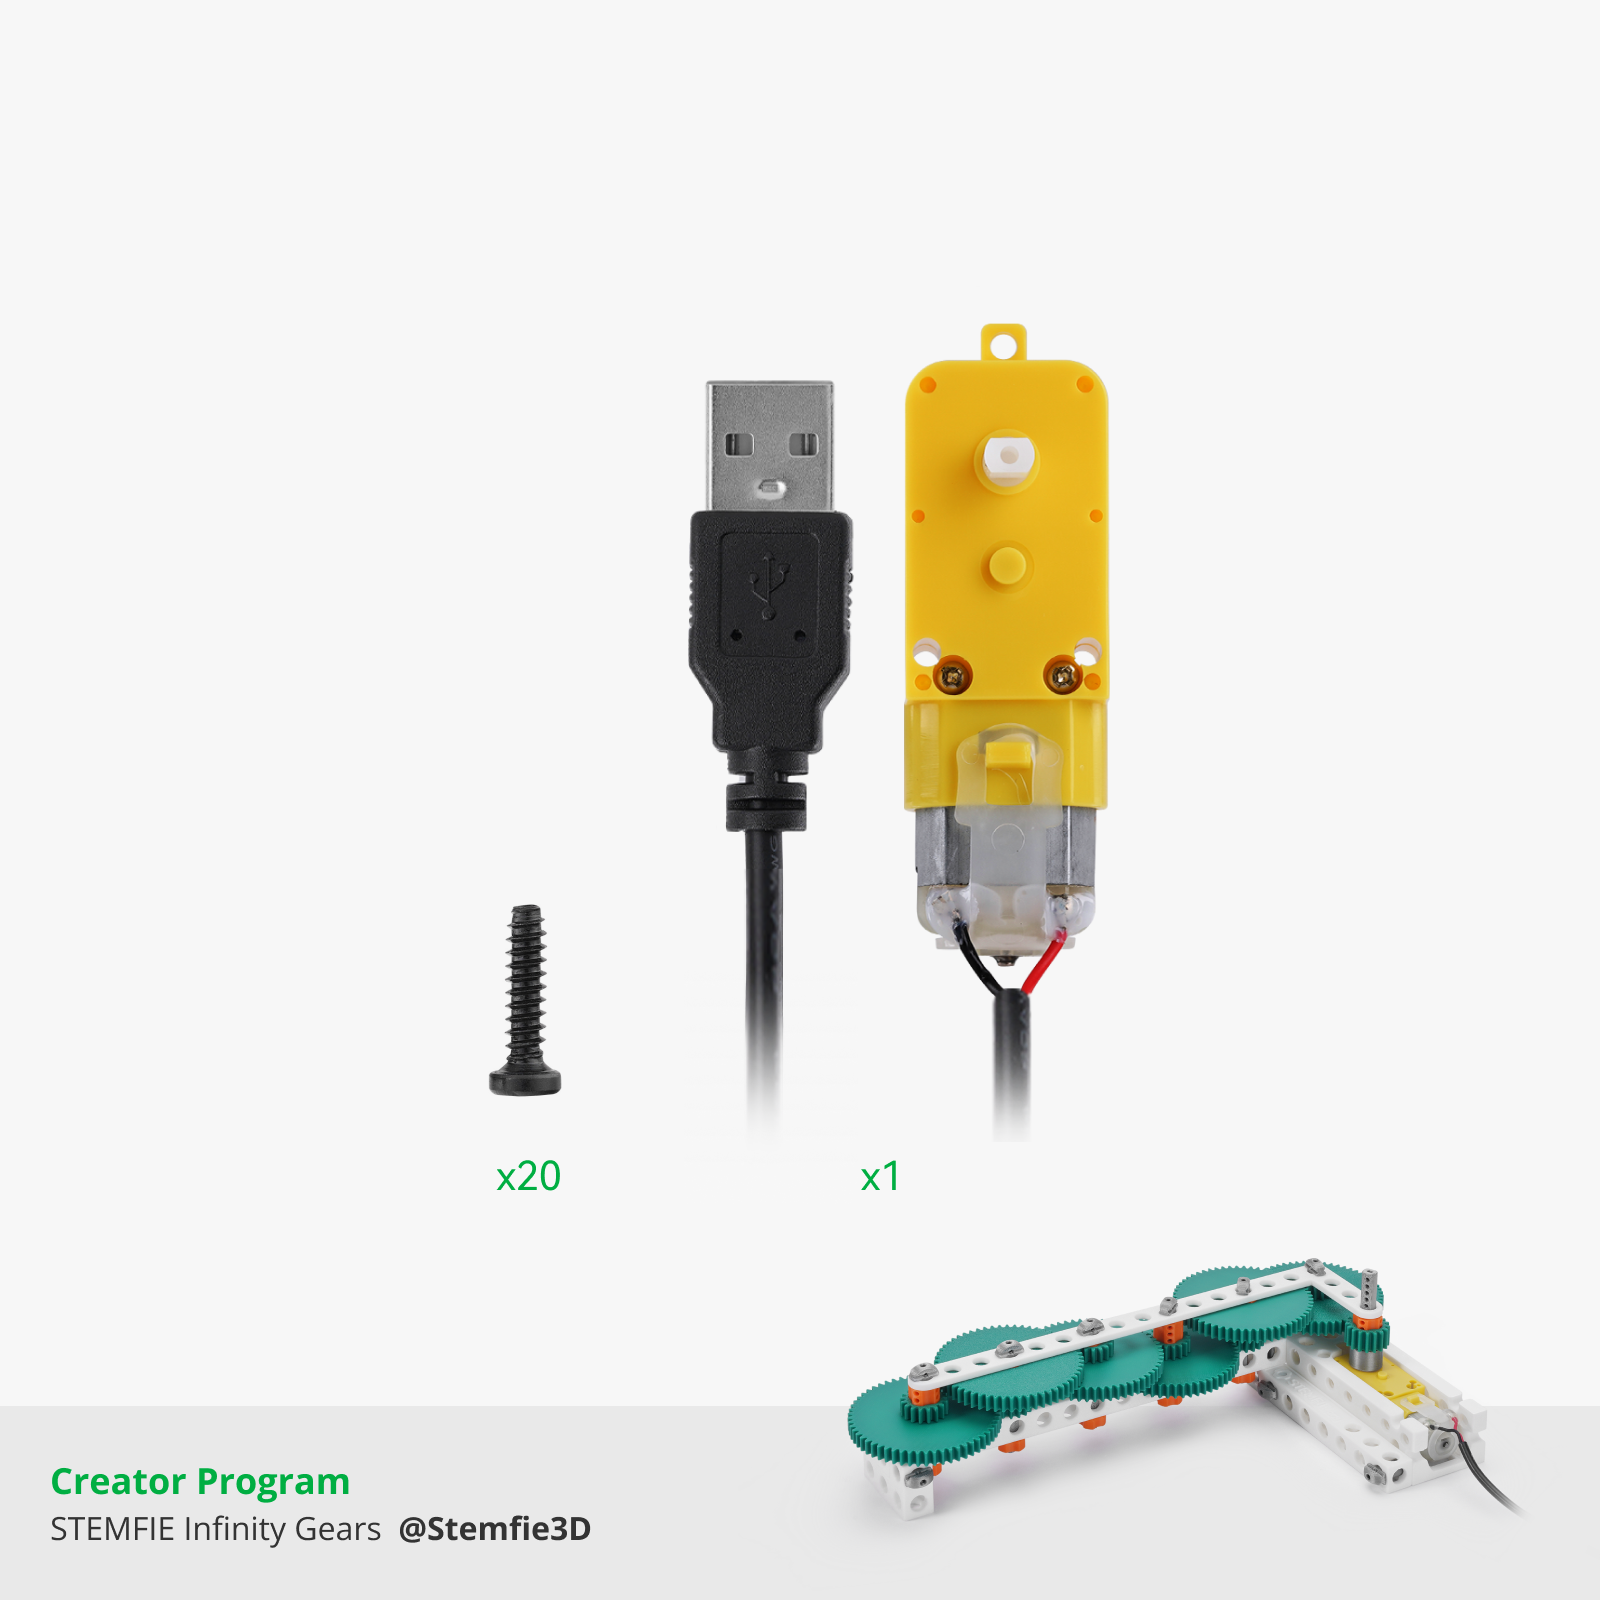
Bill of Materials


Description
Membership
If you're interested in commercially licensing my models, here it is! If you're simply interested in supporting my projects, you can do that too at a lower price! Thanks in advance
Boost Me (for free)
If you want to support me directly here on makerworld, leave me a boost! THANKS!
OTHER SUPPORT
Leave me a tip to support my work HERE
---------------------------------------------------------------
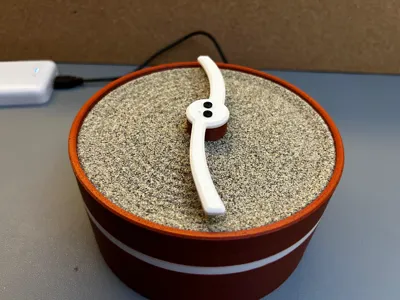
I've been working on this model for weeks, but finally here we are with the complete model!
A completely automatic zen garden, completely modular with pieces from the bambu store, and easy to print since it has NO supports!
Designed to be printable on mini A1
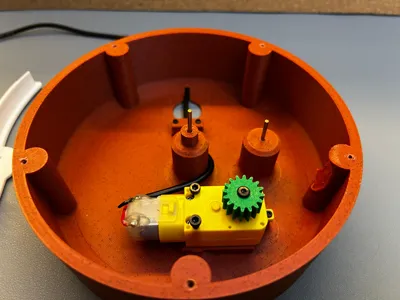
ASSEMBLY
1. Fix the cable and the motor to the base
2 M3x25mm screw
3 BT2x8 screw (included in the STEMFIE Infinity Gears kit)
Insert the motor in his place and fix it with 2pcs of M3x25mm screw and one BT2x8 screw.
Pass the cable trought the hole, and after that fix the cable with the 2 remeanings BT2x8mm screw.


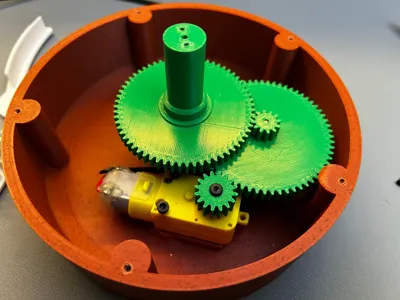
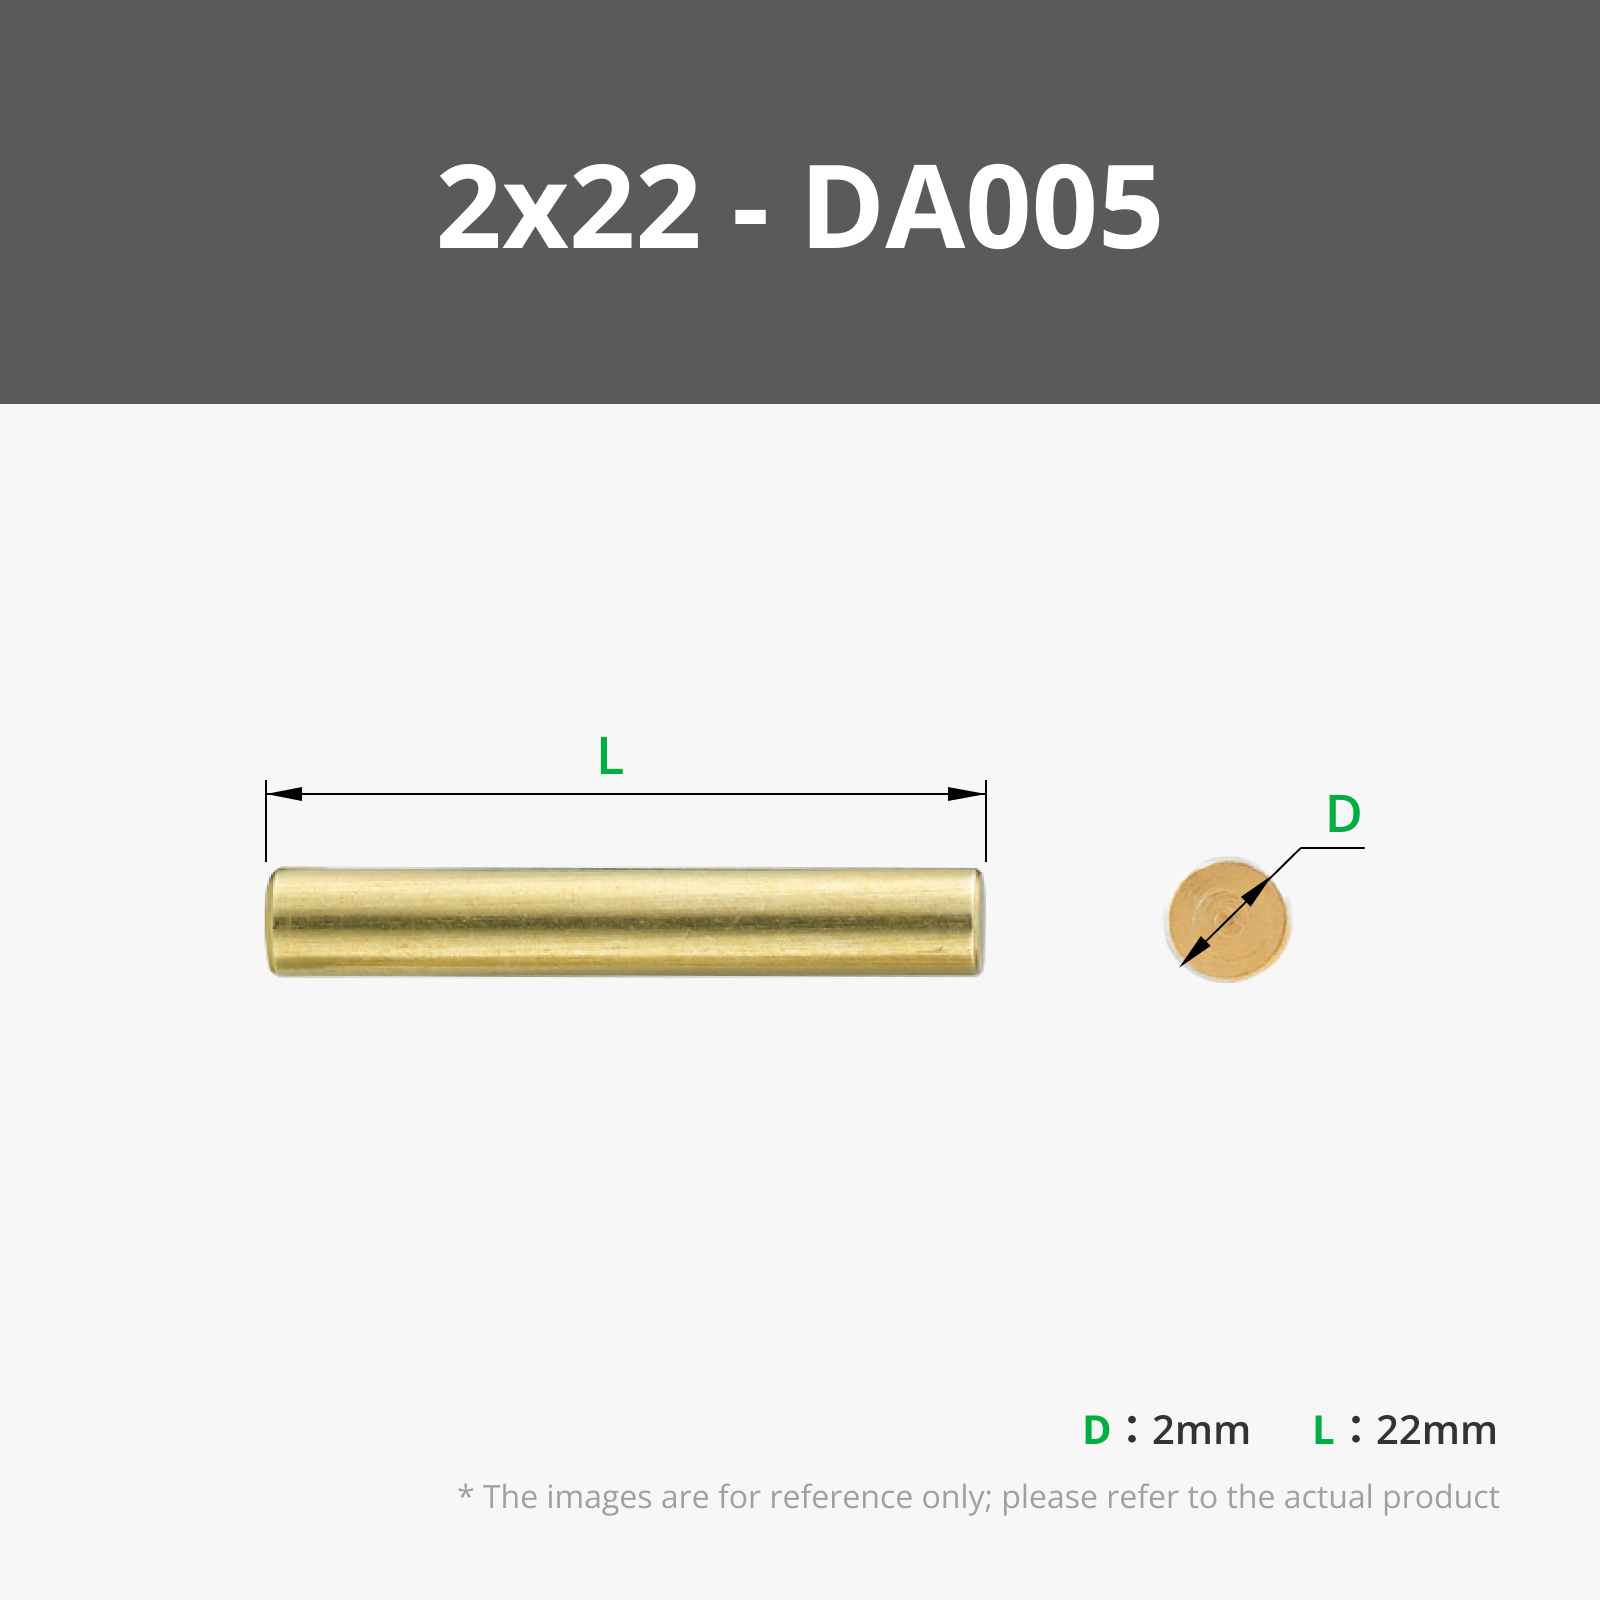
2. Put the pins and fit the gears
1 BT 2.6x8mm
2 2x22mm brass dowel pin
Insert pins in those holes, if you want you can fix it whit some glue.
Fix the little gear in the motor with a BT2.6x8mm screw, and insert other gears in the pins.


3. Insert the ball bearing and close the base
1 Steel Deep Groove Ball Bearings 6700ZZ
5 BT2.6x8 screw
Put the ball bearing in his hole, you have only to push it.
Fix this part with 5 BT2.6mm screw, careful to fit the ball bearing into the gear.


3. Put the sand bowl, fix rake and fill with sand
2 BT2.6x8 screw
Catch the bowl and fix it on the base, simple turning it.
Put the rake on the gear, and fix it with 2 BT2.6x8mm screw
Put the sand into the bowl (you can also put it before)


INTERIOR

This is the interior of the zen garden.
I have never worked on a similar project, when I started I thought "I will never do it", but the desire to have an object like this on my desk gave me the strength to carry on. Usually these objects cost a lot, but by building them with your own printer you can save a lot of money.
---------------------------------------------------------------
Membership
If you're interested in commercially licensing my models, here it is! If you're simply interested in supporting my projects, you can do that too at a lower price! Thanks in advance
Boost Me (for free)
If you want to support me and my models consider leaving a boost, I would be very grateful. Thanks!
License
You shall not share, sub-license, sell, rent, host, transfer, or distribute in any way the digital or 3D printed versions of this object, nor any other derivative work of this object in its digital or physical format (including - but not limited to - remixes of this object, and hosting on other digital platforms). The objects may not be used without permission in any way whatsoever in which you charge money, or collect fees.
Comment & Rating (3)