Blastoise 150% Multipart Color (20 cm height)

Remixed by
Copyright Claim

Blastoise 150% Multipart Color (20 cm height)

Remixed by
Boost
805
1261
426

Print Profile(7)

All
X1 Carbon
P1S
P1P
X1
X1E
A1
A1 mini

X1/P1P/P1S - 0.16mm layer, 150%, 3 walls, 10% infill, Flow Adjusted.
Designer
28.5 h
8 plates
4.9(252)

A1 Mini - 0.16mm layer, 150%, 3 walls, 10% infill, Flow Adjusted.
Designer
32.6 h
11 plates
5.0(17)

A1 Mini Version,added missing parts, scaled to 75%, 0.16mm layer, 2 walls, 10% infill,
12.4 h
8 plates
4.8(22)

BRIM - better adhesion - 0.16mm layer, 2 walls, 10% infill
9.7 h
8 plates
4.8(14)
Click to see more

Boost
805
1261
426
115
2.3 k
6.4 k
Released

Description

Original Source Material:
- Original Creator Blastoise Model: neb1236 on Thingiverse.

- Original Creator AMS Version Blastoise Eyes: Waikikiprod on Makerworld/Printables.

Some small notes: 
- Please support the original designers, they did the awesome job of making this model. 
- For licences/selling the print: please contact the original designers, not me. I did not create this awesome model.
- On16-02-2024 , I created a printable version in Bambu Studio which should work on the A1 Mini. It has the same printing settings as the X1C/P1P/P1S version, but all the parts are divived on more plates, since the build plate on a A1 Mini Printer is quite a bit small. Maximum printtime for every plate has been reduced to 4 hours maximum because of this. 
- I am not able to test the A1 Mini version, simply because I do not own this printer and only have a X1C. Use the profile on your own risk.
 

Description:
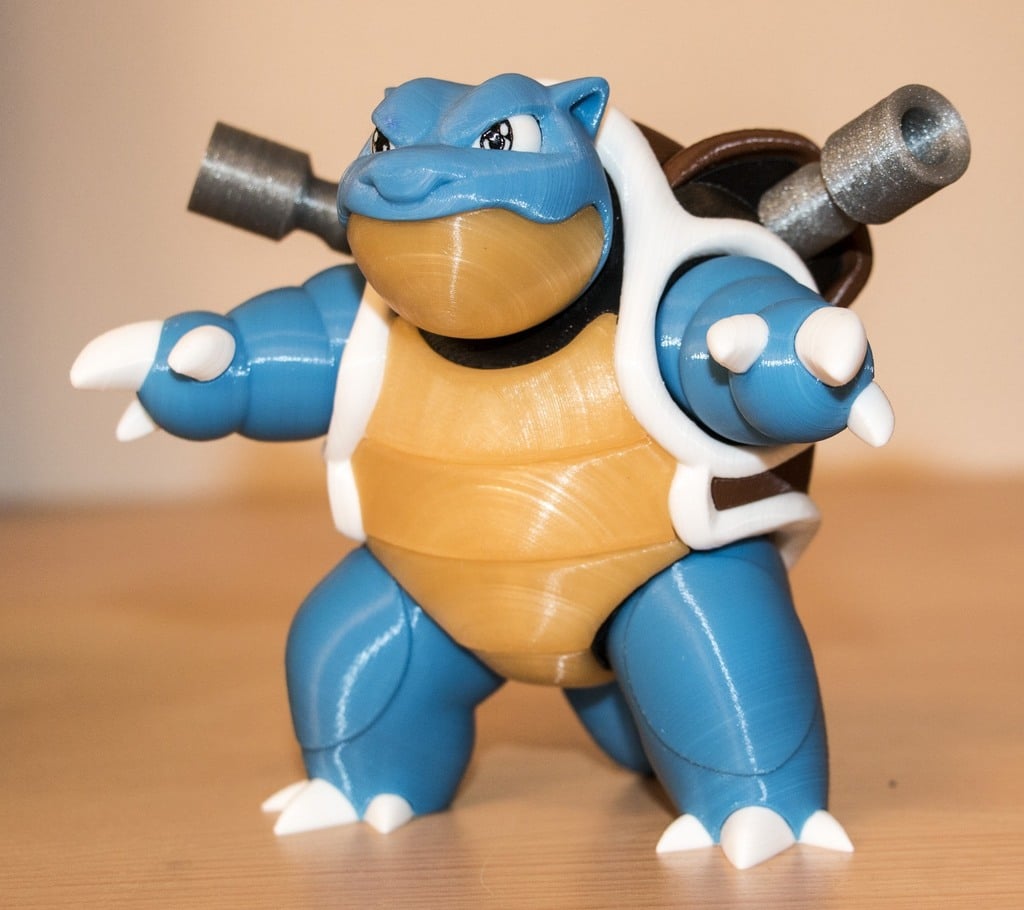
A remix/share from the awesome Blastoise model. I have scaled alle the parts to 150%, as I think a Blastoise should be bigger!

This Blastoise is about 20 cm high and weights about 700 grams!

I also did the following:
- I used a 0.16 settings basefile I like and edited it.
- I sorted all the different parts on different plates for easier printing, based on color.
- The default eyes are replaced by the AMS version, which makes dual color printing possible.
- I adjusted the flowrate in my settings profile so the coloring of the model should be the same overal.
- I put ‘Ironing’ off in my settings profiles, since this would give coloring differences, most notable in the brown shell parts.
- I fixed some of the more noticable parts that where having Top Layer Spheres by using this guide.


If there are more suggestions for better settings, please upload them!

The color sorting in the 3fm-file is based on the following filament that I used for this print:
- Black: eSUN PLA+ Black.
- Beige: eSUN PLA+ Beige.
- Blue: eSUN PLA+ Light Blue.
- White: eSUN PLA+ Cold White.
- Brown: eSUN PLA+ Brown.
- Grey: eSUN PLA+ Grey.
Please note that eSUN is currently switching to Carton Spool Holders if you want to print from the AMS-System. I used the ‘old’ plastic filament spools which I currently still have.


A complete timelaps video from all the plates/parts can be found here:

Comment & Rating (426)

Please fill in your opinion
(0/5000)

all finished went with MIKA3D copper silk for top shell Elegoo electric blue silk PLA+ for body Elegoo tan PLA for under shell and Bambu white and black matte PLA for the rest I love the way it turned out.
8
Reply
Boosted
wow this blue looks amazing 👍🏼
0
Reply
thank you. this is one of the best silk blues imo
0
Reply
Print Profile
X1/P1P/P1S - 0.16mm layer, 150%, 3 walls, 10% infill, Flow Adjusted.
Printed with Esun Glow in dark white parts. looks good.
The designer has replied
6
Reply
That's just so awesome to see. What a great idea! Thanks for sharing.
0
Reply
Link for the Filament?
0
Reply
Replying to @Troythomasjr :
eSUN PLA Blask Filament do Drukarek 3D, Swiecący w Ciemności Zielony Filament 1,75 mm, Dokładność Wymiarowa +/- 0,05mm, Szpula 1 kg (2,2 LBS) Filament do Druku 3D do Drukarek 3D, Świecący Zielony https://amzn.eu/d/dZgh8lP
0
Reply
I did a dark version kind of like evil . what do you all think?
8
Reply
I scale up to 200% and it look great, but I need so many glue to get into 1 piece
3
Reply
How tall was it at 200%? I'm looking to increase the size of mine also.
1
Reply
Replying to @Troythomasjr :
it’s tall around 45cm or more
1
Reply
Replying to @maiduyloc :
Holy Hell lol, Appreciate the feedback.
1
Reply
Print Profile
X1/P1P/P1S - 0.16mm layer, 150%, 3 walls, 10% infill, Flow Adjusted.
Ich habe alles auf 75% skaliert und auf dem A1 mini gedruckt. Die Teile lassen sich problemlos drucken. Die Qualität und die Passgenauigkeit sind sehr gut. I scaled everything to 75% and printed it on the A1 mini. The parts can be printed easily. The quality and accuracy of fit are very good.
The designer has replied
1
Reply
Ah, good to here someone made a print profile for the A1 Mini. I don't have that printer, only a X1C. Good to see it worked out when scaling down. If I may make a suggestion, perhaps you can edit the title to something like 'A1 Mini Version, scaled 75% down' or something. That would make things a little bit more clear for everybody, I guess. :-)
(Edited)
1
Reply
Replying to @Kroeskoppie :
Thanks for the hint. Completed! :)
(Edited)
1
Reply
Replying to @Schacky :
Hej kannst du mir Verraten wie groß er ist und welche Farben du verwendet hast ? Ich kann mich beim blau und beige nicht entscheiden welches Pla es werden soll. Anbei nice Arbeit 😍
(Edited)
1
Reply
Print Profile
A1 Mini - 0.16mm layer, 150%, 3 walls, 10% infill, Flow Adjusted.
I love it
The designer has replied
2
Reply
I like the Gameboy also. :)
0
Reply
Print Profile
X1/P1P/P1S - 0.16mm layer, 150%, 3 walls, 10% infill, Flow Adjusted.
perfect!
3
Reply
Boosted
Print Profile
X1/P1P/P1S - 0.16mm layer, 150%, 3 walls, 10% infill, Flow Adjusted.
I love this print. thanks for the upload and thanks to the original creator
3
Reply
Print Profile
X1/P1P/P1S - 0.16mm layer, 150%, 3 walls, 10% infill, Flow Adjusted.
I'm new to 3d printing and this print profile helped ease me in to multicoloured prints.
The designer has replied
2
Reply
Good to hear, looks great!
(Edited)
1
Reply
Print Profile
X1/P1P/P1S - 0.16mm layer, 150%, 3 walls, 10% infill, Flow Adjusted.
It came out amazing, thank you. I ran this print at 0.08mm and slowed the outer wall and top surface speed to 60.
(Edited)
The designer has replied
2
Reply
Looks good!
(Edited)
1
Reply