Seeed XAIO & Grove Base Case
Seeed XAIO & Grove Base Case


Print Profile(1)

Description
I wanted a little case for one of my XAIO boards and a variety of mounting options as I have a few sitting about so I can use them in different ways. Later I realised I could modify it to fit the other XAIO models.
If you are looking for something fun to do with your device and it is ESP32 based, have a go at setting it up with Home Assistant via ESPHome and plugging in and configuring some supported sensors, more information can be found in this guide. Sorry I am not able to support you with ESPHome or electronics :)
Currently there is a simple base, a wall mount base and an 8x2mm magnetic disc mount option available, we will be at least adding a magnetic base in the short term and possibly a stand.
Required For Assembly
- 8x M2 inserts, CNC Kitchen/Ruthex/others of similar size
- 4x M2x8 screws, for the lid
- 4x washers, for the lid
- 4x M2x12 screws for the main body/base
- Pin strip
- Soldering iron
- Grove Base
- Seeed XAIO ESP32S3 Sense/RP2040/SAMD21/nRF52840/ESP32C3/nRF52840 Sense
For the optional magnetic mount you will need 1-3 8x2mm disc magnets. Probably a good idea to use three if you are plugging in accessories and use some glue to ensure they stay in place.
Printing
Please use the pre-configured profile from the top of the page and not the raw model. It has the base and lid options on the first plate. The second plate has the main body options. Delete the optional parts you do not want to use.
Use the “sense” objects of the lid and the main body if you have the ESP32S3 Sense, else use the “others” objects along with the base of your choosing.
If you are configuring the unconfigured 3MF yourself it is an easy print with a 0.4 nozzle. The main body needs hybrid tree supports to support the tray and SD card/switch/USB-C port holes for the “sense” variant. I printed the above at 0.16 layer height so it came out smooth.
Post
It is sometimes the case that there is a small mess under the tray where the supports were. Take a sharp, thin knife and make it tidy to prevent issues with the SD card slot.
Assembly
First, get out your soldering iron and solder pin strip into the holes at the side of the Seeed XAIO unit.
Following this, plug the soldered unit into the Grove base.
If you are using a device with a camera, remove the camera unit if it is attached. If you are using a device with an antenna, connect the antenna. | |
| Install 4x M2 inserts into the four holes that protrude from the sides of the main body. |  |
| Install 4x M2 inserts into the four holes in the base. |  |
| If you are using the optional screw mount base, mount it to its final location after the inserts have cooled. |  |
| If you are using the optional magnetic mount base put a tiny dab of glue in the holes and poke in the magnets. |  |
| If you are using a device with an antenna, thread the antenna through the massive hole. ensure the cable is placed so that it goes up through the thin section and rests at the side. |  |
Carefully insert the boards into place. Being careful aligning the USB port and switch is the key to success.
Keep the cable antenna in place so it is aligned with the gap in the side if one is present. |  |
Align the main body on top of the base, you will need to fold the antenna if you have one to make it fit well.
Screw M2x12 screws in the 4 holes here. Careful to not damage the MCU or base board.
We do not use washers for these screws, so be careful not to connect them too tightly. |  |
| If using a device with a camera, connect the camera to the board and insert it into the upper tray. Ensure it is pushed up fully into the upper tray. |  |
Connect the lid with four M2x8 screws and washers. If you are using a device without a camera be sure to use the lid without a hole.
Congratulations, you are done! | 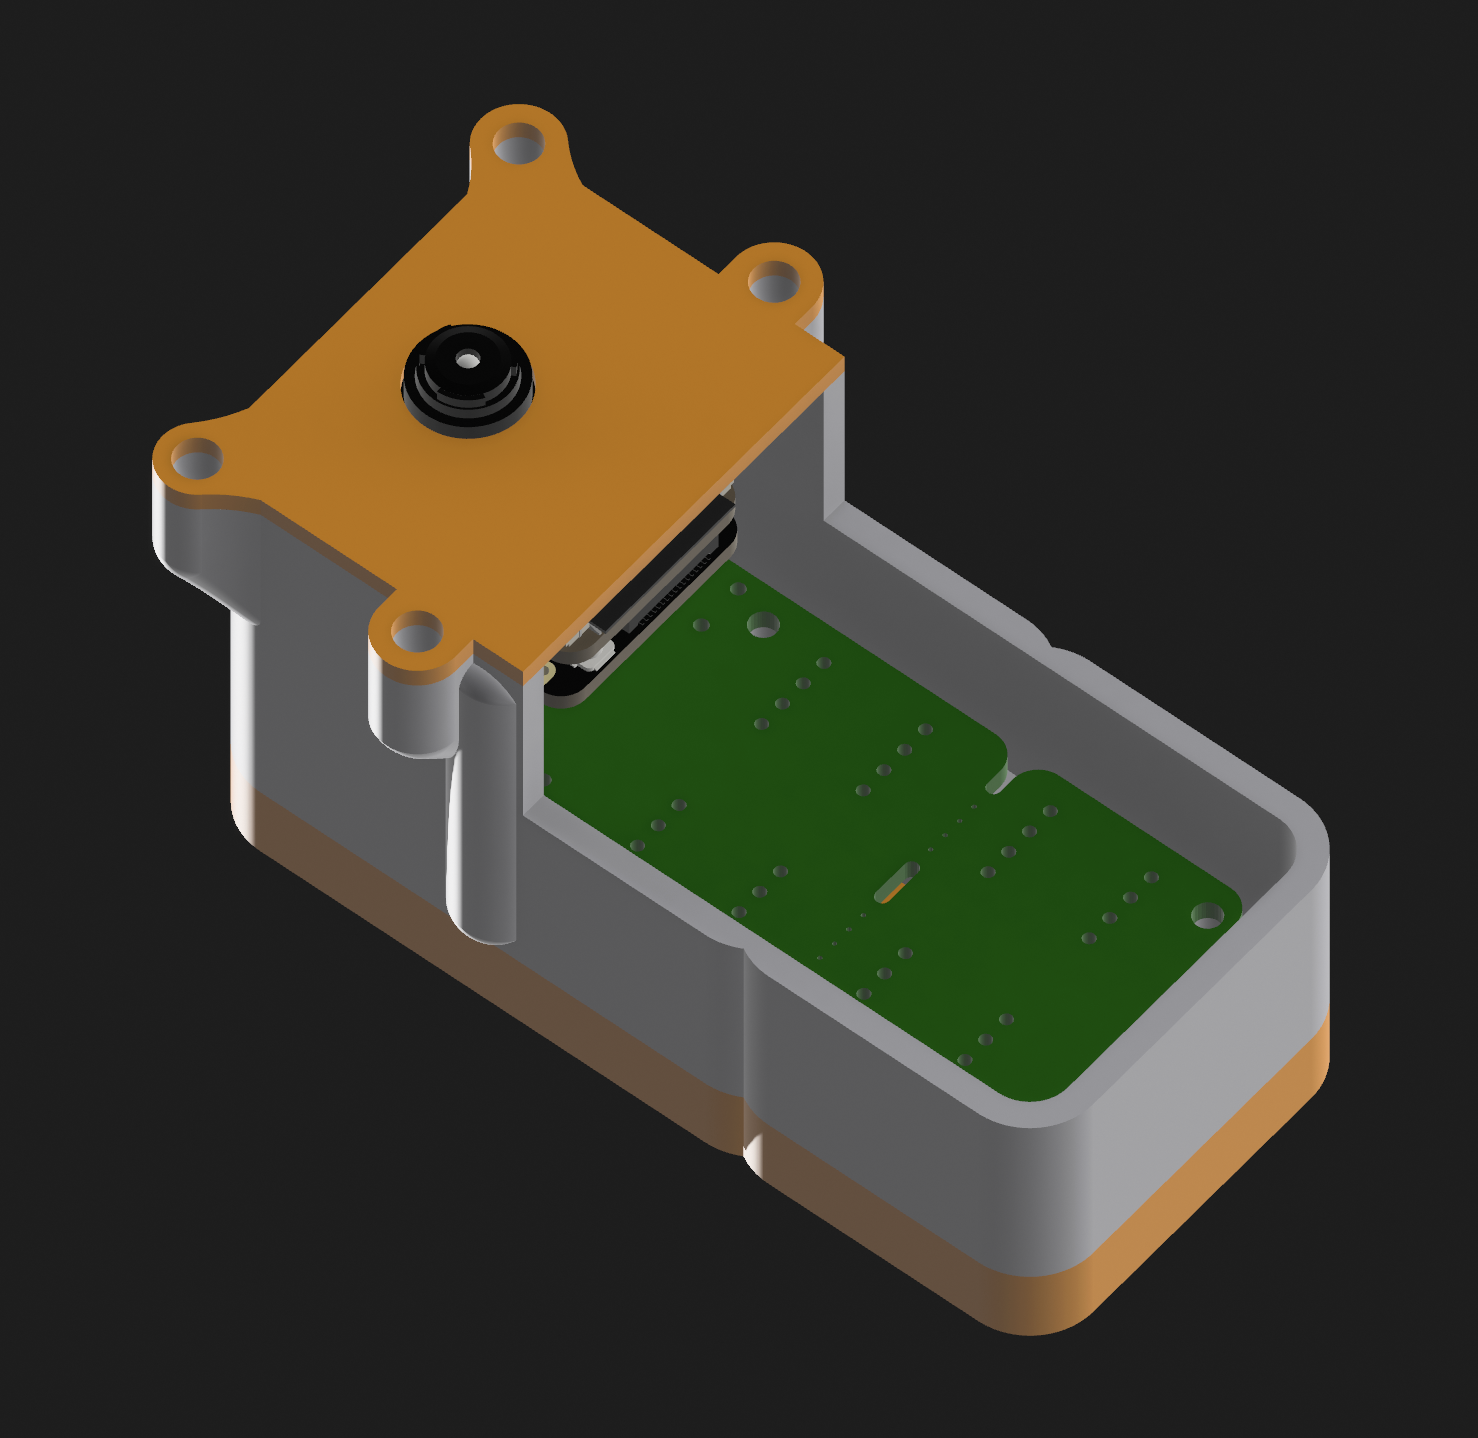 |
Versions
2024012701: Enlarge USB-C port hole to manage different pin strip offsets.
2024012301: Initial version.
ESPHome
Here is a working config file for ESPHome for the command line utility for the XAIO ESP32S3 Sense board, which is the one I initially posted here. Note that you need to enter your own wi-fi details, and depending on how you want to orient the device you may need to change the “vertical_flip” and “horizontal_mirror” settings.
Sorry you will need to work out ESPHome things by yourself but I wish you the best of luck :)
# Configuration for ESPHome
esphome:
# Name of the ESP32-S3 device
name: xsense1
# PlatformIO build options
platformio_options:
build_flags: -DBOARD_HAS_PSRAM
board_build.arduino.memory_type: qio_opi
board_build.f_flash: 80000000L
board_build.flash_mode: qio# Configuration for ESP32
esp32:
board: esp32-s3-devkitc-1
framework:
type: arduino# Enable logging
logger:# Enable Home Assistant API
api:# Over-the-Air update configuration
ota:# Wi-Fi configuration
wifi:
ssid: "Your Wifi SSID"
password: "Your Wifi Password"# Enable fallback hotspot (captive portal) in case wifi connection fails
ap:
ssid: "Xiao-Esp32s3 Fallback Hotspot"
password: "MoLTqZUvHwWI"# Captive portal configuration
captive_portal:# Configuration for the ESP32 Camera
esp32_camera:
id: espcam
name: My Camera
external_clock:
pin: GPIO10
frequency: 20MHz
i2c_pins:
sda: GPIO40
scl: GPIO39
data_pins: [GPIO15, GPIO17, GPIO18, GPIO16, GPIO14, GPIO12, GPIO11, GPIO48]
vsync_pin: GPIO38
href_pin: GPIO47
pixel_clock_pin: GPIO13
resolution: 800x600
vertical_flip: false
horizontal_mirror: false
# Configuration for the ESP32 Camera Web Server
esp32_camera_web_server:
- port: 8080
mode: stream
- port: 8081
mode: snapshot


