


Print Profile(4)


Description

If you want to sell prints of this model, as well as all of my models - future and past
Subscribe to My Patreon:

Or Subscribe for a commercial License Directly in Maker World:
Membership
C3D Commercial Membership - Authorized Merchant

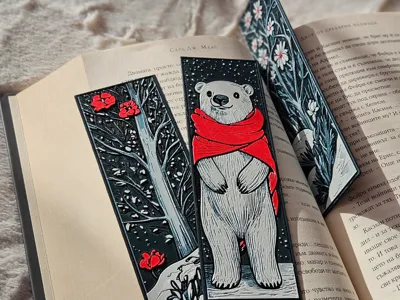
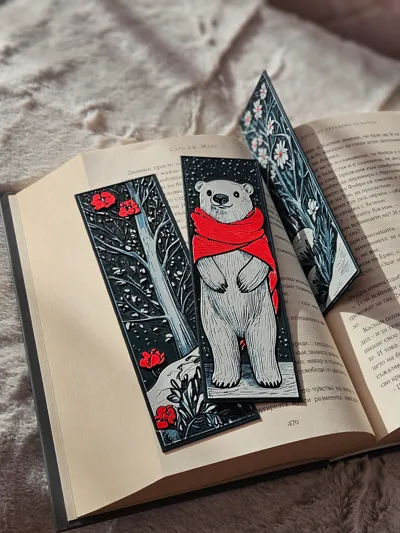
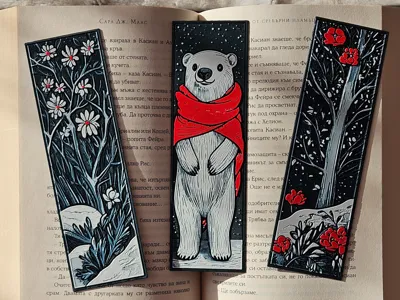
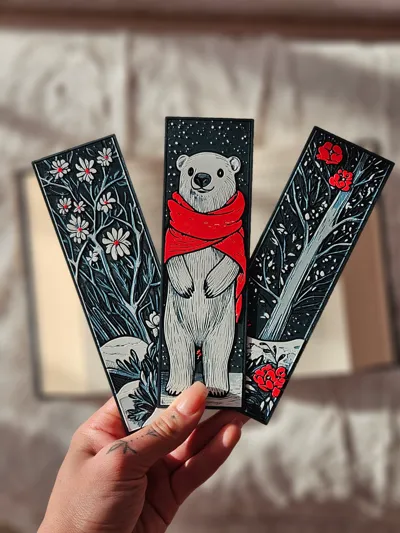
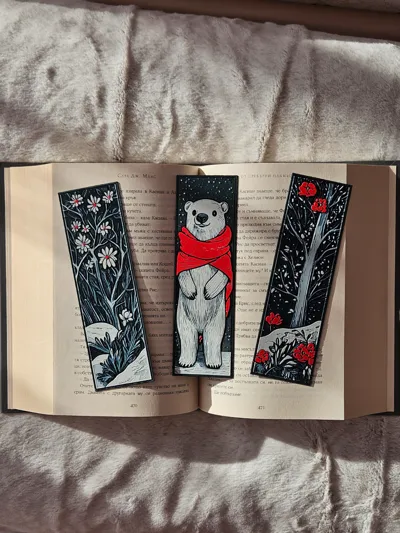
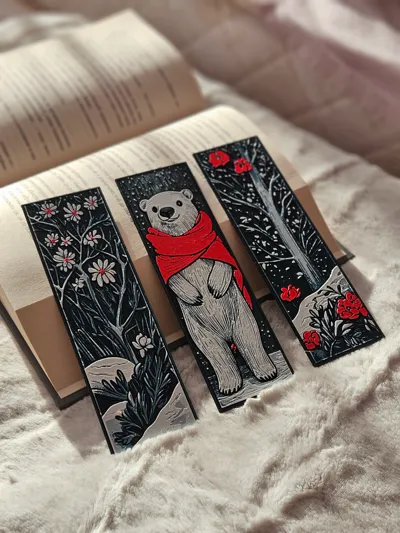
Bearberry Winter is here to add some holiday magic to your books! You’ve got a snuggly polar bear rocking a festive red scarf, snowy trees, and pops of winter blooms that bring just the right amount of cozy vibes.
Perfect for curling up with your favorite holiday read, a warm blanket, and a cup of cocoa. Let Bearberry Winter bring a little cheer to every page you turn! 🎄❄️📚
For best results use 0.2 nozzle if possible, but 0.4 is also works great (The pictures show a model printed with a 0.2 nozzle)
The design allows for printing with simple color changes at layer, which saves a lot of filament!
- NOW WITH 0.2 NOZZLE PROFILE READY FOR DOWNLOAD - USE FOR BEST RESULTS
USE A LIGHTER! - a quick pass with a torch on the printed parts will get rid of the inevitable stringing that comes with this type of models.

Print at 100% infill with a layer height of 0.08mm with a base layer of 0.16mm
Filaments Used:
PLA Kingroon Black Transmission Distance: 0.4 / Amazon
PLA Prusa Gentleman's Grey Transmission Distance: 0.2 / Amazon
PLA+ Jayo Sky Blue Transmission Distance: 4.4 / Amazon
PLA 3D Jake Eco White Transmission Distance: 2.5
PLA EryOne Rose Red Transmission Distance: 2.4 / Amazon
Color Pallete:

Swap Instructions:
Start with Black
At layer #8 (0.73mm) swap to Gentleman's Grey
At layer #12 (1.05mm) swap to Sky Blue
At layer #15 (1.29mm) swap to White
At layer #18 (1.53mm) swap to Rose Red for the rest.
Boost Me (for free)
Enjoying this model? Give it a boost! 🌟 Your support helps my creations reach more makers—thank you for keeping the magic alive! ✨🚀
How to do more than 4 colors on a single AMS?
To use more than 4 colors with a single AMS is pretty simple when it comes to HueForges.
Always start the print from either Bambu Studio or Bambu Handy App - This will allow you to map the rolls of filaments to a certain slot in the AMS:
Now map the first 4 colors (which should already be inserted in the AMS to Slots 1 - 2 - 3 - 4
Once thats done move to maping colors 5 - 6 - 7 - 8 to respectively AMS Slots 1 - 2 - 3 - 4 again!
This will allow you to Change the rolls of filament once the printer is done with that color.
For example, in the picture above once we are done with the Black color (Which is usually first) we are going to remove the black roll (you can do that while printing) with White, then once Charcoal Black is done we are going to change that to Red, Dark Gray to Yellow and we are done. ~ You can do that with as many colors as you need!
YOU CAN PLACE A PAUSE ON THE LAST LAYER OF COLOR 4 TO AVOID HAVING TO BABYSIT THE PRINTER. ONCE PAUSED CHANGE 1-2-3 WITH 5-6-7 AND RESUME. IF YOU NEED MULTIPLE PAUSES YOU CAN DO THAT TOO
Drop me a follow!🤜🤛
License
You shall not share, sub-license, sell, rent, host, transfer, or distribute in any way the digital or 3D printed versions of this object, nor any other derivative work of this object in its digital or physical format (including - but not limited to - remixes of this object, and hosting on other digital platforms). The objects may not be used without permission in any way whatsoever in which you charge money, or collect fees.
Comment & Rating (37)