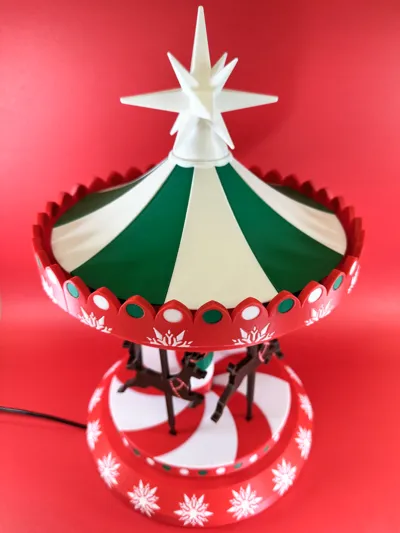
Kinetic Christmas Carousel 2.0 | Motorized version


Print Profile(2)


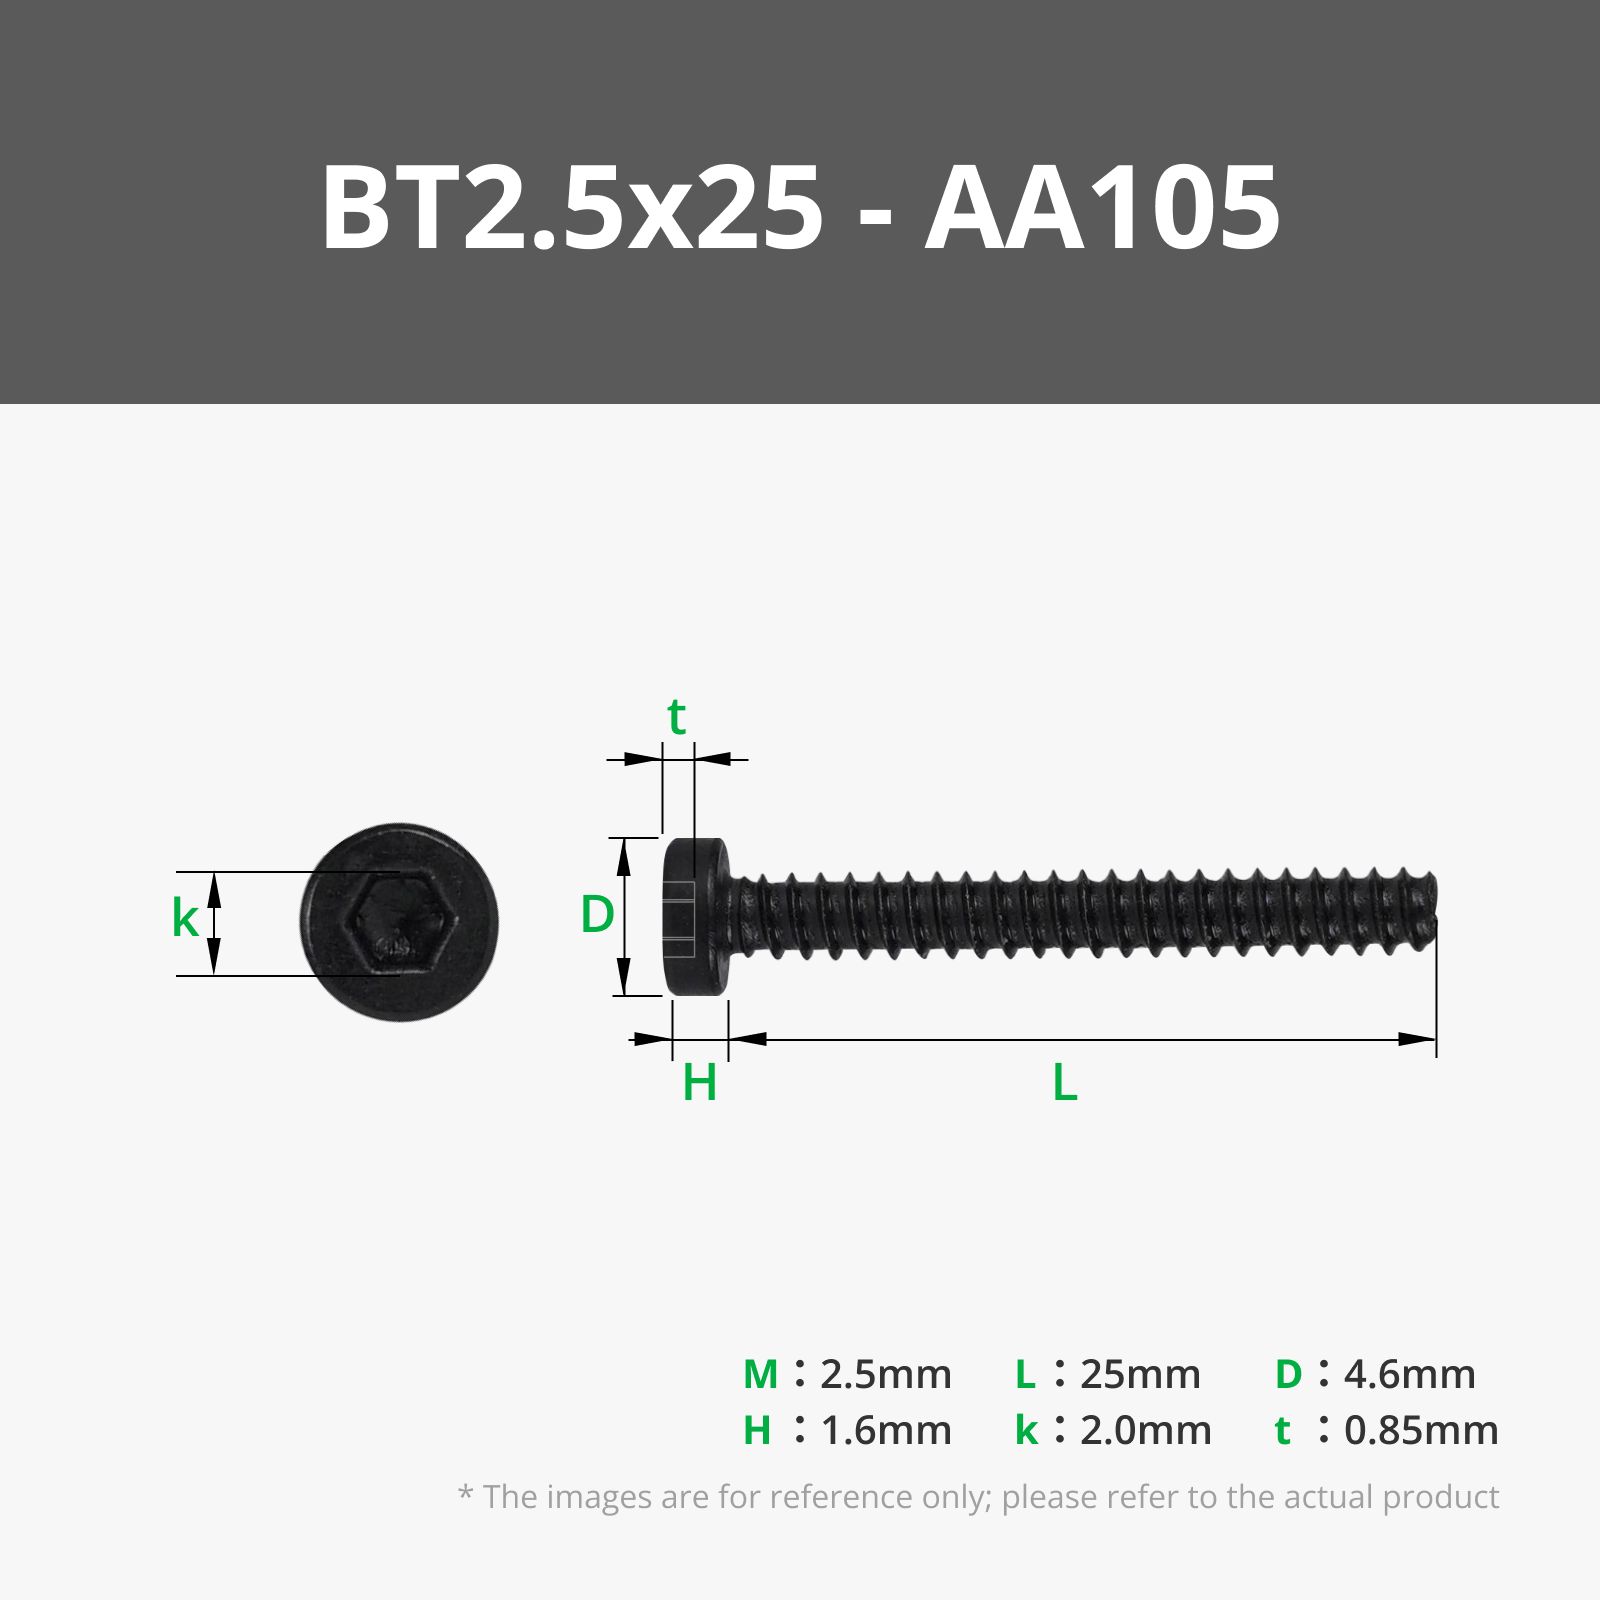
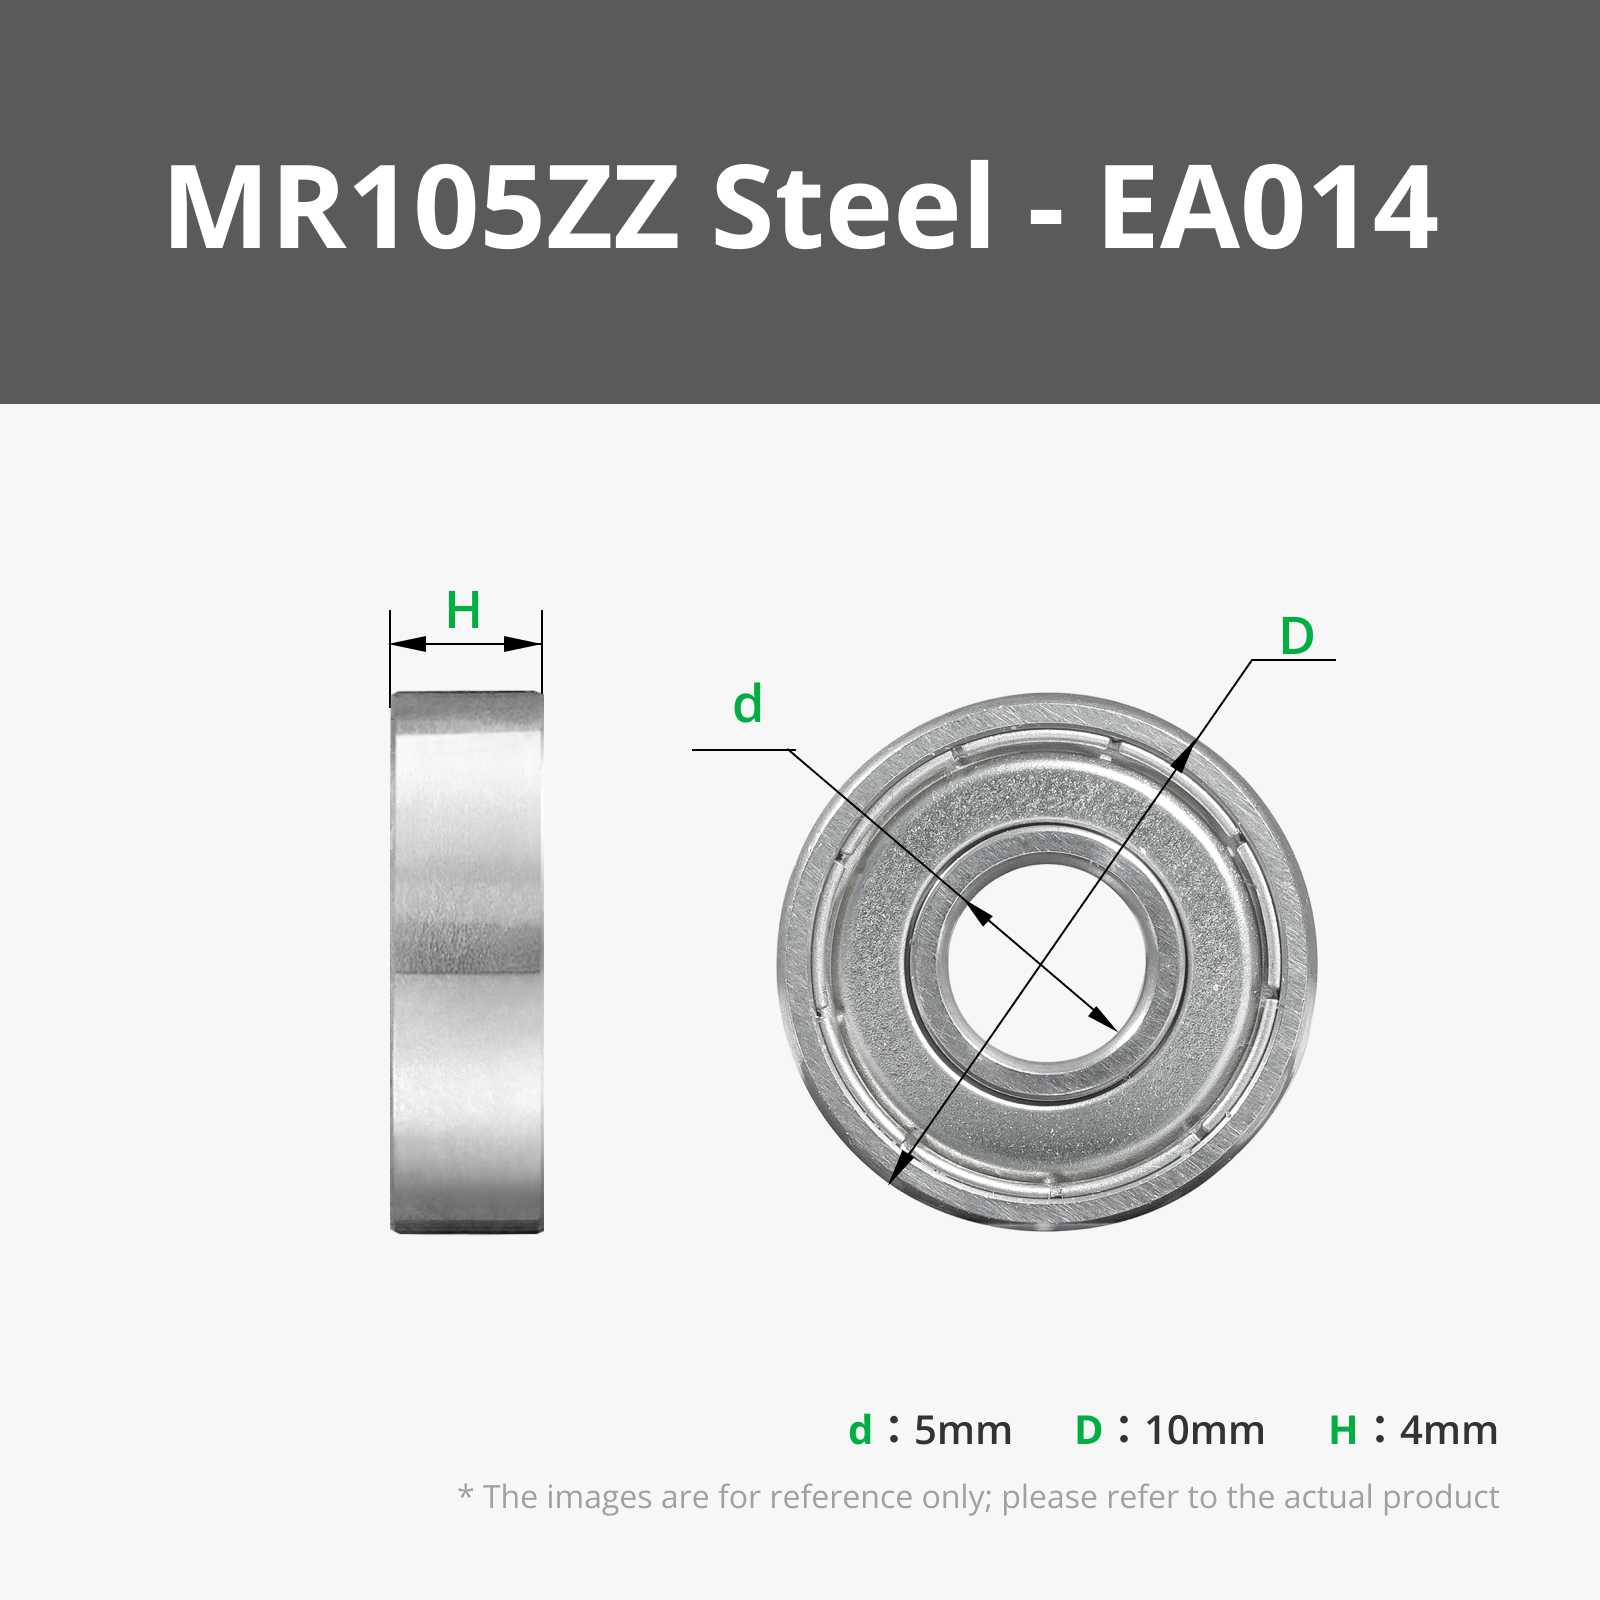
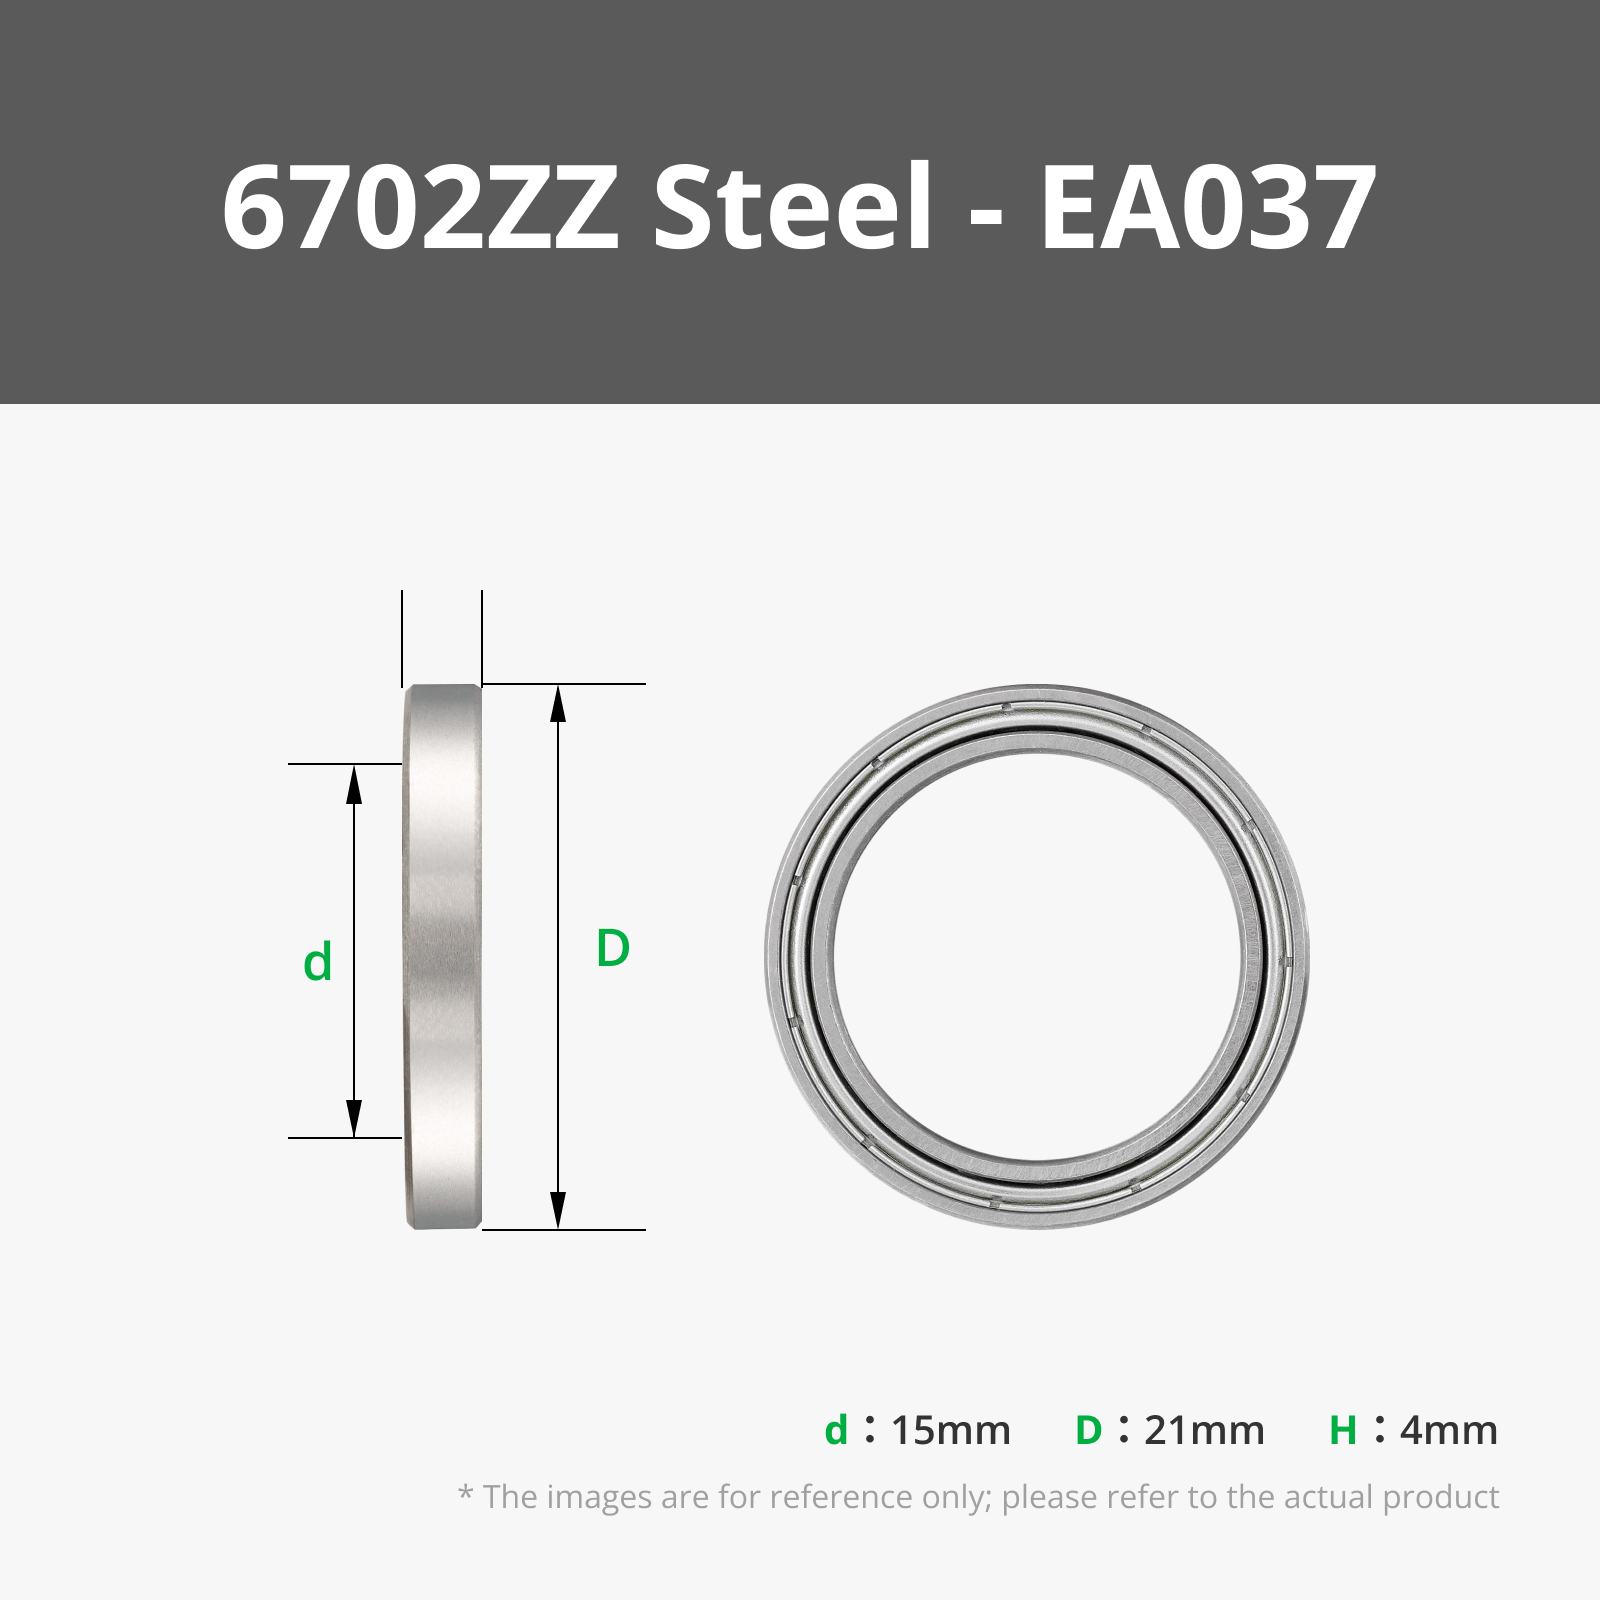
Bill of Materials


Description
12/28/2024 Update: Letters are added to top plate parts for easier assembly
Step into the holiday spirit with🎄✨🦌 Motorized Kinetic Christmas Carousel 🦌✨🎄. Last year, I introduced a hand-spun version of this festive carousel, but this year, I gave it a magical upgrade. Powered by a motor, the carousel now rotates gracefully, bringing your favorite holiday scene to life.
This cozy display features intricate 3D-printed details, vibrant Christmas colors, and a mesmerizing kinetic movement that fills the room with festive cheer and holiday magic.
Designed with care, 3D printed with precision, and assembled with love, this project captures the essence of a cozy Christmas in every spin.
Let the charm of the season come alive with this unique motorized kinetic carousel!
Here's the detailed assembly video:
Feel free to comment and share your prints; it'll be nice to see them. I would appreciate any feedback!
To support my projects or gain access to a Commercial License, please consider joining my Patreon community.
Thank you,
Happy Tinkering!
Boost Me (for free)
Your support helps bring more creative designs and exclusive content to life!
License
You shall not share, sub-license, sell, rent, host, transfer, or distribute in any way the digital or 3D printed versions of this object, nor any other derivative work of this object in its digital or physical format (including - but not limited to - remixes of this object, and hosting on other digital platforms). The objects may not be used without permission in any way whatsoever in which you charge money, or collect fees.
Comment & Rating (150)