Zhuge Repeating Crossbow mini only 18g


Print Profile(1)

Description
Boost Me (for free)
Creating is not easy, please support me! Thank you very much, and I wish you all the best!
Model Introduction:
I am fascinated by the structure of the repeating crossbow. After studying some materials, I created this Zhuge Repeating Crossbow. It is very mini, only palm-sized, and only requires 18g of filament. However, though small, it has all the necessary parts. It includes all the parts required for the repeating crossbow to achieve continuous firing, and they work together very well (some parts need to be fixed with a little glue). It can also actually fire "bullets" with a diameter of 6.5mm and a length of about 20mm, supporting 3-shot bursts. It is an excellent teaching tool to demonstrate the firing principle of the Zhuge Repeating Crossbow, a delicate desktop ornament, and something to pick up and play with at any time. In short, I really like it.
Accessories:
Besides the printed parts, only 1 rubber band (or string) and a little filament strand are needed.
Installation Process:
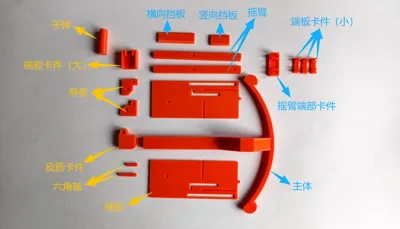
This model has a total of 15 parts, and their names are shown in the figure:

These 15 parts can form 3 main components: box, main body, and connecting rod
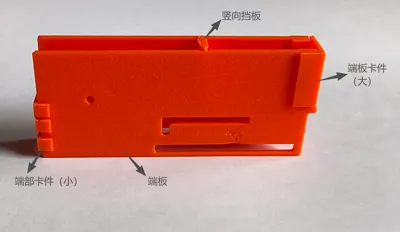
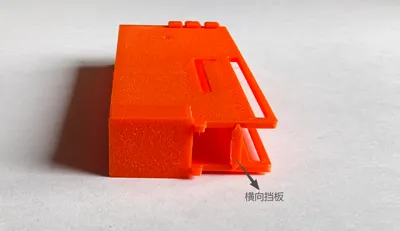
Box installation diagram:


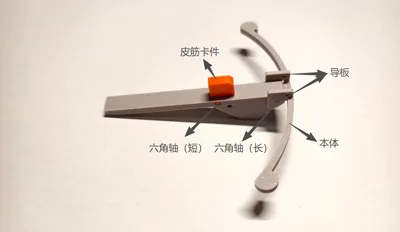
Main body installation diagram:

Note: The connection point between the hex shaft (long) and the guide plate needs to be fixed with glue.
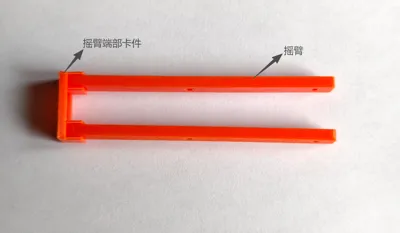
Connecting rod installation diagram:

Note: The connection point between the end clip and the rocker arm is best fixed with glue to enhance the integrity of the component.
Finally, combine the three components:
1. Place the box on the main body, position it between the two guide plates, and connect the guide plates and the box by threading a small piece of filament through them.
2. Align the connecting rod with the holes on the box and the main body, and connect them by threading a filament through.
3. Tie on a rubber band (or string).
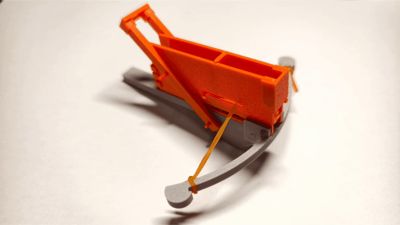
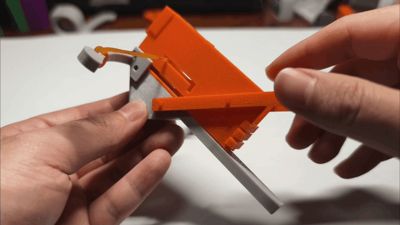
The finished product is shown in the figure:

How to use:
1. Load the "bullets" into the main body one by one;
2. Push the connecting rod to move the box forward until the box hooks the rubber band;
3. Pull back the connecting rod, and the rubber band will automatically detach from the groove due to the obstruction of the clip, launching the bullet.
Repeat steps 2 and 3 to achieve continuous firing.
Welcome to visit:
PS: Feel free to visit my homepage often, you'll surely find something you need (●'◡'●)
Homepage link: https://makerworld.com.cn/@Pbreak
License
You shall not share, sub-license, sell, rent, host, transfer, or distribute in any way the digital or 3D printed versions of this object, nor any other derivative work of this object in its digital or physical format (including - but not limited to - remixes of this object, and hosting on other digital platforms). The objects may not be used without permission in any way whatsoever in which you charge money, or collect fees.
Comment & Rating (0)