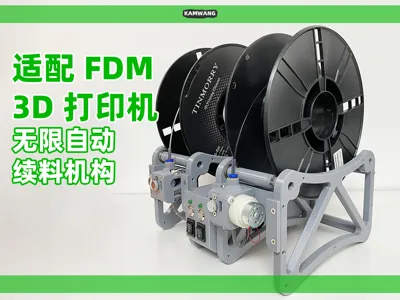
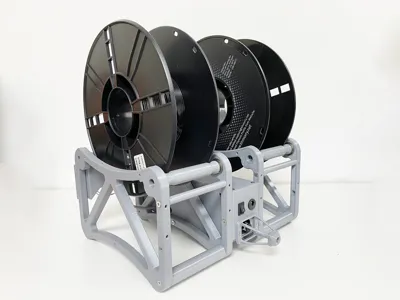
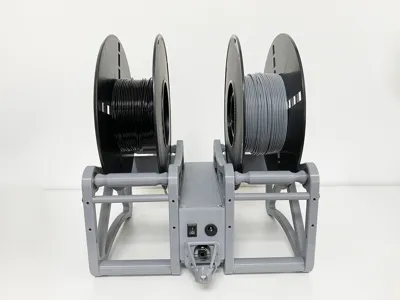
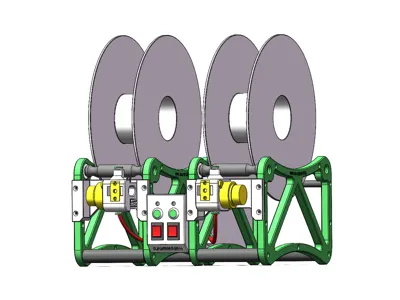
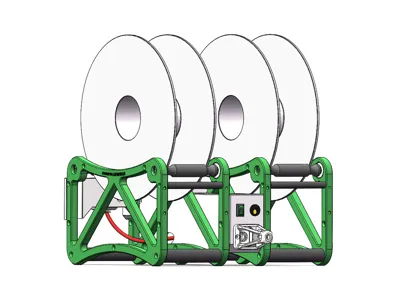
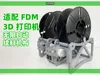
Compatible with all FDM 3D printers Infinite auto-feeding mechanism Dual-spool version [Updated 2026.4.18]


Print Profile(1)
Description
Model Introduction and Function Demonstration
Project Rationale:
This project was inspired by a foreign video I saw on YouTube in early 2025 which sparked my curiosity However due to various reasons it was put on hold and it wasn't until the end of 2025 that I had enough time to pick up this long-delayed project again
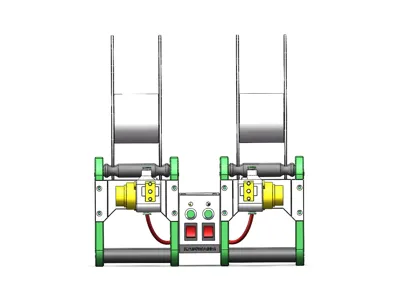
As a design principle for this project everything is simplified meaning complex circuits are avoided if possible and purely mechanical structures are preferred However this approach might be unstable so let's use the simplest microswitches for control Besides avoiding the design development and production complexity of complex circuits one benefit of using only microswitches is that the components are simple and their performance is mature and stable A switch has a lifespan of at least millions potentially tens of millions of cycles and costs only a few dimes to a few yuan each During daily use like car maintenance regular replacement can ensure the stable and long-term operation of the continuous feeding mechanism making maintenance costs low
Most filament detection points in this project in addition to microswitches also use small bearings This is to utilize the rigidity of the small bearings and their friendliness to the filament during long-term friction preventing wear on the microswitches Therefore among all microswitches in this project only the trigger microswitch for the spring buffer needs regular replacement the others are largely set-and-forget
Points to Note for Use:
- If used for A1 you need to replace the 5-way above the extruder with the 2-way (one in one out) in the file to ensure smooth feed
- If printing with other machines it is recommended to download the PTFE tube connectors in the file The official connector channels are not designed for automatic feeding and have a larger inner diameter which can easily cause filament jams when two segments of filament enter simultaneously
- To be safe it is recommended to use a single continuous PTFE tube to avoid connections in the middle If unavoidable please refer to the second point above
- It is recommended that the auxiliary filament feed is just enough for the mechanism's extruder to grab it Do not feed too deep to avoid affecting the automatic feeding effect
- The pressure strength of the extruder gear should be such that you cannot manually pinch the feeding filament to prevent the extruder from failing to feed the tail end filament smoothly
- When one side of the filament runs out and the tail end enters the extruder you will hear the extruder gear grinding the filament for a short period Do not worry this is normal
- Please ensure that the filament for automatic feeding is about 10 centimeters longer than the entire feed path (from entering the mechanism's extruder to the print head) to prevent filament from getting stuck in the tube without power causing a jam
- If Filament Pull Back is needed remember to first cut the filament that has already entered the 3D Printer tool head then operate the feeding mechanism for Filament Pull Back and unloading otherwise it will cause wear on the filament in the gear section affecting secondary feeding and unloading
Version Description:
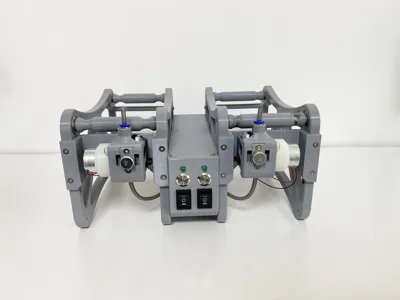
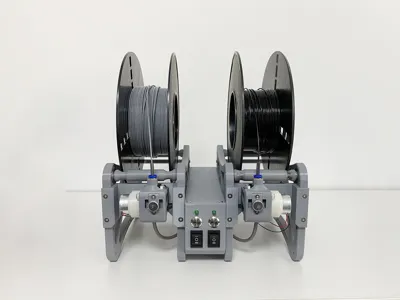
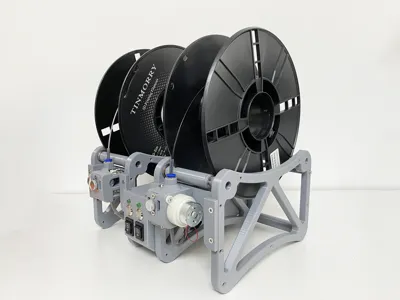
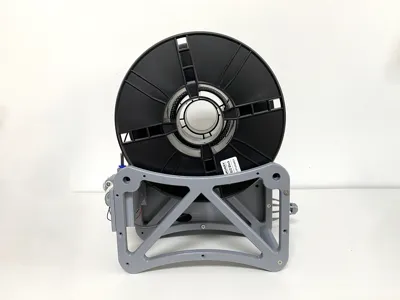
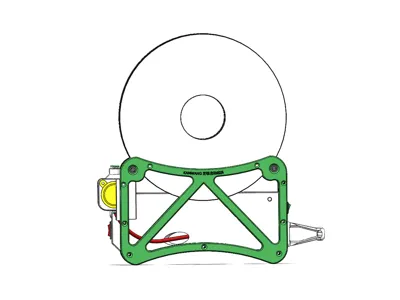
Version Number: 26-1A (Bracket Version)
This version has been revised more than 10 times and can now print continuously for more than ten hours without exceptions or filament jams meeting the preliminary finalized plan The first version is being released for now
As for some fan friends saying they don't need a bracket because many use rice containers different versions will be continuously updated later
Subsequent Updates and Related Information:
This is my first stable version It is possible that after you print and assemble it a series of unpredictable problems may arise due to the superposition of different factors such as printing accuracy assembly accuracy 3D Printer and filament If needed I will consider setting up a fan group later specifically to answer questions related to this automatic feeding mechanism
Since I am not engaged in 3D printing full-time this is just my personal hobby I am still managing my company and factory daily so model iteration updates and replies to your questions might be delayed Please wait patiently I will reply to everyone as soon as I see them
Optimized Updates:
Updates on 2026.4.18 are as follows:
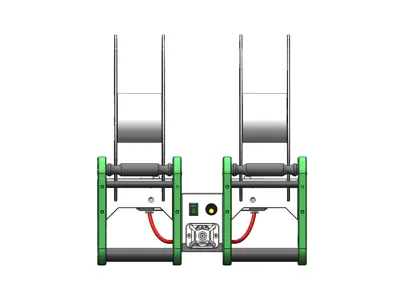
1、Updated mounting hole dimensions for the bottom bracket section for better installation
2、Rounded corners and chamfers for the bottom bracket for a more refined appearance
3、Optimized some microswitch mounting screw holes for easier installation
4、Updated Bowden connector sizes for different versions compatible with 9.1mm outer diameter and 8.4mm outer diameter5、Corrected bearing clearance for the two-in-one-out tee increased by 0.2 for smoother feed
6、Added cable clips on both inner sides of the central wiring box for neater cable routing
[IMPORTANT] Regarding Copyright and Commercial Use:
I recall that at the end of 2023 I developed the first smart version of a Bambu Lab riser that could embed a Mijia MESH control board enabling remote lighting control and auxiliary heat dissipation I sold it for a period with complete print files and a BOM list It was precisely because of this action that issues arose online where people directly took my model files and BOM list to assemble and sell finished products
To maximize the maintenance of the spirit of the open-source community I solemnly emphasize here that this model is for personal research use only no organization or individual may use it for commercial purposes otherwise all legal consequences shall be borne by themselves
Of course I will not consider authorizing commercial use in a paid manner for now
Reminders Regarding Model Printing:
Since this model involves many parts that need to be assembled and some modules (especially the extruder and tee) have high precision requirements it is strongly recommended that everyone first adjust the accuracy and scaling ratio of their 3D Printer and filament to ensure that the printed part dimensions match the design dimensions otherwise it will affect the final product user experience
The source files for PTFE filament connectors have already been uploaded in the print files These have high requirements for printing accuracy otherwise poor feeding and unusable parts may result Everyone can modify the hole sizes according to their needs to adapt to their own 3D Printer
BOM List
Although the model has been open-source shared out of respect for my personal efforts I hope everyone can follow my Bilibili account KAMWANG and reply via private message with "automatic feeding" to get the list of all parts involved in this model project
Mechanism Assembly Video Tutorial and Related Principles Explanation
Version Update and Iteration Notes:
2026.4.24
1、Corrected microswitch mounting hole dimensions for the extruder module
2、Optimized microswitch mounting position at the bottom of the extruder
3、Optimized the wiring hole between the extruder mounting base and the central mechanism housing
4、Synchronously optimized 9.1mm and 8.4mm Bowden connector versions
2026.4.18
1、Updated mounting hole dimensions for the bottom bracket section for better installation
2、Rounded corners and chamfers for the bottom bracket for a more refined appearance
3、Optimized some microswitch mounting screw holes for easier installation
4、Updated Bowden connector sizes for different versions compatible with 9.1mm outer diameter and 8.4mm outer diameter5、Corrected bearing clearance for the two-in-one-out tee increased by 0.2 for smoother feed
6、Added cable clips on both inner sides of the central wiring box for neater cable routing
2026.4.6
1.Updated the top sharp corners of the bottom bracket with rounded treatment
2.Enlarged the text on top of the bracket and modified printing parameters for clearer visibility
To be continued...
License
You may create derivative works based on this object, provided that all such derivative works are published exclusively on the MakerWorld platform and include proper attribution to the original creator. You may not share, upload, host, distribute, or publish this object—or any derivative work of this object—on any other digital platform, marketplace, or distribution channel. Commercial use of this object and any derivative works is strictly prohibited. This includes, but is not limited to, selling, renting, sublicensing, or using the object in any context in which you receive monetary compensation or other financial benefits.
Comment & Rating (0)