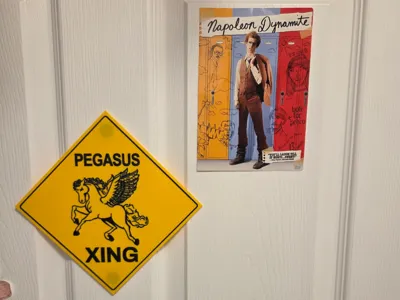
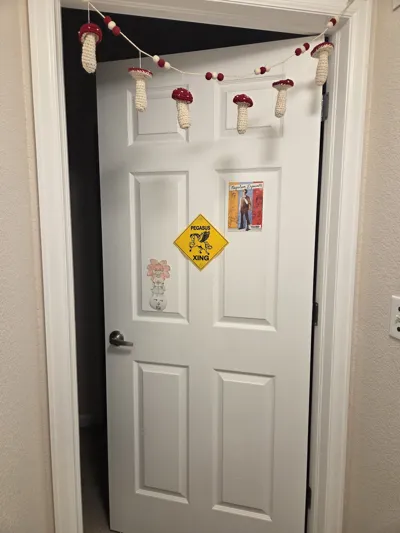
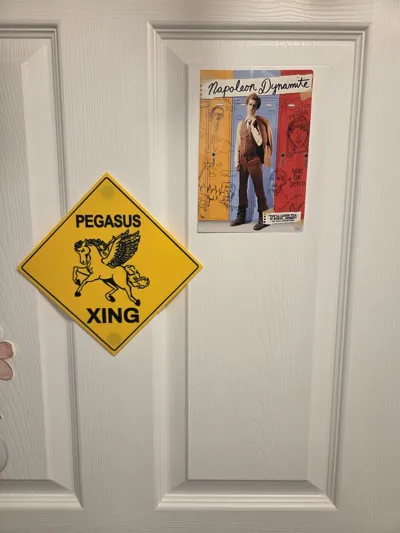
Napoleon Dynamite Pegasus XING Sign


Print Profile(1)

Bill of Materials


Description
For fans of the cult classic film, Napoleon Dynamite, this sign will be instantly recognizable. It's seen in the movie as a sign plastered on Napoleon's bedroom door as we get a glimpse of him learning/practicing dance moves with an instructional VHS he found at a thrift shop.
My daughter wanted one of these signs and while I was able to locate a prop reproduction website that sells them, they only sell them in a 6in x 6in size and they're charging $40 for that. No, thanks. I took matters into my own hands and tracked down the highest resolution photo of the sign that I could find, I used AI to upscale the image and further sharpen the details, then I used an online converter to transform it from an image file to a 3D .STL file.
From there, I edited the model to clean it up as best I could. Next, I painted the model to match the sign from the film. The hardest part of all this was getting it to print properly. It took about 6 iterations to get it to print without any smearing of color or any inconsistencies in the first layer due to tiny gaps between filament within some of the design.
I originally was printing this with a 0.4mm nozzle but quickly realized that, although I was able to get a couple surprisingly good prints with it, I need to swap that out for my 0.2mm nozzle. What you will end up with is a thin and lightweight sign that is 9in x 9in and it can easily be placed on a vertical surface by using tape or adhesive Velcro tabs.
I recommend only using PLA Basic filament. I was originally using Basic for the yellow sign and Matte for the black details and this resulted in the black smearing in about 80% of my iterations. This is even after I altered things such as the flushing volume to make the A1 flush more filament when changing from black to yellow. You might be able to print this sign using strictly PLA Matte as well, I haven't tested this though. Whatever you do, make sure you just stick to one type of filament for best results.
Make sure the plate is customized (hexagon icon to the right of your plate) so that the "First layer filament sequence" and "Other layer filament sequence" options show the order of your filament as having yellow > black > etc. > etc. You want yellow to be printed first for each layer so the chances of black being smeared are reduced.
Unfortunately, this print does take several hours to to complete. I tried my best to reduce the print time without sacrificing quality and the settings I've selected are what enabled the best print for me. You might be able to fiddle with the settings and get the print time further reduced without sacrificing quality but I am happy with what I've got here.
Enjoy and may all your wildest dreams come true!
Comment & Rating (1)