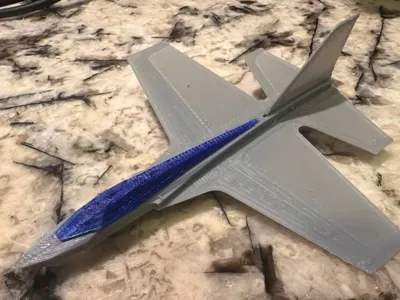
Mini working F49 jet (100mm buildplates!)

Print Profile(0)
Description
Meet the F49 Screen-Time Fighter
A compact, high-performance glider evolved from the widely acclaimed F47 design.
This model is a perfect entry point into 3D-printed aviation toys—fun and educational for everyone from kids to grandparents.
The F49 introduces core concepts of aerodynamics, physics, and spatial motion in a hands-on way.
Assembly is simple and tool-free: remove the parts, press them together, and you’re ready to fly.
Designed to get you outside—expect flights exceeding 75 yards with plenty of healthy movement between launches.
Print multiple units in different colors and swap parts to create custom combinations that look great and fly even better.
PRINTING GUIDELINES
- First layer height: 0.2 mm
- Remaining layers: 0.15 mm
- Infill: 25–45%
- Higher infill shifts the CG forward for longer, smoother flights
- Recommended shell settings:
- 2 bottom layers
- 3 top layers
- 2 perimeter walls
For best surface strength, orient the model so the first-layer infill lines run left to right rather than diagonally (most slicers do this by default).
Allow the print bed to cool completely before removal. Lift gently to avoid warping or bending aerodynamic surfaces.
Material notes:
ABS is strongly recommended—it’s lighter than PLA, more durable, and provides superior flight performance.
PLA may require increased infill or added nose ballast. Lightweight PLA can be used for the fuselage, but additional nose weight will be necessary for balance, and excessive flexibility may cause issues during high-energy launches.
Target center of gravity should be just forward of the opening on the underside of the fuselage where the dorsal fin installs.
ASSEMBLY INSTRUCTIONS
- Detach all components from the print sheet.
- Trim sprues, tabs, and any remaining artifacts to ensure smooth surfaces.
- Carefully free the elevators above the trim tabs as shown in the reference “keyboard” image.
- Slide the rudder in from the rear and secure it by installing the dorsal strake (see underside reference image).
- Press the launch hook firmly into the canopy.
- Install the canopy and hook assembly into the fuselage slot, pushing fully down until seated.
All parts are designed for press-fit assembly. A small amount of superglue can be added for increased durability if desired.
PRE-FLIGHT SAFETY CHECK
- This glider is fast—never launch directly toward people.
- Eye protection is strongly recommended for both pilot and observers.
- Confirm all components are securely installed and aligned correctly.
- Verify that all aerodynamic surfaces are straight, symmetrical, and that elevons are evenly reflexed upward.
- Make adjustments gently—do not crease the surfaces.
- Ensure a clear flight path free of people, trees, and obstacles.
FLYING INSTRUCTIONS
Use a small rubber band (6–8 inches / 150–200 mm). For initial flights, launch gently at approximately a 45-degree upward angle.
TRIMMING & ADJUSTMENTS
- Rolling left or right:
Check for symmetry and twist in the wings or elevons. - Correct right roll / induce left roll:
Slightly increase upward bend on the rear left elevon. - Correct left roll / induce right roll:
Slightly increase upward bend on the rear right elevon. - Excessive climb or to extend glide:
Reduce upward reflex equally on both elevons. - Excessive dive or more aggressive aerobatics:
Increase upward reflex equally on both elevons.
Make changes incrementally—small adjustments have noticeable effects.
MANEUVERS
Once trimmed correctly, experiment with stronger or longer rubber bands and angled launches (20–40° off vertical) for dynamic maneuvers and boomerang-style returns.
For maximum distance, reduce elevon reflex or add a small amount of nose ballast (modeling clay works well).
For loops and aggressive aerobatics, slightly increase elevon reflex.
Vary launch strength and angle to explore different flight behaviors.
ADVANCED EXPERIMENTS
(Recommended only after mastering basic flight and trimming)
Try introducing subtle wing bends—both symmetrical and asymmetrical—and observe the aerodynamic effects.
You can also create experimental control surfaces using tape tabs or small cuts to explore flaperons, flaps, ailerons, spoilers, and other advanced concepts.
License
You shall not share, sub-license, sell, rent, host, transfer, or distribute in any way the digital or 3D printed versions of this object, nor any other derivative work of this object in its digital or physical format (including - but not limited to - remixes of this object, and hosting on other digital platforms). The objects may not be used without permission in any way whatsoever in which you charge money, or collect fees.
Comment & Rating (0)