DIY MAS (kDMAS / DMAS) for Pimax VR Headsets


Print Profile(1)

Description
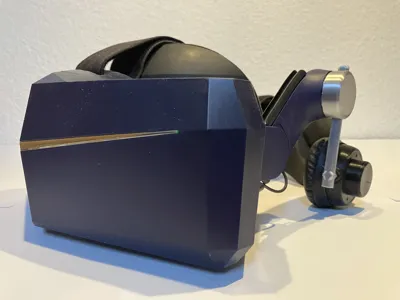
This is a DIY version of the MAS for Pimax VR headsets, which can be used as “DMAS” or with ear cushions as “kDMAS” - this is version #1 as headphone shells could not be removed without unsoldering.
The overall sound with the given / linked speakers is pretty good - IMHO better then the original system - and has been tested on a Pimax Crystal Light as well as on a Pimax 8k+ headset.
DISCLAIMER: I am not responsible for any damage on your VR headset or any injuries resulting by usage of this system
Costs:
Overall costs including speakers, filament, pogo pins, threaded inserts and cushions should be between 15 and 20 Euro (yes, for both sides).
Parts:
DISCLAIMER: I have used AliExpress links, but you will find the parts on Amazon as well as at most electronic parts shops
- Speakers (45 mm overall diameter, 20 mm diameter of coil housing)
- Ear cushions (60 mm, 55 mm may be too small)
- Thread inserts (M2x4)
- Pogo pins (must be at least 5 mm long in total)
How to build and install?
ATTENTION: files for DIYMAS1 rails have been adjusted (print the DIYMAS rail with a diameter of 8 mm (or x and y axle scaled to around 96%))
Pogo pin and blank wire ends version:
- download and print DIYMAS_Spacer and DIYMAS_Insert
- insert the spacer into the insert (align holes with help of nose)
- make sure the holes beside center are 1.5 mm for pogo pins and / or wires
- center hole in the insert must be 5 mm, center hole in the spacer must be 3.5 mm
- solder pogo pins to wires and pull them through the holes (plus is left side viewing the inserts bottom with nose top)
- put a M2 threaded insert (M2x4) into the spacer (it must not hang over)
- continue with steps for both versions
PCB connector wire version:
- download and print DIYMAS1_Insert
- pull out two wires of a PCB connector and make sure the holes are of 1.6 mm or even a bit more
- pull the wires through the holes
- make sure contacts fit the rectangle deepening
- hold the contacts in position and glue the wires from the inside to the insert (plus is left side viewing the inserts bottom with nose top)
- put a M2 threaded insert (M2x4) into the insert (it must not hang over)
- continue with steps for both versions
Both versions:
- download and print DIYMAS1_Rail, DIYMAS1_Spkcover, DIYMAS_Cover, DIYMAS_Ring or DIYMAS_<xx>_extension
- pull the wires through the cover
- pull the wires through the rail
- pull the wires through the speaker cover
- solder the wires to the speaker
- place the speaker in the speaker cover
- push the ring or one of the extensions on the speaker cover
- (optional) pull over the cushion
License
You may create derivative works based on this object, provided that all such derivative works are published exclusively on the MakerWorld platform and include proper attribution to the original creator. You may not share, upload, host, distribute, or publish this object—or any derivative work of this object—on any other digital platform, marketplace, or distribution channel. Commercial use of this object and any derivative works is strictly prohibited. This includes, but is not limited to, selling, renting, sublicensing, or using the object in any context in which you receive monetary compensation or other financial benefits.
Comment & Rating (0)