FNT H2C Stackable buildplate holder


Print Profile(3)


Description
Read first, then print
please read this article, which explains the structure of the FNT model family and details the compatibility of each version with different 3D printers.
FNT H2C Stackable buildplate holder
Boost Me (for free)
Please support my work if you like the model. Boosts invests in purchasing material for prototype models. Thank you. :-)
Holder Versions
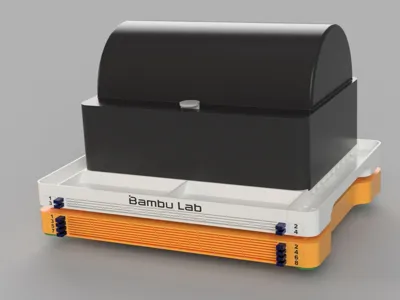
Based on your requests, I have added a new model to the FNT family, designed specifically for H2C printers. This page focuses on the version that combines a build plate holder for the H2C printer with a top surface designed to support the AMS 2 Pro.
For each model, you will find multiple capacity variants — for 4, 6, or 8 build plates. The lowest slot of each module is taller (2.7 mm instead of the standard 1.7 mm), allowing you to store not only standard build plates but also Vision Encoder plates, Cutting Mats, or other non-standard thick build plates.
The entire FNT series for H2C consists of multiple modular components that can be freely combined. For better clarity, each model has its own dedicated page.
As a new feature for FNT models, the M4 screws can be replaced with 3D-printed pins.
⚠️ Compatibility Notice (Important)
AMS and AMS 2 Pro versions are NOT interchangeable.
Each AMS generation has different physical dimensions, therefore models designed for AMS 2 Pro will NOT fit the original AMS, and vice versa.
In the photo, you can see an example configuration composed of multiple FNT H2C modules:
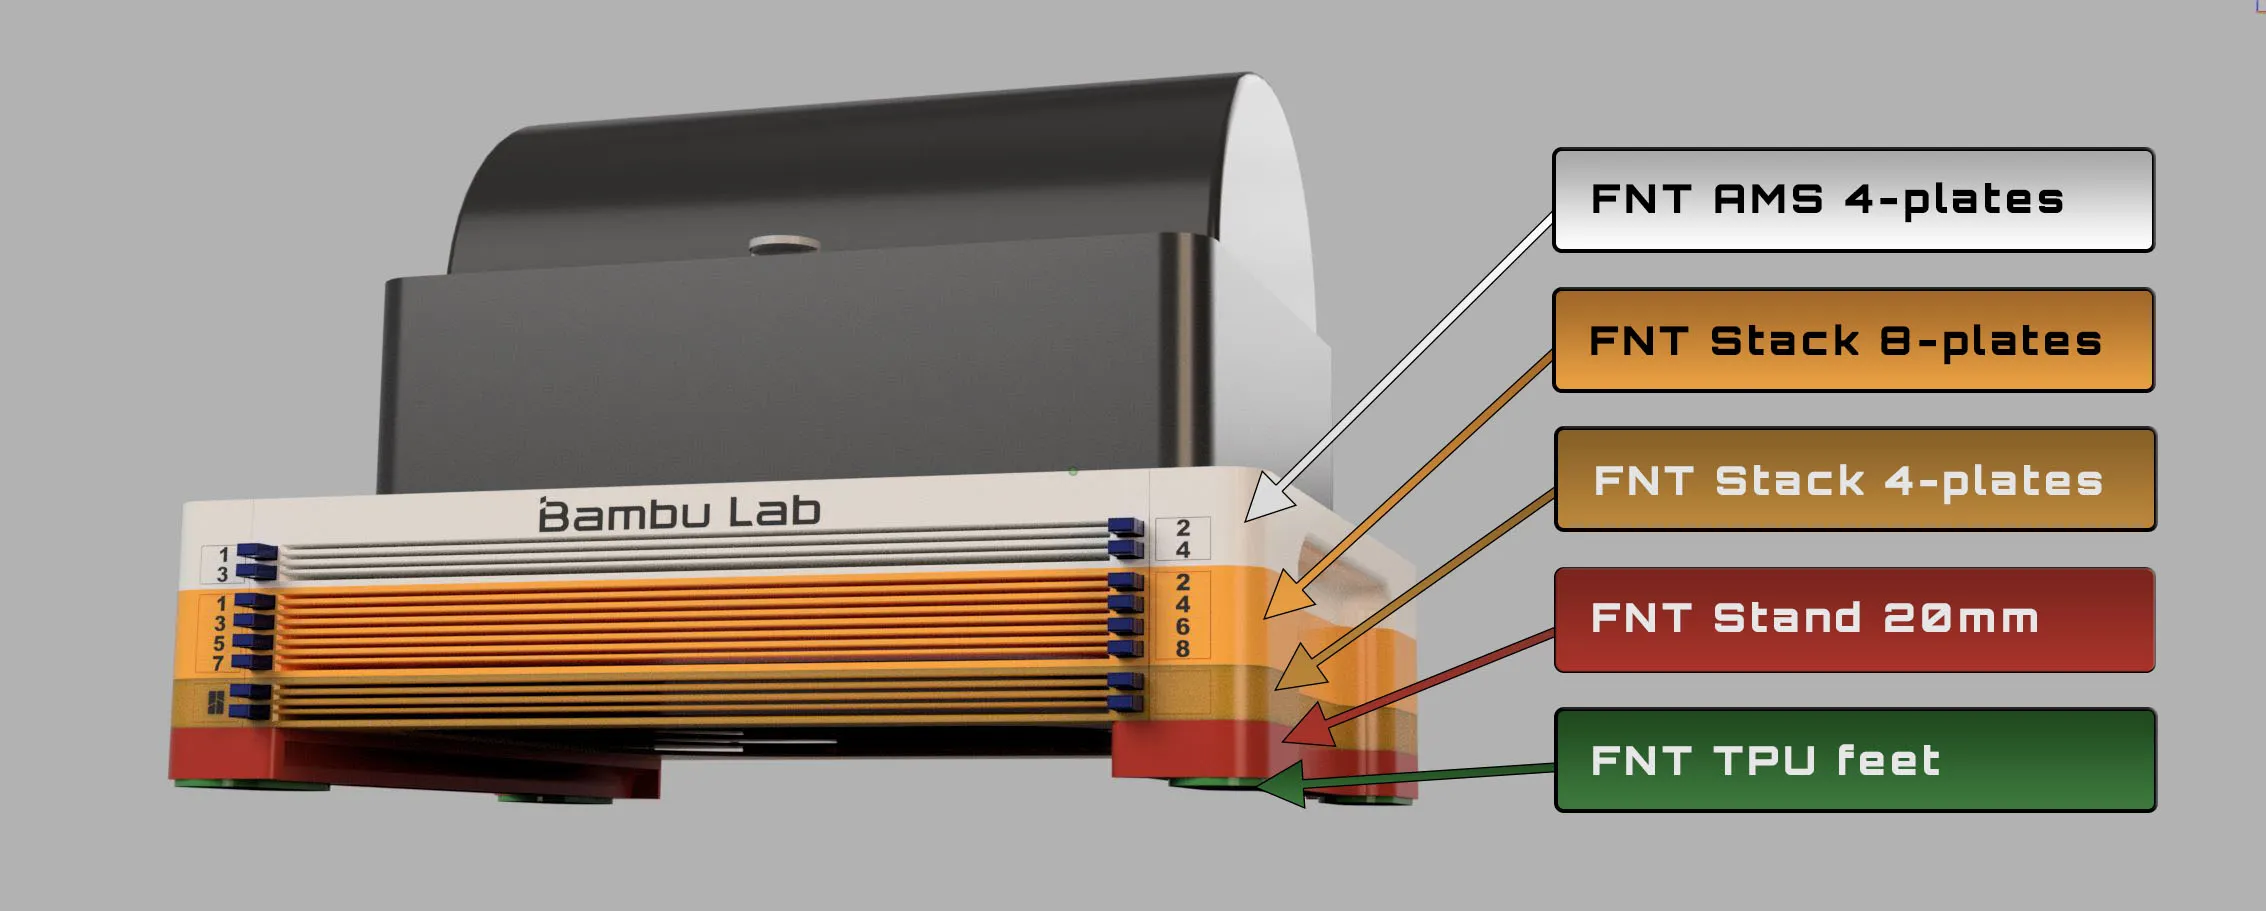
FNT AMS 2 Pro 4-plates (WHITE) - This is the core top module of the entire assembly, designed to support the AMS 2 Pro. If you only have 4 build plates, this is the only part you need to print.
The AMS 2 Pro version includes an integrated handle, allowing the entire assembly to be easily carried and repositioned.
However, if you plan to place it on the top glass of the printer, I recommend adding a Stand to raise the holder above the level of the printer handle or display. In this case, you will also need anti-slip feet for proper stability.
FNT Stack 8-plates (ORANGE) - the version featured on this page.
The Stack version can be used to expand the AMS 2 Pro version, but it can also be used independently — for example, placed under a shelf or under a desk as a standalone model.
FNT Stack 4-plates (BROWN) - the version featured on this page.
It is possible to stack multiple Stack versions on top of each other. They can have different heights and store different numbers of build plates, allowing you to customize the setup to your needs.
FNT Stand 20mm (RED) - If you plan to place the build plate holder on top of the printer, keep in mind that the printer has a display or handle on the top side. When the holder is placed directly on the printer, the lower build plate slots cannot be used.
To make full use of all slots, the holder needs to be raised using a Stand, which is available in multiple height options.
FNT TPU feet (GREEN) - universal feet that can be printed from a flexible material and easily inserted into the build plate holder by simply sliding them in.
They can be used with the AMS 2 Pro holder, Stack modules, and Stand.

FNT H2C Stackable buildplate holder
Key Features
- The entire model can be printed in PLA.
- The lowest slot of each module is taller (2.7 mm instead of the standard 1.7 mm), allowing you to store not only standard build plates but also Vision Encoder plates, Cutting Mats, or other non-standard thick build plates.
- As a new feature for FNT models, the M4 screws can be replaced with 3D-printed pins.
- Clean and practical workflow
Buildplates are easy and smooth to insert and remove by button - Space-saving design
- Stable and rigid construction
- Modular FNT ecosystem
- Easily replaceable & customizable logo plates
- Fully compatible with other FNT H2C components (stands, stack modules, feet), allowing future expansion.


Introduction
I have many build plates for Bambu printers and very limited space for storage. So I decided to create plates holder with eject button for easy insertion and removal.
Inserting and removing build plates goes very smoothly. There is no danger of the printing surface getting dirty from greasy fingers :-)
By pressing the button, the build plate ejects approximately 3 cm. By inserting the build plate, the button will pop out easily.
Vertical placement/sticking to the side of the printer also works great.


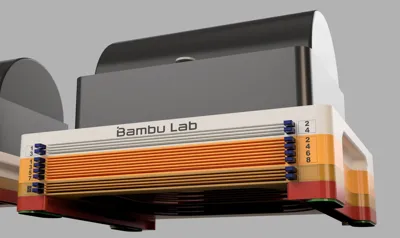
The pins are available in different lengths — use the length you need. Each pin is labeled according to its length.
- If you are printing a pin for a 4-plates holder, use the pin labeled S4.
- If you are using a combination of AMS 4-plates holder + Stack 4-plates, use the pin labeled S4+S4.
- If the assembly is placed on a 20 mm Stand, use the pin labeled S4+S4+20Stand


What non-printing parts will you need?
- M4 screws and nuts
- If you choose not to print the mounting pins, please use M4 screws instead.
While screws are stronger, the printed pins are sufficiently durable, so there is no need to worry about their strength.4 or 8 pieces of M4 nuts - 4 or 8 pieces of screws M4x16 type DIN7985 or simmilar (for 4-Plates holder)
- 4 or 8 pieces of screws M4x25type DIN7985 or simmilar (for 6-Plates holder)
- 4 or 8 pieces of screws M4x30 type DIN7985 or simmilar (for 8-Plates holder)
- If you choose not to print the mounting pins, please use M4 screws instead.
- I recommend 4 pieces of non-slip pads.
- Silicone - round up to 12x3.5 mm
- Foam/rubber - round up to 22x2.5 mm


The holder contains several interesting solutions:
- Interchangeable labels on the sides. A simple click inserts the label, a hole on the other side allows it to be removed. A template is included , so you can customize the image or text - file LogoPlate
- If you don't want it as a stand for AMS, but you would like to attach it to the underside of a table or shelf, just use the free holes and attach it to the board with screws.
- Side handles for easy carrying
- 4x Holes on the bottom for placing anti-slip pads
- 8x Holes for neodym round magnets 8x3 mm

WARNING: If you plan to use the stand with the AMS on top of the printer, make sure to use some form of non-slip rubber feet, or print TPU Feet.The glass can be dusty and if the printer dances with the heavy AMS and the feet slipping, an accident can occur. Do not leave the printer unattended until you are sure the AMS is not moving.
Printing instructions
- Please use the included print profile. It is tuned and tested for optimal results
- Print only on closed printers such as H2C / H2C or simmilar
- Before starting printing, make sure the build plate is clean and degreased. If necessary, use 3DLac.
- Use only good quality filament to avoid problems with peeling/non-functional buttons due to poorly printed surfaces. Bambu PLA Basic is OK
- Do not increase the speed or change the height of the layer
- layer 0.2mm, supports: yes, use Brim
- I use Textured plate 60°C and PLA. I have no problems printing.
- When I used SuperTack and the recommended 45°C, the model peeled off

Assembly:
- Print Holder body (Front, Back and Left+Right), buttons and arms of selected version
- Slide Left+Right parts to the Front and Back parts
- Insert minimum 4 pcs of M4 nuts and screws into the hols in the corners, or use the pins
- The pins must be pushed firmly into the screw holes until they snap into place.
By pressing the end of the pin (for example with pliers) and pushing it through, the pins can be removed if needed.
- The pins must be pushed firmly into the screw holes until they snap into place.
- Insert button to the holder. Slide in / out several times to clean slot and button bar from printing imperfections
- Rotate Holder body
- Align the button and arm teeth according to the picture. Push the arm into the holder firmly. First attach the upper arms (1 and 2), then the lower arms (3 and 4).
- Test whether the button and arm move easily
- Install labels
- Install the holder under your AMS
10. If you want to use the module in a Stack configuration, use longer pins (available in a separate print profile), or magnets in combination with a stack adapter.


An emergency button / arm removal procedure
If for any reason the arm or button needs to be removed, I am adding an emergency removal procedure. The removal should not damage the body of the holder, but the button and arm will likely be damaged.


Happy printing!
Comment & Rating (9)