Locking Pill Box | The Capsuleer v2


Print Profile(4)


Bill of Materials


- Crayon x 1:
Description
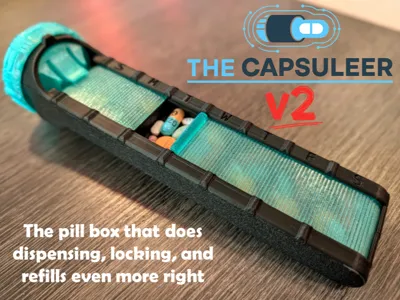
A Smarter, Smoother, Cooler Pill Box
Please know the Capsuleer v3 is available by clicking here! Same magic as v2, but in a sturdier, snappier, grippier, and more refined design.
The original Capsuleer became far more popular than I ever expected. I poured a lot of time into designing and refining it, but I still had a few ideas I wanted to bring to life. Capsuleer v2 is the realization of those ideas — after nearly 4+ kg of filament, many prototypes, and countless hours of dialing in details, this is the best Capsuleer yet.
The Capsuleer remains what it’s always been: a seriously awesome pill box that money still can’t buy — it locks, isolates pills, and makes refills incredibly easy. But Version 2 takes all of that and makes it even better. If you need something to handle AM/PM or two weeks worth, check out the x2 version.
(On a side note, if you need something to cut PTFE tubes that's precise, safe, and seriously satisfying, you won't want to miss out on my Bowden Puck Pro!)
What’s New in v2?
- Less bulk - A slightly slimmer, refined silhouette that feels better in the hand and in your bag.
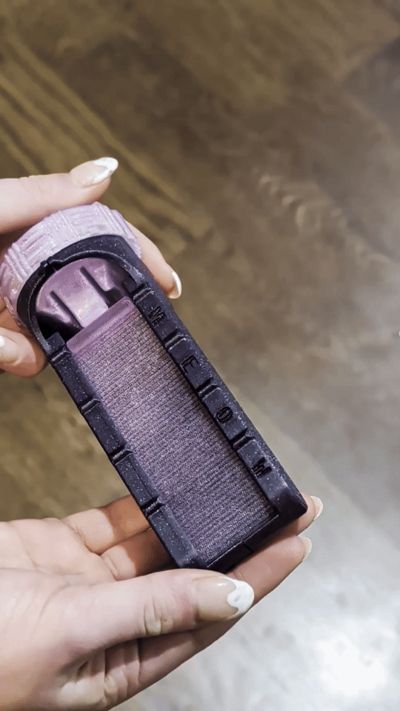
- See-through - The hex pattern was cool, but being able to see your pills through translucent filament? Much cooler — and it cuts cover print time by ~65%.
- Slightly larger bins - Thanks to the redesigned cover, each compartment is now about 5% roomier.
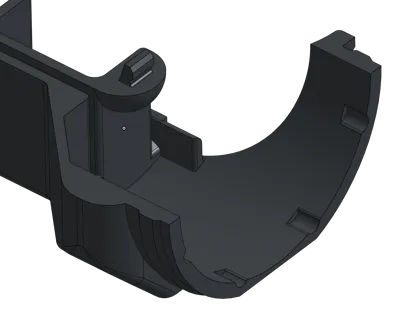
- Snappy dial - The dial now has gentle snap positions for dispensing, refilling, and locking. It feels good, helps with alignment, and smooths out after a short break-in period.
- Improved locking - The lock stays where it should — no wandering.
- Easier alignment - New side notches give you both visual and tactile cues when lining up the cover.
- Quality-of-life tweaks - Lots of small refinements throughout the model that make the overall experience smoother, cleaner, and more reliable (and a shout out to @ndom91 for the flawless feedback that directly lead to one of the design changes here).
Features
- Smart - Slide the cover back to reveal one compartment at a time, or all the way open for effortless refills.
- Secure - Fully lockable — so your pills don’t go on vacation inside your toiletries bag.
- Glue-less - Snap-fit design. No mess, no fuss.
- Grippy - Custom knurling on the dial for satisfying, confident rotation.
- Stylish - A sleek tambour-style rolling cover.
- Easy to print - Designed for reliable results with minimal support.
- Customizable - Days of the week (or anything else!) right in your slicer — no model edits needed.
- Two sizes - Full-size and mini versions available, with 7 or 4 bins. (Each bin is ~20×32×10mm.)
- Two-color friendly - Prints beautifully in dual colors without an AMS.
- Unique - A lockable, flashlight-shaped, compartment-isolating, dial-controlled pill box. Yeah, nobody else has one of these.
Important Notes
- Let the cover cool completely before removing it from the plate. Removing it warm will likely lead to warping or brittleness.
- The first layer matters — a lot. Because the cover is thin, any bulges or waves in your first layer will affect smoothness or even cause breaks. If needed, see Bambu's troubleshooting guide at https://wiki.bambulab.com/en/a1-mini/troubleshooting/print-issues-troubleshooting before printing.
- PETG recommended for the cover. PLA works, but PETG is more resilient for the cover’s flexing requirements.
- Dry your PETG. Moist PETG = brittle cover = sad everyone.
- Orientation and infill direction are critical. Please use the included print profile as-is. Custom changes (especially infill angle, solid infill direction, seams, and orientation) can significantly affect function and success.
- Bin halves snap together permanently. Please don’t try to pry them apart afterward — they will likely break.
- Cover and dial require a short break-in period and will become smoother after a few days of use.
- X/P Series users: Uncheck flow calibration when printing the cover.
- Avoid PLA Matte and Silk. They look great but are much more brittle under stress.
- OrcaSlicer users: You must set Solid Infill Direction to 0° and, for the individual Dial Objects, set Support Type to Tree (auto) and enable On build plate only; Orca changes other stuff too, but these settings are essential for a smooth cover and dial, and happiness.
Assembly Steps
- Print the bins, cover, and dial in your chosen size.
- Trim the brim ears from the end of each bin half and snap the halves together carefully. (The cantilever joints are fragile, so make certain they are not angled when being inserted.)
- Lightly rub a crayon along all edges of the cover — sides, start, and end. This dramatically improves smooth sliding. (Borrow a crayon if you must!)
- Insert the cover from the top, starting with the non-handle end.
- Slide it back and forth gently across all bins a couple of times to begin the break-in.
- Slide the cover fully inside the bin area so it doesn’t enter the dial cavity.
- Snap the dial onto the front. Tolerances are tight — firm pressure may be needed.
- Firmly grasp the bins and rotate the dial through all positions a few times to break it in.
- Turn the dial to the thick horizontal line (refill position) and align it with the bin’s top protrusion. Proper alignment is important or the cover will be difficult or impossible to slide.
- Slide the cover fully open to expose the bins. A portion of the cover will temporarily come out of the bottom of the dial — that’s normal.
- Refill the bins.
- Close the cover and ensure the handle is aligned with the bin front.
- Turn the dial to the single vertical line (dispense mode).
- Slide the cover to the desired day.
- Pour the contents of that bin into your hand.
- At the end of the week, repeat steps 9-13.
- For locking: close the cover fully and turn the dial to the double vertical lines.
Changelog:
Dec 3, 2025: Add missing fillets on full-size bin walls
Nov 27, 2025: Increase diameter of brim ears to improve bin bed adhesion
Nov 25, 2025: Remove unnecessary brim ears from mini cover
License
You shall not share, sub-license, sell, rent, host, transfer, or distribute in any way the digital or 3D printed versions of this object, nor any other derivative work of this object in its digital or physical format (including - but not limited to - remixes of this object, and hosting on other digital platforms). The objects may not be used without permission in any way whatsoever in which you charge money, or collect fees.
Comment & Rating (365)