The Versatile 100mm Duct Flange


Print Profile(1)

Description
🌬️ The Versatile 100mm Duct Flange – Perfect Passage for Exhaust Air & Reliable Sealing
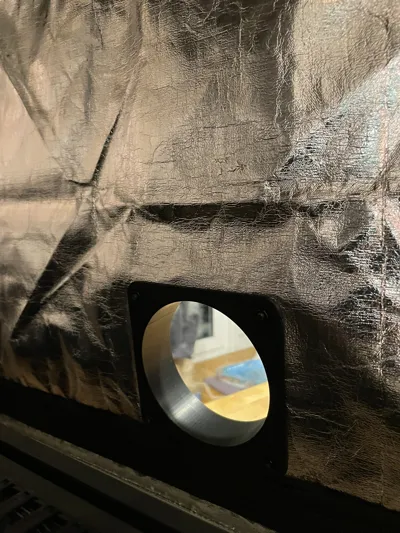
Are you looking for a robust and flexible solution for routing 100mm flexible ducts through enclosures, tents, or boxes This 3D-printed 100mm duct flange offers a simple and effective way to install exhaust or intake air systems cleanly and securely Ideal for DIY projects, exhaust systems for laser enclosures, grow tents, and more
✨ Key Features & Benefits
- Universal Compatibility: Perfectly designed for all common 100mm (4 inch) flexible exhaust ducts and hoses
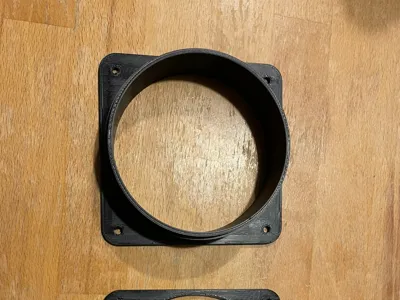
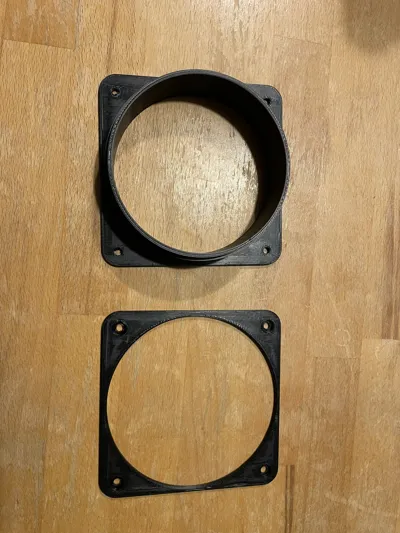
- Two-Part Design for Maximum Flexibility: Consists of an inner part with duct connection and a cover plate This design allows for easy installation and reliable sealing, even with thin or flexible materials like tent tarps or enclosure walls
- Robust Construction: The model is designed for 3D printing and can be manufactured from a variety of materials
- Ready for High Demands: Originally developed from ABS for use in a laser enclosure exhaust system, where it withstands heat and vibration
🛠️ Assembly & Required Hardware
Required Hardware (Not included in download):
To securely attach the flange to a wall or an enclosure and connect the two parts, you will need:
- 4x M4 screws (length depending on the thickness of your enclosure wall)
- 4x M4 nuts (preferably lock nuts to prevent vibrations)
Assembly Instructions:
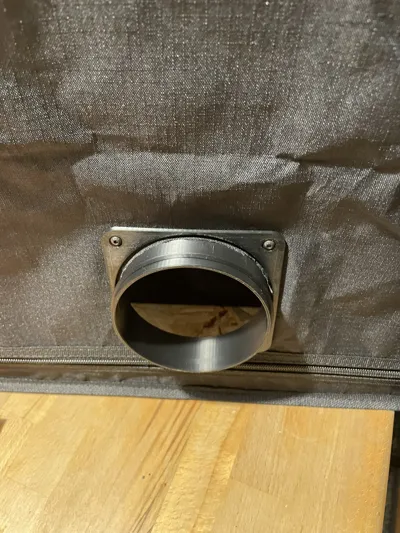
- Preparation: Cut a hole (slightly larger than the duct connection, approximately 105mm) into the wall of your enclosure/tent
- Insert Inner Part: Guide the inner part with duct connection through the hole from one side
- Attach Cover Plate: Place the cover plate onto the inner part from the other side The four holes must align
- Secure: Insert the 4x M4 screws through the holes and secure them with the 4x M4 nuts Tighten them to ensure a tight and stable connection
- Connect Duct: Slide your 100mm exhaust duct over the connection nozzle
License
You shall not share, sub-license, sell, rent, host, transfer, or distribute in any way the digital or 3D printed versions of this object, nor any other derivative work of this object in its digital or physical format (including - but not limited to - remixes of this object, and hosting on other digital platforms). The objects may not be used without permission in any way whatsoever in which you charge money, or collect fees.
Comment & Rating (11)