


Print Profile(1)

Bill of Materials


Description

Disclaimer - This is a difficult print, print it at your own risk!
(If you need help, let me a comment or send me a message)
Index
- General Considerations
- Printing the G-code on Bambu A1 / A1 mini
- Adapting the G-code for Other Printers or Materials
- Generating the G-code in Grasshopper
1. General Considerations
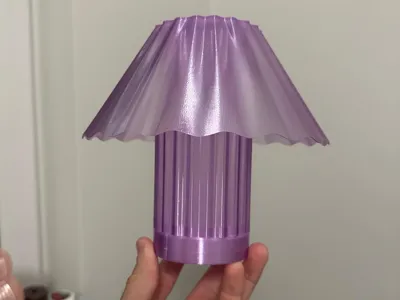
This project is experimental. The goal is to print a lamp shade using non-planar extrusion, meaning the printer head moves in X, Y, and Z at the same time while extruding.
This is not produced using a traditional slicer. Instead, the tool-path is generated directly in CAD.
Important Risks
- There is a risk of nozzle collisions with the printed geometry.
- Each printer has different mechanical clearances, so the Z height must be tuned carefully.
- This technique requires close supervision during the entire print.
Use this method at your own risk. Always monitor the machine while printing.
To make this model I used the software Rhino, in particular the Grasshopper extension and the following videos:
- Non planar 3D print path generation in grasshopper
Rhino User Webinar: Advanced 3D printing with Grasshopper
Boost Me (for free)
If you enjoy my work and would like to help support my ability to share more (and even better) models in the future, please consider boosting & follow me 💖
2. Printing the G-code on Bambu A1 / A1 mini
To make things easy, I’ve uploaded the G-code files for the lampshade, compatible with Bambu A1 Mini and Bambu A1 printers.
These G-code files are configured assuming:
- Textured build plate
- PET-G filament
- 0.4 mm nozzle
If you want to use different settings (plate, material, nozzle, etc.), please refer to Point 3 where I explain how to re-slice the model.
Steps:
Download the G-code for your printer.

- Open it in Bambu Studio.
- From there, send it directly to your printer.
Note: The real print time is visible in the slicer, but it may not display correctly on the printer during printing. Keep that in mind.
Only the lampshade uses a special non-planar G-code.
The other parts can be printed normally.
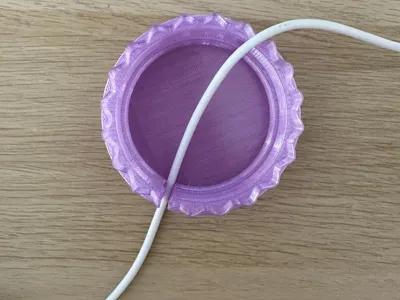
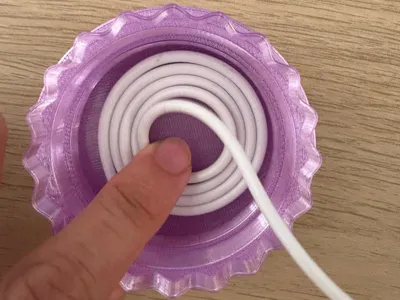
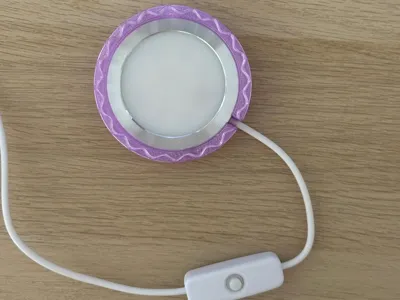
Assembly
After printing the 3 parts, simply assemble them together.
Make sure to check the file names, because I uploaded two different lamp designs:
| Lamp Model | Filename Identification |
|---|---|
| Lamp EX1 | Unna - (1,2,75,130,85,3) |
| Lamp EX2 | Work In Process |
3. Adapting the G-code for Other Printers or Materials
In this section we will take the Base G-code and integrate it into a normal sliced file, so you can use different printers, materials, and parameters.
Important Requirements:
- The nozzle clearance must be at least 3 mm.
- The nozzle size must be 0.4 mm.
If you use a lower clearance, the nozzle will collide with the model.
Steps
- Import the Model
- Load Unna Top (x,x,75,130,85,3) into Bambu Studio, like any normal STL.
Position the Part
- Move the model from the center to position (90, 90, xx).
- Ensure the orientation is correct.
- No supports are needed.

Set Print Parameters
- Choose the material, heated bed surface, and slicing profile.
- Slice the model.
Export the sliced file.

- Extract the G-code
- Right-click the exported .3mf project file → Show more options → Open with 7zip
(7zip must be installed). - Inside the archive, open the folder: Metadata/
- Locate plate_1.gcode
Copy this file to your desktop.


- Right-click the exported .3mf project file → Show more options → Open with 7zip
- Edit the G-code
- Open plate_1.gcode with Notepad (or any text editor).
Press Ctrl + B (or Ctrl+F) to search for: ; close powerlost recovery

- Delete everything below that line.
- Insert the Base Non-Planar G-Code (See documents attached)
Paste the Base G-code directly below:

- Save the file.
- Repack the G-code
Replace the modified plate_1.gcode back into the same Metadata folder inside the .3mf archive (using 7zip).

- Your project file is now ready.
- Optional
Replace the project thumbnail image (512x512) if you want a nicer preview.

- Verify
- Open the .3mf file again in Bambu Studio.
You should now see the non-planar G-code merged into the file’s preview.

- Send to Print
- Everything is ready — send to your machine and print.
4. Generating the G-code in Grasshopper
WIP….. follow to know about the updates.
That´s all, thank you for been here! You can also check my other files.

Boost Me (for free)
If you enjoy my work and would like to help/support my ability to share more (and even better) models in the future, please consider boosting & follow me 💖
Documentation (1)
License
You shall not share, sub-license, sell, rent, host, transfer, or distribute in any way the digital or 3D printed versions of this object, nor any other derivative work of this object in its digital or physical format (including - but not limited to - remixes of this object, and hosting on other digital platforms). The objects may not be used without permission in any way whatsoever in which you charge money, or collect fees.
Comment & Rating (2)