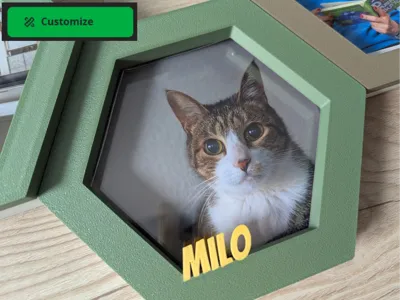
Hexatiles - Picture Frame - Fully Customizable


Print Profile(1)

Description
Boost Me (for free)
If you like this model, please consider a boost
This is a remix and therefore big shoutout to @laisch and @Roger.Karlsen for this awesome model and idea!!!
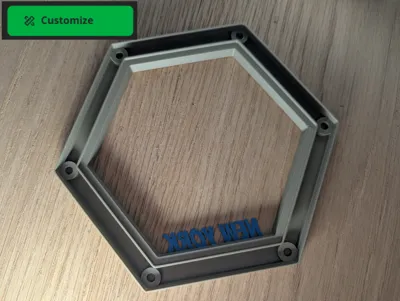
I strongly recommend to use the customizer, you can change the side, the height and width of the frame.
In addition you can add any Text, change it's size and position.
Both versions work best with a 1mm acrylic glass.
** Update 03.10.2025 **
You can now add Text on each side

** Update 28.09.2025**
I have uploaded a new mode to generate litophane images that can be inserted into the picture frame

For the clips to hold the acrylic glass in plase, please visit the original version: https://makerworld.com/en/models/974727-hexatiles-picture-frame#profileId-947175
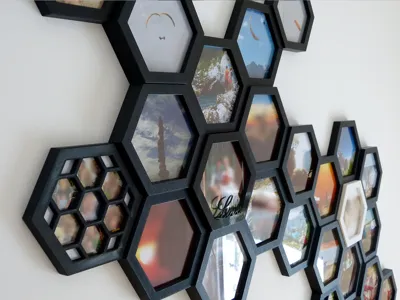
Large Version
The large version is based on the original. There is not much difference, but I wanted to give you the option to customize the size yourself using the tool in Makerworld.
When using the large version, you need to use a 6x3mm magnet.
For the base, please visit the original model from the creator https://makerworld.com/en/models/974727-hexatiles-picture-frame#profileId-947175
Small Version
The small version is suitable for smaller pictures and also for the A1 mini.
When using the small version, you need to use a 5x3mm magnet.
For the base, please visit the model of https://makerworld.com/en/models/1194492-led-wall-tiles-a1-mini-no-ams-needed#profileId-1206956
Big shoutout to @Roger.Karlsen
Step-by-Step Guide
Use the customizer to create your individual frames.
You can use the flat to flat parameter this is the dimension from the opposite sides (not corner to corner!)
175mm for the original one from @laisch
148.6mm is for the smaller version from @Roger.Karlsen suitable for a A1 mini

Use wall height to make the frame deeper / heigher and frame width to adjust the thickness of the border

Specify if you want to display a text
If you toggle the option, it will only print the frame without a text.
Use the text adjust if you want to move the text higher up or lower down, you can make the text fully part of the frame

Adjust the magnet, each hole is 3,2mm deep and rises depending on the height your select.
Use tube id to sepecify the width of the magner


Please consider to buy me a coffee if you like my design
If you are interested in a commercial license, check out my membership options
Membership

Comment & Rating (1)