Govee Outdoor 2 Elite Light Cable Caps & Fixtures


Print Profile(2)


Description
FOLLOW me for new updates and models - https://makerworld.com/en/@menerso
Check out my other GOVEE models - https://makerworld.com/en/collections/9427068-govee-accessories
Check out my other Around the House models: https://makerworld.com/en/collections/6181334-around-the-house
UPDATE 12-01-25: Added a BLACKOUT mount to cover up any light you do NOT want to show. You should print in a darker filament to not have the light glow through the plastic.


Why I created this…
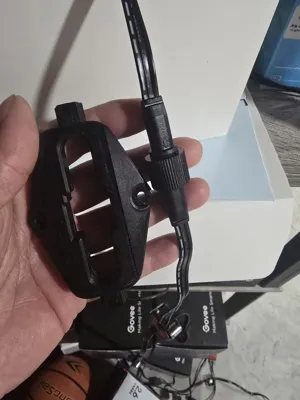
I created models for my Govee Pro Outdoor lights wiring here. A user requested the same setup for their Govee Elite Outdoor lights. I model these for them and they tested fitment.
Disclaimer
I modeled and printed each of these parts, but I did not test them. A member tested them on his Govee Elite lights. We went through a few revisions to get everything to fit.
Raceway snaps into place on each side of the light fixture and onto a mount that goes in the middle of the two caps. You can slide caps on, I made the mount short enough to do that.
 |  |
 |
How many to print
You need one light fixture mount per light. 2 caps and one mount between each light. 1 connector fixture for when you connect between strings. The connector fixture has shorter caps to use, I didn't need the mounts for those because they are so close to each other, but they are there if you want them. I had couple splices, so 1 per splice.
Testing
You should print a test light fixture, connector fixture and a cap and mount to make sure everything fits. I printed mine in ABS so there is a small bit of shrinkage, but everything fit well. If you do have to increase or decrease the size by a percentage, MAKE SURE TO DO THAT FOR ALL PIECES after you figure out the correct fitment. Otherwise, you may run into fitment issues.
Screws
Use #6 Stainless Steel self-tapping screws if going into metal or just #6 wood screws. Self-Tapping: https://a.co/d/1UFSzRh or Wood: https://a.co/d/3N1rLlk
Placement of the mount strips
You should mount the Raceway Mounts somewhere in the middle of the two lights. It doesn't have to be exact; it will just hold the caps in place. The curved segment has a short, curved mount you can put on the middle of the curve to hold that tight.
Models
Light Fixture x1 per light

Light Fixture Corner (optional)

Connector Fixture x1 per connection

Main Mount and Caps x2 caps and 1x mount from light to light


Connector Mounts and Caps x2 caps ( you may not need mounts because they are short )

Curved Segment (optional)

Curved Segment Caps and Mounts x2


Splice Connector (optional)

Boost Me (for free)
Hoping to get enough points to pay for a Bambu H2D or the new H2C. It is FREE and it really helps me out. Thank You!!
Membership
Want to support me with a small monthly tip or open a commercial license to sell some of my prints?
Check out my other models and Collections. Why not give me a FOLLOW since you are there.
I post new models and updates to models frequently.

License
You shall not share, sub-license, sell, rent, host, transfer, or distribute in any way the digital or 3D printed versions of this object, nor any other derivative work of this object in its digital or physical format (including - but not limited to - remixes of this object, and hosting on other digital platforms). The objects may not be used without permission in any way whatsoever in which you charge money, or collect fees.
Comment & Rating (34)