Dyson Airwrap Diffuser


Print Profile(2)


Description
The excellent model is by Nathan, shared at Printables. I have created a handy 3mf with two tables. Print in heat-resistant plastic such as ABS or else it will melt.
---
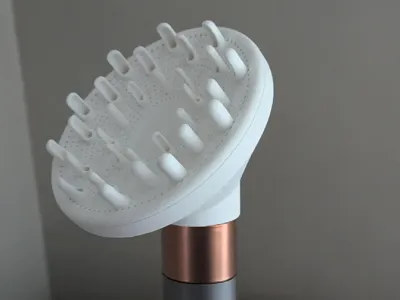
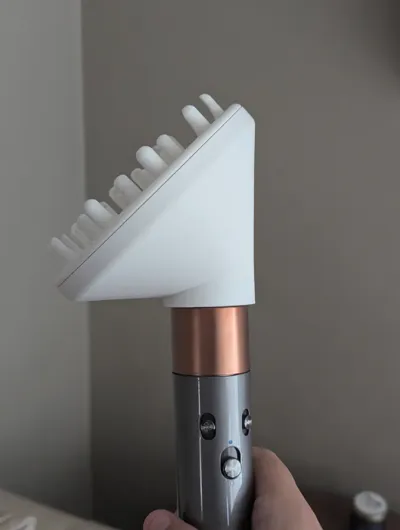
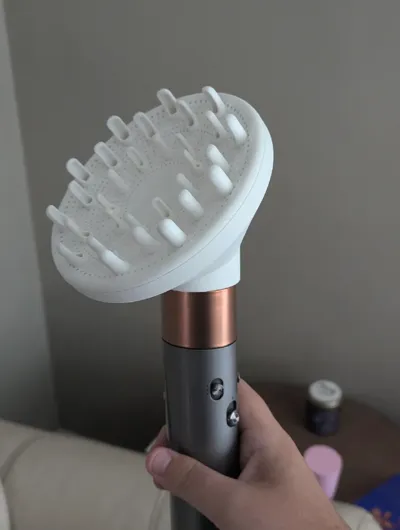
This is a 3D model of a diffuser attachment designed for the Dyson Airwrap. Ideal for those looking to experiment with new accessories for their Airwrap, this model helps distribute air more evenly to enhance curling and drying performance without frizz. I created this because this product was not available for purchase at my location for a long time.
Materials
For optimal heat resistance, print this attachment in at least ABS but preferably Nylon. Absolutely do not print this in PLA or PETG unless you only plan to use cold air with it, or it will melt and potentially ruin your Airwrap.
I printed my own on my X1C using Bambu Lab ABS-GF. It seems to withstand the heat output of the Airwrap on the highest heat setting without deforming or softening.
Printing
Print in 2 parts, the “Air Wrap Body + Connector” & “Air Wrap Diffuser”. Both parts will need supports. I have included screenshots of the orientation you should print both parts. The diffuser itself will take quite a while to slice because of the detail of all the holes.
The diffuser can be difficult to remove the supports, I found that marking off the “posts” (those bits of the diffuser that stick out) as no support zones it makes removing the supports easier. The nasty surface will be hidden once assembled with the body.
I also suggest printing with dynamic layer heights for the diffuser itself, this produced better results for me.
Assembly
The body and the diffuser should just be a press fit and doesn't require any glue or fasteners. If you find yours it a bit loose, some CA glue should work fine.
Notes
- I have included a separate folder with the diffuser body and connector separated, which should anyone to remix this with a new connector for different hair stylers without remodeling everything.
- If you are printing for an Airwrap, you shouldn't need these, but you can print just the “Air Wrap Connector” part if you want to check the tolerances of your printer before printing the whole part.
- With the body and the diffuser as separate pieces, additional diffuser plates can be created to swap in an our depending on the requirements.

Comment & Rating (33)