Drink Token - Movie Stub Style


Print Profile(2)


Bill of Materials

- Loctite Super Glue x 1:
- Elbow Grease x 1:
Description
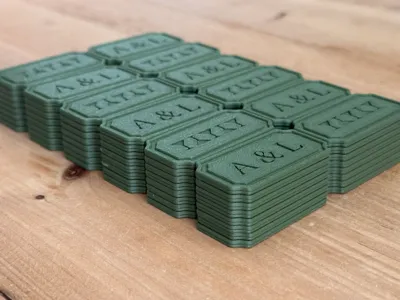
A Drinks token I designed for a wedding I've got coming up. These are customisable using the below instructions. Please use these instructions no matter which variant you use (whole or split) as they are relevant for the text.
Boost Me (for free)
If you've printed these or even just learned something about Booleans today then please leave a boost. It's appreciated :)
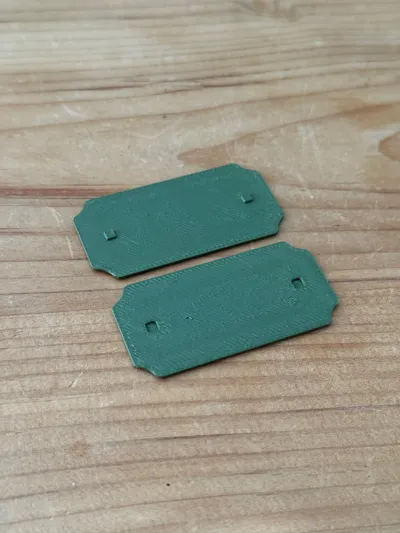
PLEASE NOTE: When using the split variant, to correctly assemble them please ensure that the Text is the correct way up and you fasten this to the Cocktails having Three Glasses facing up. This ensures best fitment.
I would also recommend calibrating/drying your filament before embarking on a mass production of these. This will help ensure that the tight tolerances on the interlocks functions correctly as well as giving a better finish on the tokens themselves.
First you want to find the text item within the objects list (It's named Initials eg. A & L). After this you want to click the Text Shape icon in the top central toolbar and then modify the text in the input field. I have A & L in there at the moment but you can put whatever you like there.

After the above, you want to remove the text using a Boolean operation. These have been numbered for you so you can follow the exact steps if this is something you are unsure about doing yourself.

You want to click Mesh Boolean (B) and then the button Difference. After this, select the object numbered 3. for the Subtract From field. Then object 4. for the Subtract With field.
Click the Delete Input check box and then finally click difference.
If all of this has been done correctly you should have some text that is now 0.75mm deep unless you changed this depth in the previous step. I advise that you do not go any deeper than this value due to risk of clipping through the other side and messing up the infill.
All of the items labelled Generic Cube within the objects list are very important. These are the interlock pins to enable the split variant of the model to be locked together with the aid of superglue. I just dabbed the glue all around the perimeter and then inside the holes for the pins. Press down for 10seconds and that seemed to do the job for me.
I have printed 96 of these using the split version. I used Loctite Super Glue, a bit of elbow grease and determination to get these assembled and ready.
License
You shall not share, sub-license, sell, rent, host, transfer, or distribute in any way the digital or 3D printed versions of this object, nor any other derivative work of this object in its digital or physical format (including - but not limited to - remixes of this object, and hosting on other digital platforms). The objects may not be used without permission in any way whatsoever in which you charge money, or collect fees.
Comment & Rating (3)