Search models, users, collections, and posts
insta360 Link backplate for Elgato Prompter
Remixed by
IP Report


Print Profile(1)

0.2mm layer, 3 walls, 15% infill
Designer
4.9 h
1 plate
Open in Bambu Studio
Boost
6
23
8
2
38
18
Released
Bill of Materials
List other parts
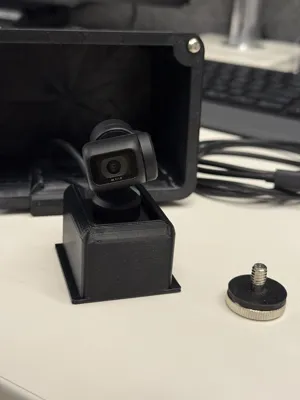
- 1/4"-20 Headless Hex Socket Adapter x 1: Headless Set Screw
- 1/4"-20 x 1: Thumb nut
Description
I really appreciated gmorse81's original, but I kept breaking the side clips on the prompter. I also had to re-drill the mounting holes, so I decided a complete overhaul/remix might be more helpful. Here's what I've tweaked:
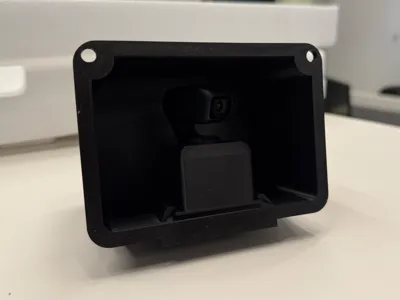
- The backplate no longer clips into an attachment ring; these are now one piece.
- Bevels added below most of the attachment flange, increasing sturdiness and also requiring less printing support.
- Mounting holes have been resized and realigned with the prompter body.
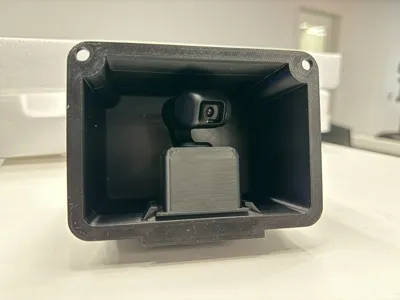
- Camera cradle now has a “popped collar” that hides the red/green/blue LED indicator light, so that it does not detract from on-screen image.
- Camera cradle and backplate now each have an aligned hole on bottom for you to add ¼"-20 screw and thumb nut. This adds a layer of security and makes it so that the camera won't fall out of the cradle if the rig is inverted. Helps with genereal prompter handling and adjustments.
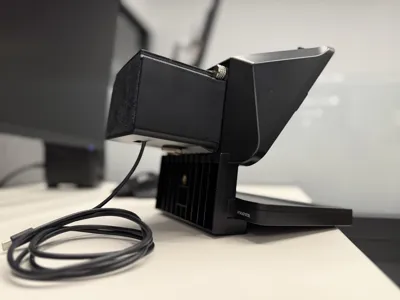
- Strengthened some other geometries and moved the cable port.
ABS yields good quality for both pieces. I tried PAHT-CF, which was awesome, but that caused too much friction for the cradle to mate with the backplate. The increased strength (at cost) also seemed overkill, so I reverted back to ABS. The Cradle in my images was printed with a .6mm nozzle but I've been able to get much smoother results with a .4mm nozzle
My next remix will involve making the backplate/box as small as possible…however, the current ‘boxy’ design does enable a simpler print with less support.
This remix is based on

License
This user content is licensed under a
Creative Commons Attribution-Noncommercial-Share Alike
Comment & Rating (8)