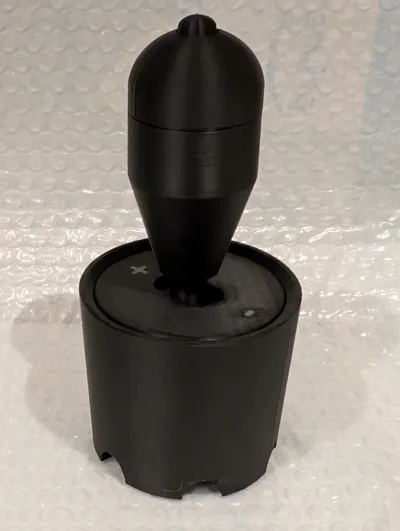
Tesla S3XY shifter


Print Profile(1)

Description
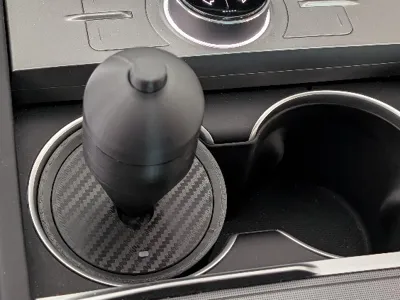
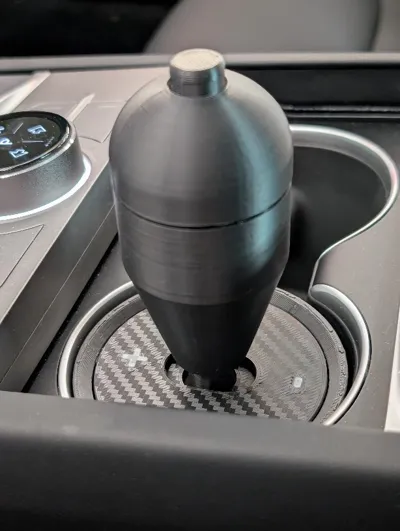
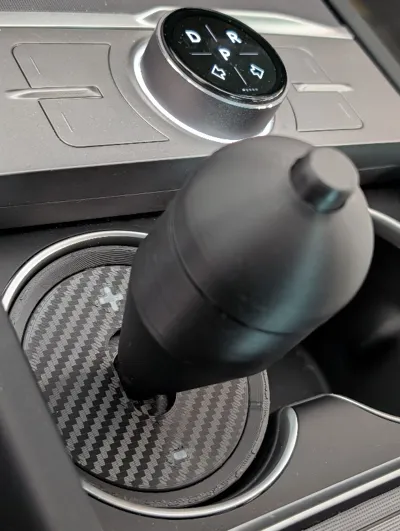
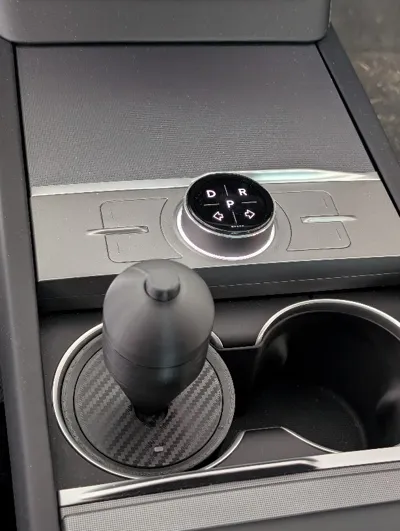
In the new Tesla models, the shifter stalk has been removed and replaced with a touchscreen interface for gear selection. This “shifter” fits in the cup holder and utilizes three S3XY buttons from Enhance Auto. To activate the buttons, you push the lever forward, pull it backwards, or push the button at the top of the shift knob. This makes gear selection more convenient and more ergonomic.
I currently have mine set to push forward for Drive, pull backwards for Reverse, and push button for Park. I find this to be much more natural and easier for gear selection – especially for situations like parallel parking where multiple gear selection happens back and forth in short intervals. As these are S3XY buttons you can obviously program any function you wish. You can also orient this shifter in your cup holder by 90 degrees so instead of pushing/pulling the lever, you move it left/right.
There are a total of 5 plates as follows:
Plate 1 is the main cup. This fits snug in my highland Model 3 and I suspect it should fit similarly in the Y, X, and S as well.
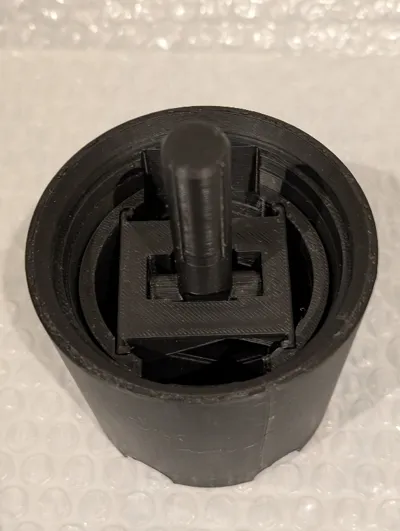
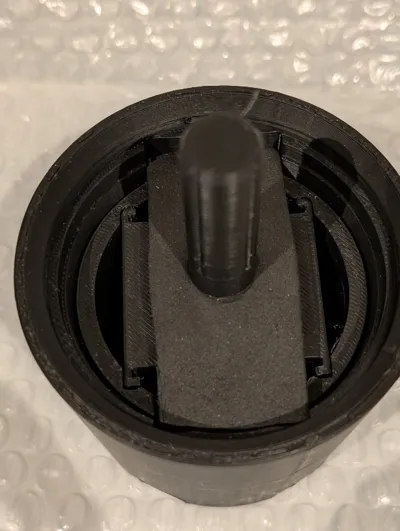
Plate 2 is the internal mechanism. There internal mechanism drops into the cup in a specific direction. There are arrows in the cup and the internal mechanism for alignment. Once the Buttons are installed slide the back plates into the mechanism to lock the buttons in.
Plate 3 is the knob and button. Inside the base of the knob there are relief channels that allow for the button to be pried out. You can also remove the button by poking it out from underneath. I recommend using a wooden pencil with the eraser end to push the button out. Once the S3XY button is installed, put the push button in the top half of the knob and screw it together. You may need to clean up the screw threads a bit. It helps to screw the knob together a few time before installing the button to get smooth engagement. The profile also uses variable layer height for the round portion of the knob for a smoother finish.
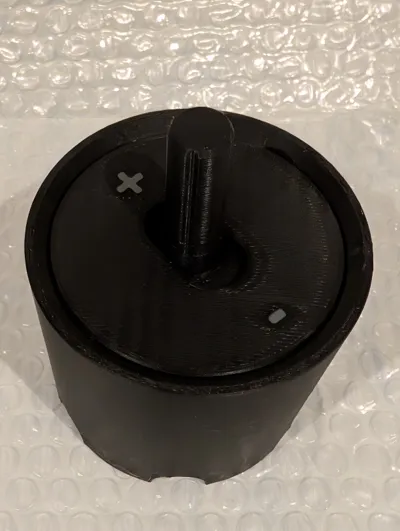
Plates 4/5 are the top finishing covers. Select one of the two depending on your liking. Also, choose a build plate that best suits your taste here. I chose to use my carbon fiber effect build plate to give it that CF looking finish – textured or hologram effects could look cool as well. You can also change the colour of the lettering/symbols to your liking. I chose grey so that it’s legible but understated. Red could be a great option as well. There are two parts to the finish plate. The small rectangular piece slides into the channel of the main part to keep the mechanism hidden when pushing or pulling on the lever.
OPTIONAL: The biggest challenge for me was to incorporate some physical resistance for the knob when pushing and pulling. I took a bit of a shortcut here to create some physical resistance and although it is not a perfect solution, it is better than nothing. My S3XY buttons came in a small black box measuring 100x74x39mm. The inside had the buttons encased in a dense black foam material. Below the buttons, there is a solid piece of this foam that is approximately 11.5mm thick. I cut this piece into a rectangle that is 30mm x 60mm and drilled a 3/8” hole in the middle of it. I further thinned this down by slicing it through the center so that the 11.5mm thick piece becomes one that is 4.5mm thick and another about 7.0mm thick. There is a rectangular channel in the cup portion and the foam goes there with the lever going through the 3/8” hole. Try the thicker and thinner piece to see which works better for you. This helps to create some resistance. You can find this type of foam in other packaged items or you can entirely bypass this step.
NOTE: I have made various versions and this one seems to be fairly effective. I appreciate feedback and if you have a print failure that is a result of a printer or filament issue, please don’t give a rating based on your printer and/or filament problem.
Last but not least, I would like to credit PCF_Creator (https://makerworld.com/en/models/197968?from=search#profileId-218576) for the design of the internal mechanism that houses the buttons.
NOTE 2: I have updated the 'cup' to add a screw on top to clamp the face plate down. If you have made this print and find that the top trim plate pops off, reprint the ‘cup’ plate. The remaining parts can be reused.
License
You shall not share, sub-license, sell, rent, host, transfer, or distribute in any way the digital or 3D printed versions of this object, nor any other derivative work of this object in its digital or physical format (including - but not limited to - remixes of this object, and hosting on other digital platforms). The objects may not be used without permission in any way whatsoever in which you charge money, or collect fees.
Comment & Rating (11)